The NanoBeast has a different chip that we'll cover another time, but it is broadly compatible [1].
I think - not had a chance to play with one yet. ↩︎
We can treat the Z84C20 as a container for two ports which are (almost) identical. Each port has some registers that allow us to control it: that's a specific set of addresses in the Z80 CPU's I/O address space that allow us to control the Z84C20. These are:
a CONTROL register, that configure the port, including setting its mode, which pins are inputs and which outputs, and which pins generate an interrupt on change.
a DATA register that lets us read or write the 8 signals that this port owns.
Port modes
Each port supports 4 different modes, they are:
mode 0: output a byte at a time
mode 1: input a byte at a time
mode 2: input/output a byte at a team (steals some signals from Port B, so this is only available on Port A)
mode 3: bit control mode
We'll be using mode 3, as we want individual control of 3 different LEDs, and this mode is the easiest way to achieve it.
Traffic light circuit
Let's get started on the hardware! First of all we're going to need a bit of breadboard, some LEDs and resistors, lots of precut wire links / bits of wire, and some hookup wires with 0.1" female headers for connection to the MicroBeast. We'll also need an integrated circuit, a 74HC244.
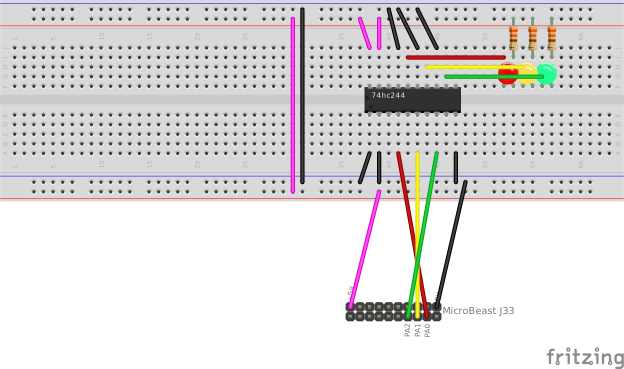
Here's an overview of what we'll be building:
First off we'll need some LEDs of the appropriate colours. I raided the parts drawer and came up with three likely candidates of dubious provenance. Measuring them with a multimeter I found the voltage drop across my red LED was 1.7v, the yellow LED was 1.8v, and the green LED was 2 volts.
We want to limit the current through these LEDs to about 10mA (plenty bright enoufg for our purposes), so we'll need a resistor for each LED. We can calculate the resistor value with the formula R = (Vcc - Vf) / If where Vf is about 2 volts (as measured), Vcc is 5V and If is 10 mA. This gives a value of 300 ohms. I don't have any 300 ohm resistors, but I do have 330 Ω, and pllugging that back in to the formula reveals that that gives an If of 9 mA, which is absolutely fine.
You might be wondering why we don't wire the LEDs directly to the 'Beast's PIO output: the Z84C20 can neither source (provide) nor sink (accept) 9mA - in fact it can only source 1.6 mA and sink 2mA, which is rather puny.
💡
These values are labelled IOL and IOH in the z84c20 datasheet, and you have to really search for them. They're hidden in the right-hand "Test Conditions" column of the "DC Characteristics" table in the rows for VOL and VOH.
This is the reason for the 74HC244 IC in our circuit.
74HC244 3-state octal buffer and line driver
This is a package of 8 (hence "octal") "buffer"s, where a buffer is a device that has one input and one output, and the output's value follows the input. This might sound a bit pointless, but the buffer also isolates the input from the output, and provides a significant current boost.
In the case of 74HC2444, each pin can sink or source 35mA, with the proviso that the total current handled by the chip cannot exceed 70mA. So our 3 * 9 mA = 27 mA total is not going to cause the 74HC244 to break a sweat, even though it would give the Z84C20 a bit of a migraine.
Just to be safe, we're using the 74HC244 to sink current rather than sourcing it: this means that current flows from the power supply, through the LED and resistor, and is delivered into the 74HC244. This has the consequence of inverting the control logic (we drive a line LOW to light the LED) - more on this later.
You can buy 74HC244s from all the usual component suppliers, but they are often expensive in small quantities. eBay or AliExpress are a much cheaper option if you can wait for a few days, but beware fakes and duds. I bought 10 from AliExpress and they all checked out fine. If you're really desperate, get hold of me on Discord and I'll send you one.
💡
When you're wiring up the 74HC244, you'll notice that there are a lot of wire links connecting the chips unused inputs to ground. DO NOT SKIP these, otherwise you'll get all sorts of weird random flickery behaviour! Ask me how I know!
Our RED led is wired to the 'Beast's PA0 pin, the amber LED to PA1, and the green PIN to PA2:
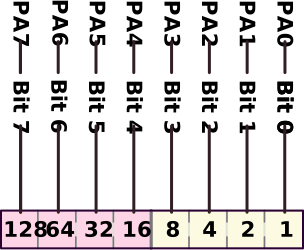
This means writing the value 0x01 to Port A's data port will control the red LED, the value 0x02 will control the amber LED, and the value 0x04 will control the green LED.
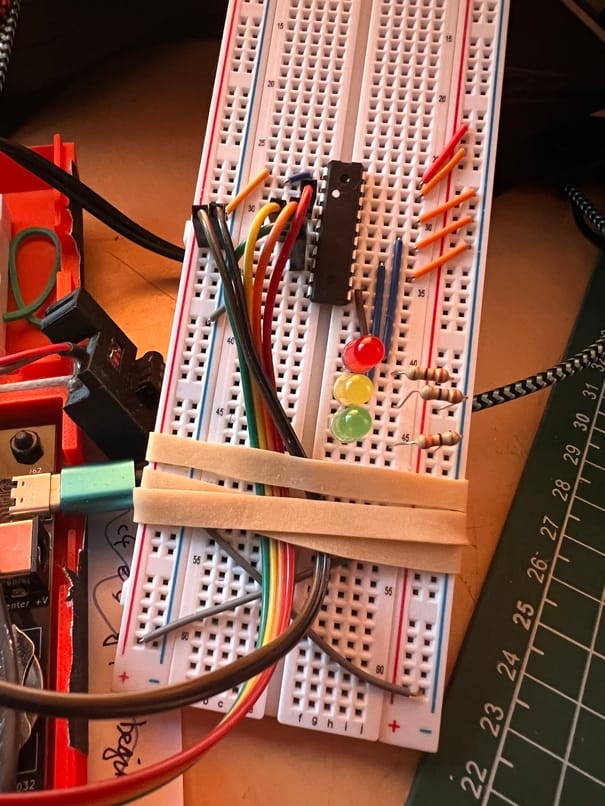
The rubber band is there to provide "strain relief", i.e. stop the Dupont pins pulling out of the board when you move the cables.
Don't forget to connect your power rails together (as in, connect the top + rail to the bottom + rail, and connect the top - rail to the bottom - rail) – do not connect a + rail to a - rail! In the Fritzing diagram this is shown as a long pink wire and a long black wire across the centre of the board. In the photo above, it's the two X shaped grey wires at the bottom.
Also worth noting that your LEDs, being diodes, need to go in the right way round. If you fit them in reverse, they won't work. An LEDs terminals are called the "cathode" and the "anode". Current must enter the LED at the anode and leave via the cathode. The cathode is usually marked by a slight flattening on the LED housing, and it usually has a shorted lead than the anode. If in doubt, test with a multimeter first.
I'll leave you to go have fun building the circuit. In part 2, we'll write some simple code to drive it!
Build a traffic light!
The MicroBeast and NanoBeast are extremely expandable computers - they offer a range of interfaces including GPIO, I2C, UART, and RC2014. These interfaces vary in their complexity and capabilities, ranging from turning a simple LED on and off all the way up to a full-blown graphics card.
We'll
This is a pity, because the VT52 supports a number of control codes that allow it to do exciting things like move the cursor, clear the screen, enter graphics mode and, .... well that's about it really, but you can achieve a lot with those, like:
0:00
/2:41
The rudimentary game above uses VT52 control codes to move the cursor so that it can draw the bat, the ball and the score in their correct places. It's not blazingly fast, and it's a bit flickery, but it is playable!
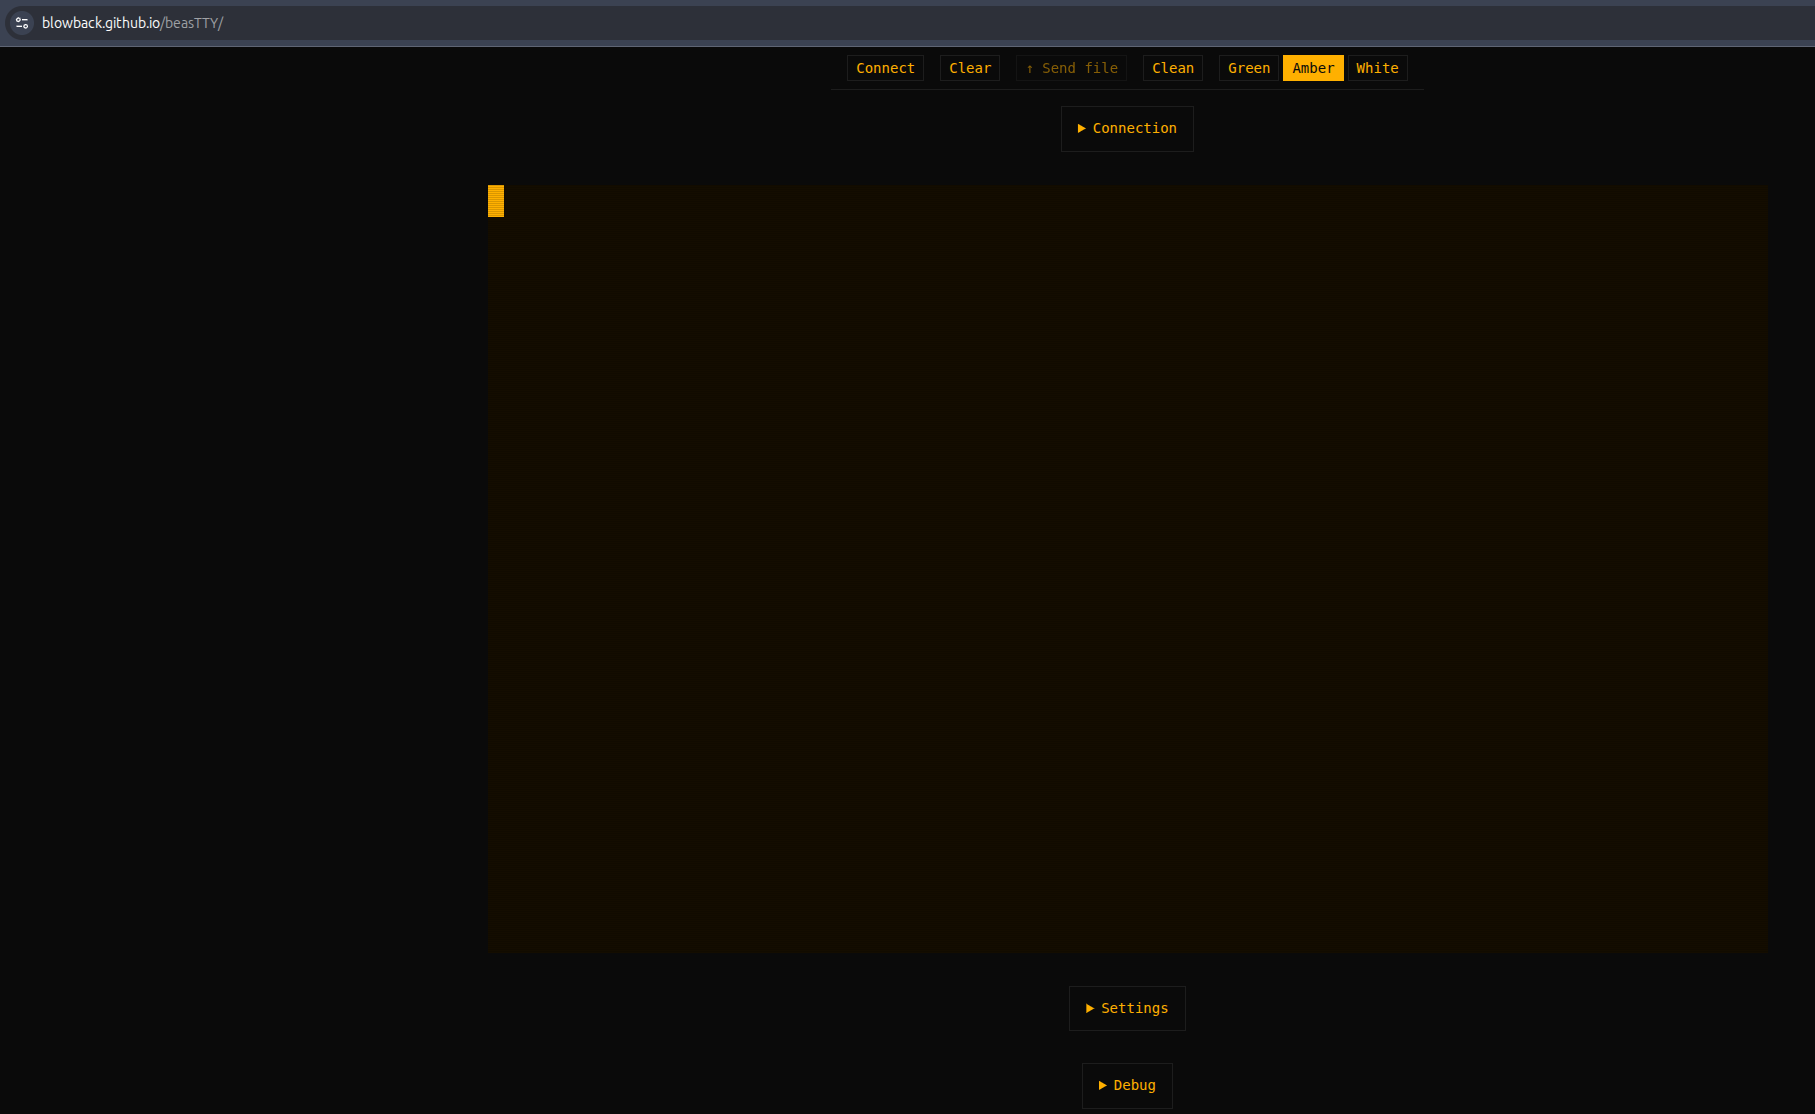
The terminal that's being used to play that game is BeasTTY.
it runs in the web browser, so nothing needs installing
it has SLIDE support built in, for drag-and-drop file transfer (in both directions)
it comes with a number of "8 bit" fonts, including the font from the original VT52 ROMs.
How to run BeasTTY
The simplest way is to click on this link which also appears top-right on the github page.
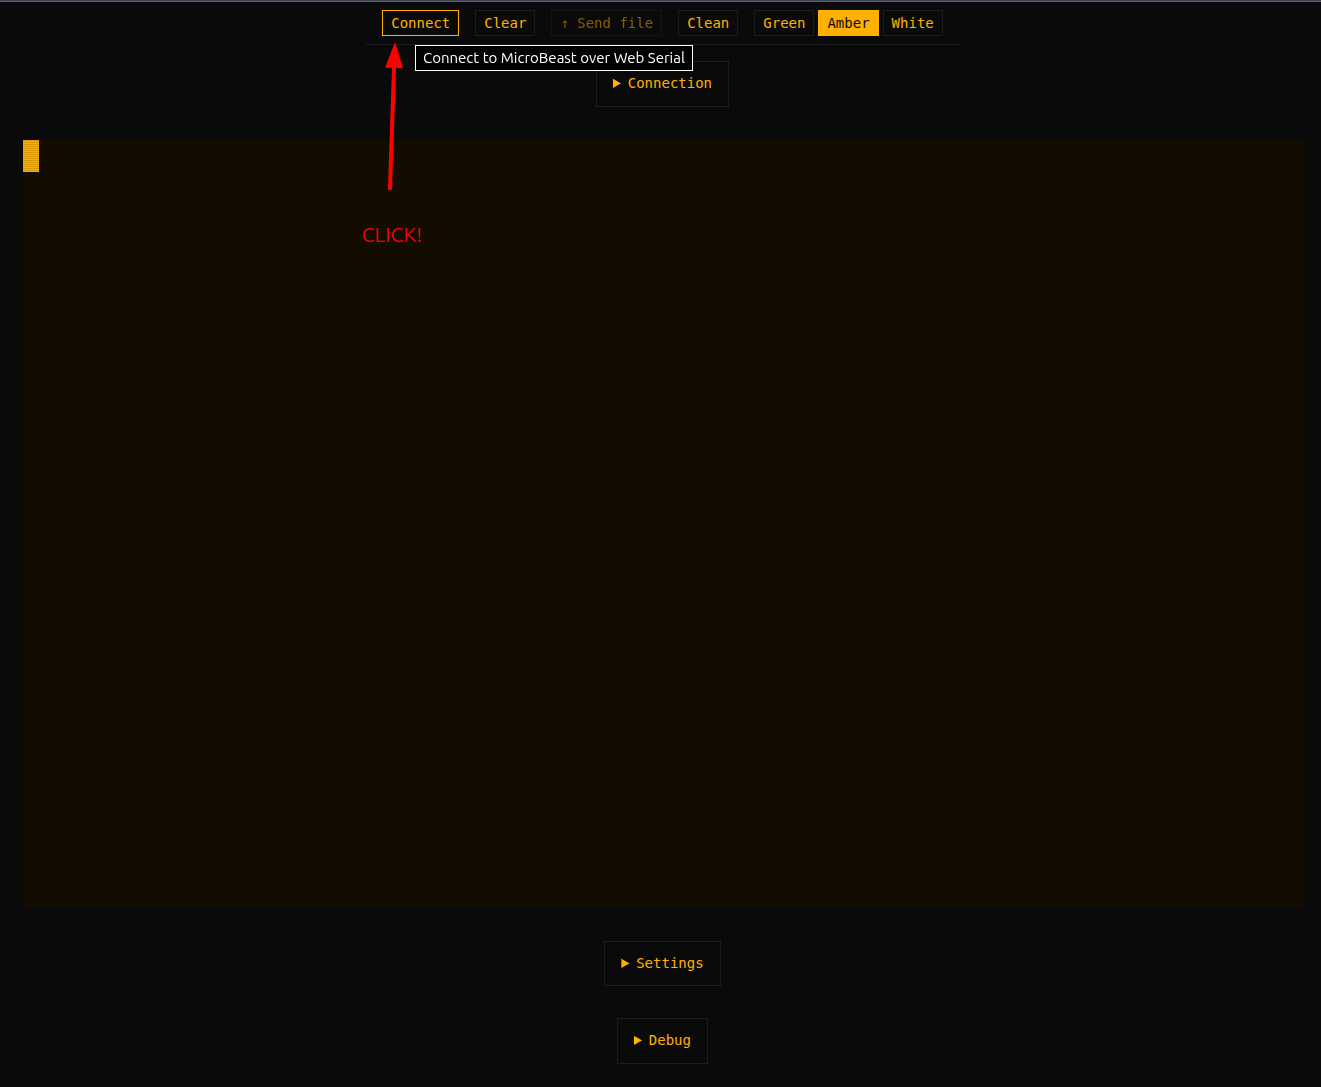
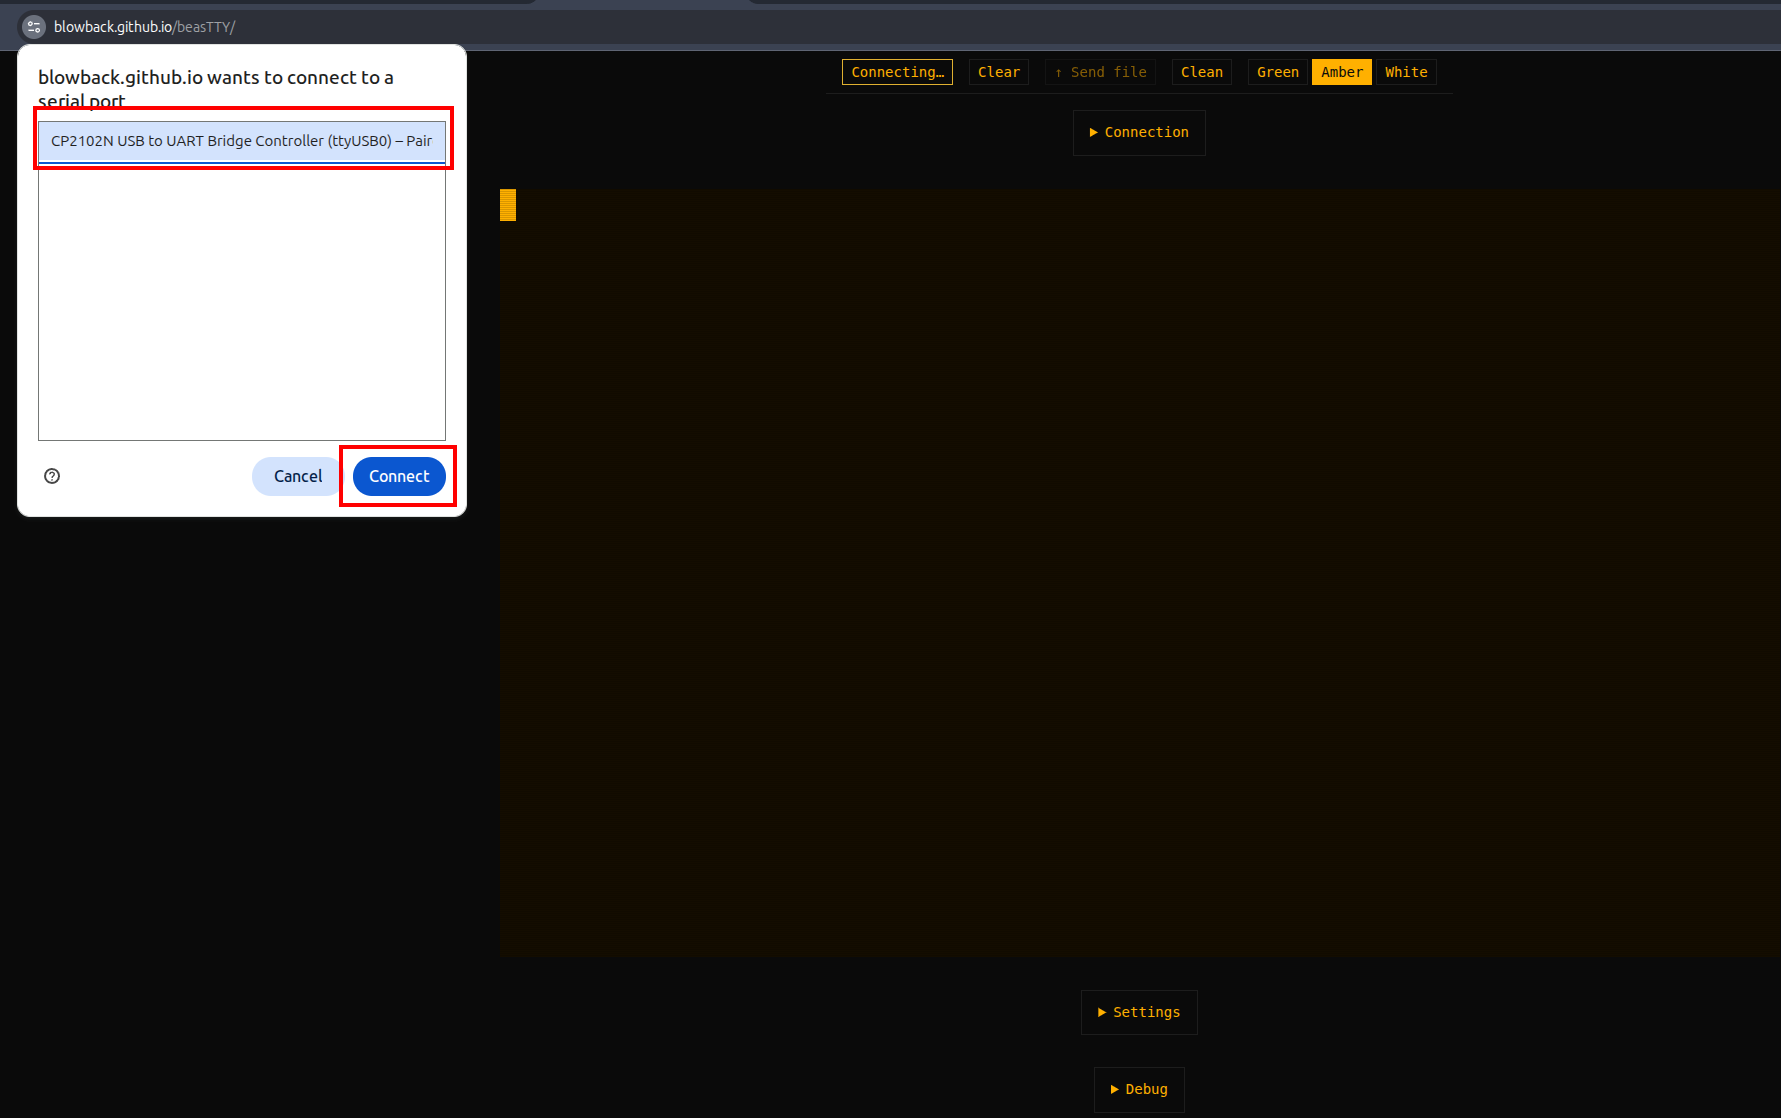
Then click on the "Connect" button at the top, and choose your 'Beast in the resulting dialogue box:
Click on the big square in the middle (so the border goes solid) and hit ENTER, and you should be rewarded with your CP/M prompt:
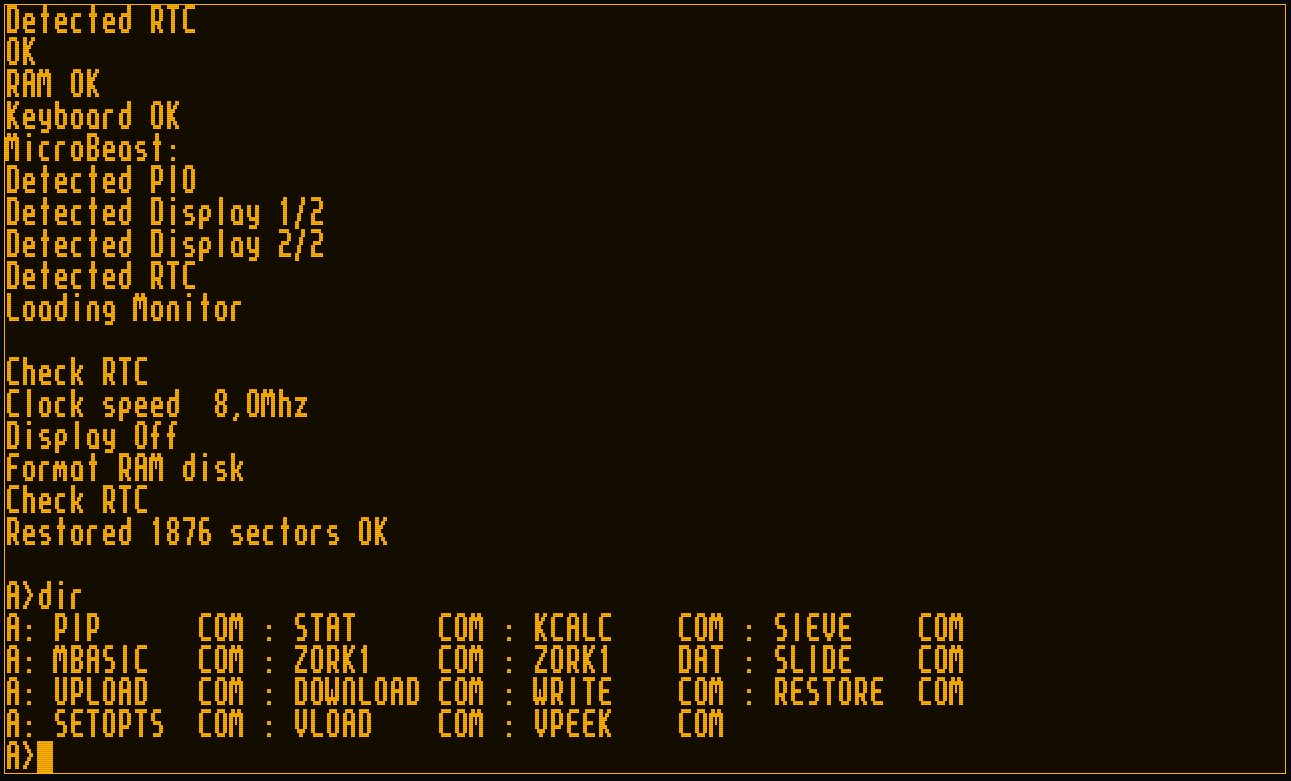
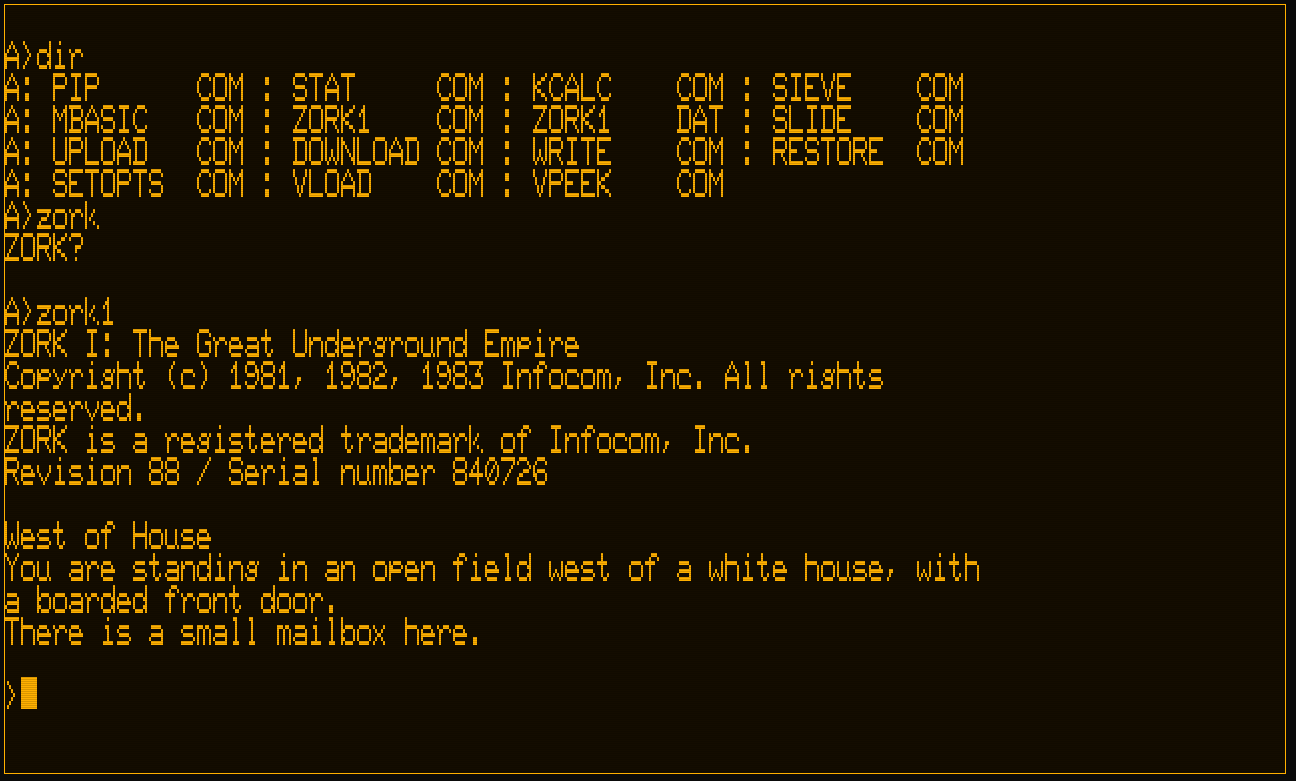
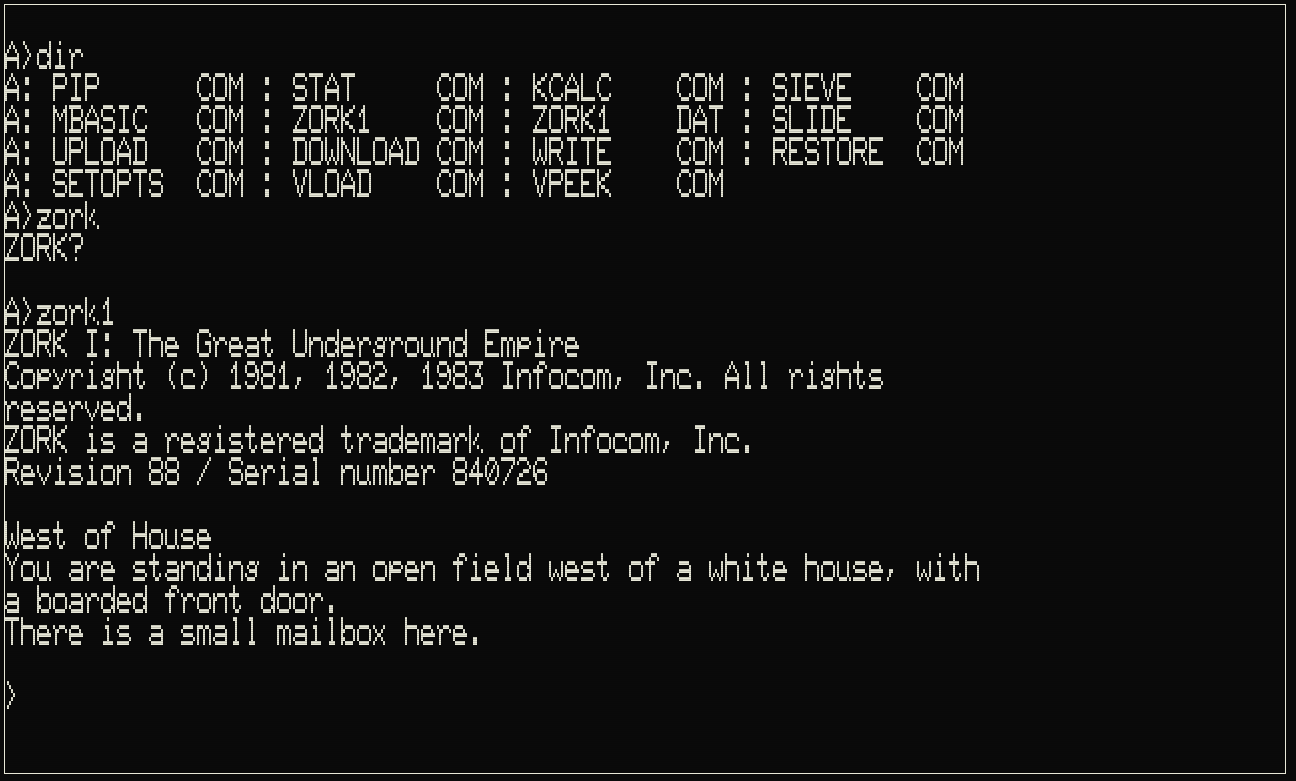
Type some commands to get more output:
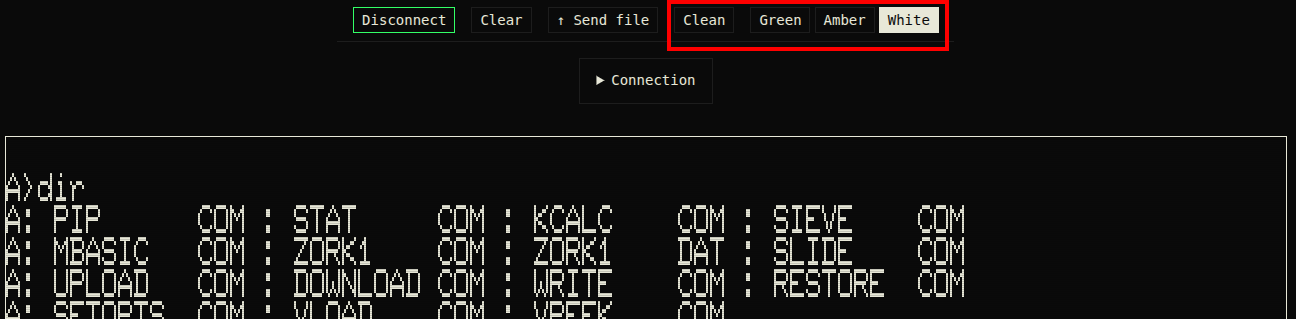
This is the "Amber CRT" display option with the original VT52 font. It looks its authentic best in white:
You can change the CRT colour (or switch to a modern "Clean" look) using the controls at the top of the screen:
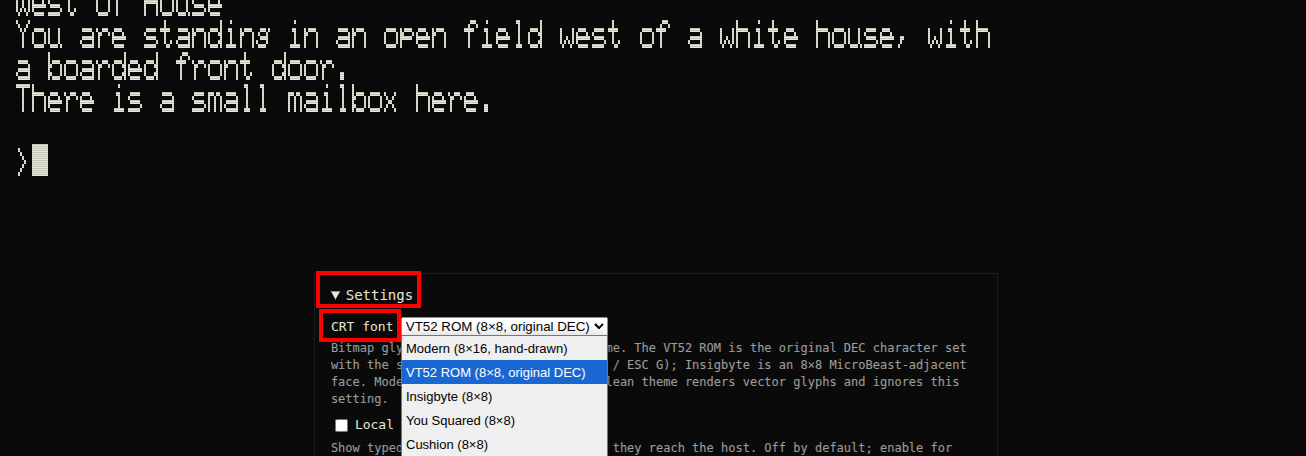
If you want to change the font, open the "Settings" section underneath the main text window, and choose a font from the "CRT font" drop-down:
The fonts only apply in CRT mode: in "clean" mode you get a built-in monospaced font. Also note that the VT52 ROM font is the only one that supports the custom VT52 alternate graphics set (although I wouldn't get too excited, it's a pretty poor choice).
How to send a file from your PC
There are a couple of ways to send a file from your PC to your 'Beast using BeasTTY.
Drag and drop
Just find the file you want to send in your file manager, and drag it onto the central region of the BeasTTY window (make sure your 'Beast is currently logged into a writable drive (i.e. B: not A:):
0:00
/0:15
Notice the "chip" top right that shows you the progress: it also gives you the option to cancel the transfer.
This works because when you drag a file into the window, BeasTTY first sends the command "B:SLIDE R\r" to your 'Beast, which executes B:SLIDE.COM R which runs the SLIDE executable in receive mode.
So for this to work, you're going to need SLIDE.COM on your B drive. You can get it from the SLIDE repo.
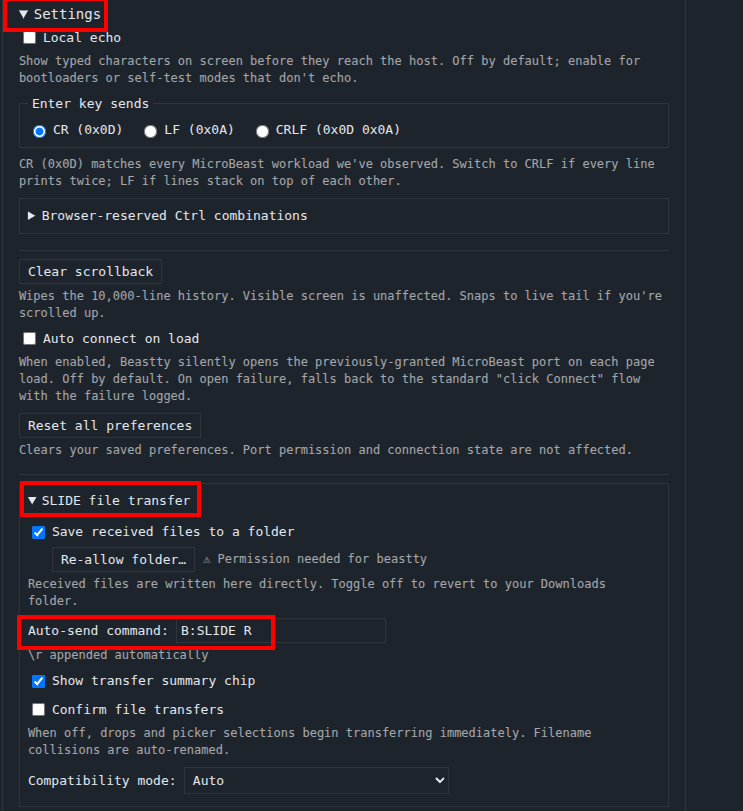
Note that versions of the MicroBeast firmware from 1.7 onwards include the SLIDE.COM binary on the A disk as standard. In this case, you need to tell BeasTTY that you want to run the A drive version - you can do this by expanding "Settings", then expanding the "SLIDE file transfer" section, then changing the "Auto-send command" option: in this case, change it to A:SLIDE R - don't forgot the 'R' at the end ("receive" mode).
Send file button
Another way to send a file is to click the "Send File" button at the top of the screen. This will give you a standard OS file picker where you can choose the file you want to send.
0:00
/0:12
How to send a file from your 'Beast
Sending a file from the 'Beast is initiated from the 'Beast itself. In the terminal window, type A:SLIDE S <name-of-file> or B:SLIDE S <name-of-file> if your SLIDE.COM binary is on the B drive.
The "S" after "SLIDE" means "send".
0:00
/0:19
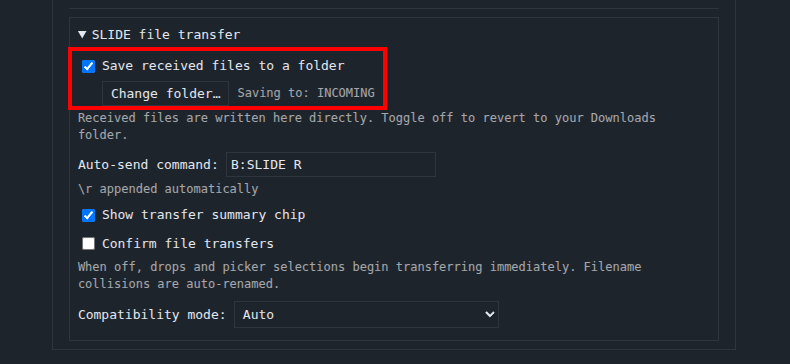
You can see in my example that the received file is automatically saved to a folder called "INCOMING" on my hard disk. This is achieved by setting the "Save received files to a folder" option and specifying a folder with "Change folder...".
💡
NB BeastTTY remembers your folder choice, but the browser will periodically require that you grant it permissions anew.
If you turn off "Save received files to a folder" then received files will use the standard browser download mechanism.
How to send multiple files from your PC
SLIDE lets you send more than one file at a time!
Drag and drop
Simply drag multiple files onto the BeasTTY window in one go. SLIDE will transfer them all individually.
0:00
/0:44
Send file button
It probably doesn't come as a great surprise to hear that you can select multiple files in the file picker that appears when you click on the "Send file" button:
0:00
/0:23
How to send multiple files from your 'Beast
Type SLIDE S <file1> <file2>... to send multiple files from the 'Beast to BeasTTY with SLIDE (that lone S means "Send"). You can specify as many files as you like, but remember that the whole line can only be 128 characters.
0:00
/0:25
These will end up in your "Save received files to a folder" folder, as for the single file case. If you haven't set this folder, your browser will use the standard download mechanism, but it will likely prompt you first to check that it's OK to download multiple files.
Introducing BeasTTY
You've probably used a terminal emulator like Terraterm or Minicom with your 'Beast countless times, but you might be surprised to learn that it's actually designed to work with a specific terminal: the DEC VT52 circa 1975. Unlike the more well-known VT100, it's
We're going to be building on that foundation here, so if you skipped earlier parts or are still a little shaky on the fundamentals you might want to go back and read them again.
To move forward, I'm going to assume that you've got SLIDE.COM on the B: drive of your 'Beast, and that you have the corresponding PC utility installed somewhere in your PATH on your development PC. Refer to the SLIDE README if you need more help with that.
I'm also going to assume that you have BBCBASIC.COM on your B drive.
We're going to start in the scrolltext/bbc_basic/effects folder.
Background info
This time, we're going to build on our scrolltext program from before, but add a little bling.
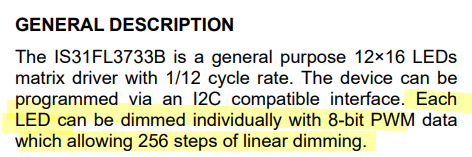
In the first installment of this series I pointed you at the LED driver datasheet and just on the off-chance that you didn't pore over this document at the time, let me quote a bit of it here:
What this is telling us is that we can change the brightness of each character on our LED display, and that each character can be set to 256 different brightness levels!
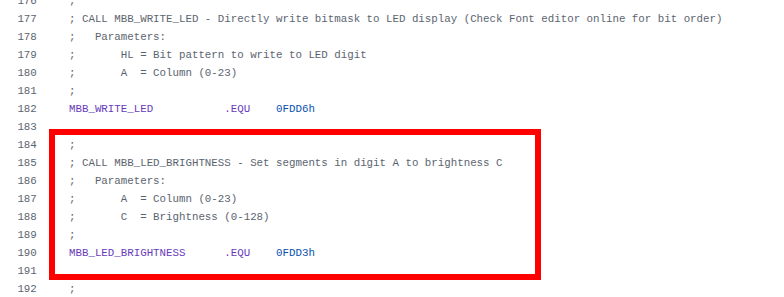
This means we can do some cool fading effects by varying the brightness. In fact you might have noticed something similar when the 'Beast first boots. The fact that the firmware is already doing this might lead you to hope that perhaps there's a BIOS routine we can call to do the heavy lifting for us, and your faith is rewarded:
I've left the familiar MBB_WRITE_LED code on there for reference. This time we're interested in MBB_LED_BRIGHTNESS, and we can see that the address this resolves to (0FDD3h) is different from MBB_WRITE_LED (&FDD6), and moreover this time the column is passed in the A register as before, but this time brightness is passed in the C register. (Note that the comment in the firmware header is wrong; there are actually 256 brightness levels, not 128.)
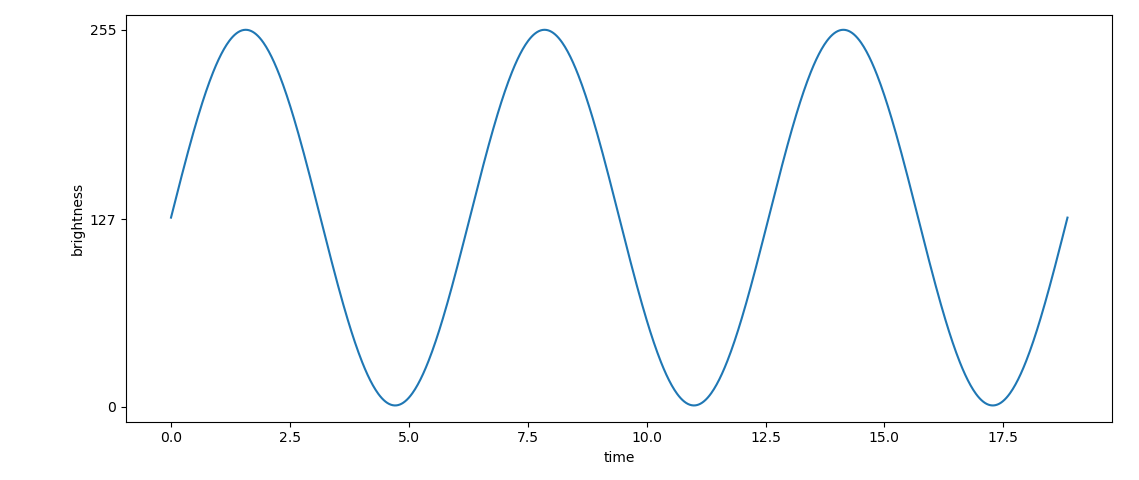
The rough plan is, we'll send lovely shimmering waves of varying brightness along our text string as it's scrolling. In order to pull this off, we'll construct a lookup table where we've pre-computed brightness levels so that they follow a sine wave pattern, like this:
We could generate this lookup table in BASIC using the SIN() function, but it's a little awkward and frankly a lot easier to generate the values and cast them to integer values in the correct range using a python script on a modern PC, so that's exactly what I did.
Here's the code we'll be running this time:
10 REM === MicroBeast LED Demo - Step 5: Sine Wave Brightness (BBC BASIC) ===
20 REM Scrolling text with a sine-wave brightness effect. The brightness
30 REM wave scrolls independently of (and faster than) the text.
40 REM
50 REM Two BIOS routines are used. BBC BASIC loads the Z80 registers
60 REM from the static integer variables A%-L% before a CALL, so each
70 REM is just a couple of lines - no machine-code stubs required:
80 REM   MBB_WRITE_LED      (&FDD6): HL = bitmask,  A = column
90 REM   MBB_LED_BRIGHTNESS (&FDD3): A  = column,   C = brightness
100 REM
110 REM --- Load font data into an array (ASCII 32-126) ---
120 DIM font%(94)
130 FOR idx% = 0 TO 94 : READ font%(idx%) : NEXT
140 REM
150 REM --- Load sine table (64 entries) ---
160 DIM sine%(63)
170 FOR idx% = 0 TO 63 : READ sine%(idx%) : NEXT
180 REM
190 REM --- Get user input ---
200 INPUT "Enter scroll text: " text$
210 REM
220 REM --- Build padded buffer: 24 spaces + text + 24 spaces ---
230 pad$ = "                        " : REM 24 spaces
240 buf$ = pad$ + text$ + pad$
250 buflen% = LEN(buf$)
260 REM
270 PRINT "Scrolling with effects... press ESCAPE to stop"
280 offset% = 1 : REM text scroll position (1-based)
290 boff% = 0   : REM brightness wave offset
300 frame% = 0  : REM frame counter
310 REM
320 REPEAT
330   REM --- Paint the 24 visible characters ---
340   FOR col% = 0 TO 23
350     ch% = ASC(MID$(buf$, offset% + col%, 1)) - 32
360     IF ch% < 0 OR ch% > 94 THEN ch% = 0
370     PROCled(font%(ch%), col%)
380   NEXT
390   REM --- Animate the brightness wave 4 times per text step ---
400   REPEAT
410     FOR col% = 0 TO 23
420       PROCbright(sine%((col% + boff%) AND 63), col%)
430     NEXT
440     boff% = (boff% + 1) AND 63
450     frame% = (frame% + 1) AND 3
460   UNTIL frame% = 0
470   REM --- Advance text position, wrapping at the end ---
480   offset% = offset% + 1
490   IF offset% > buflen% - 23 THEN offset% = 1
500 UNTIL FALSE
510 END
520 REM
530 REM --- Write bitmask bm% to LED column col% via MBB_WRITE_LED ---
540 DEF PROCled(bm%, col%)
550 A% = col% : L% = bm% MOD 256 : H% = bm% DIV 256
560 CALL &FDD6
570 ENDPROC
580 REM
590 REM --- Set brightness br% (0-255) of LED column col% via MBB_LED_BRIGHTNESS ---
600 DEF PROCbright(br%, col%)
610 A% = col% : C% = br%
620 CALL &FDD3
630 ENDPROC
640 REM
650 REM --- Font DATA (ASCII 32-126, 95 entries) ---
660 DATA &0000, &4900, &0202, &12CE, &12ED, &2DE4
670 DATA &0B59, &0200, &0C00, &2100, &3FC0, &12C0
680 DATA &2000, &00C0, &4000, &2400
690 DATA &243F, &0406, &00DB, &008F, &00E6, &0869
700 DATA &00FD, &1401, &00FF, &00EF, &0040, &2200
710 DATA &0C40, &00C8, &2180, &5083
720 DATA &02BB, &00F7, &128F, &0039, &120F, &0079
730 DATA &0071, &00BD, &00F6, &1209, &001E, &0C70
740 DATA &0038, &0536, &0936, &003F
750 DATA &00F3, &083F, &08F3, &00ED, &1201, &003E
760 DATA &2430, &2836, &2D00, &00EE, &2409
770 DATA &0039, &0900, &000F, &2800, &0008
780 DATA &0100, &208C, &0878, &00D8, &208E, &2058
790 DATA &14C0, &048E, &1070, &1000, &2210
800 DATA &1E00, &1200, &10D4, &1050, &00DC
810 DATA &0170, &0486, &0050, &0888, &0078
820 DATA &001C, &2010, &2814, &2D00, &028E
830 DATA &2048, &2149, &1200, &0C89, &24C0
840 REM
850 REM --- Sine table (64 entries, values 0-255) ---
860 DATA &0080, &008C, &0098, &00A5, &00B0, &00BC, &00C6, &00D0
870 DATA &00DA, &00E2, &00EA, &00F0, &00F5, &00FA, &00FD, &00FE
880 DATA &00FF, &00FE, &00FD, &00FA, &00F5, &00F0, &00EA, &00E2
890 DATA &00DA, &00D0, &00C6, &00BC, &00B0, &00A5, &0098, &008C
900 DATA &0080, &0073, &0067, &005A, &004F, &0043, &0039, &002F
910 DATA &0025, &001D, &0015, &000F, &000A, &0005, &0002, &0001
920 DATA &0000, &0001, &0002, &0005, &000A, &000F, &0015, &001D
930 DATA &0025, &002F, &0039, &0043, &004F, &005A, &0067, &0073
Now you can see that we've got two machine code procedures (one for displaying characters and one for setting brightness) and also two lookup tables now (one for the "font" and one for our sine-wave of brightness values).
Our character display loop (which starts at line 320) has changed quite a bit. It starts out as before, then at line 680 we have:
390   REM --- Animate the brightness wave 4 times per text step ---
400   REPEAT
410     FOR col% = 0 TO 23
420       PROCbright(sine%((col% + boff%) AND 63), col%)
430     NEXT
This goes through every column again, setting a suitable brightness value.
After that, we have this bit of chicanery:
440     boff% = (boff% + 1) AND 63
450     frame% = (frame% + 1) AND 3
What this is doing is incrementing both the brightness offset and the frame counter. When we increment the brightness offset, we AND 63 - this means that we keep only the bottom 6 bits of FC% so the effect is that whenever its value is 63 and we implement it, it wraps around to zero again.
This kind of modulo arithmetic with numbers that are a power of 2 is very, very common particularly in low level code like C or assembly language. The reason it's so ubiquitous is that a lot of maths operations in base 2 (binary) can easily be implemented with simple (and fast!) logic instructions that execute directly on the processor, like the AND we just saw. The alternative would be to do actual division and find the remainder, which is incredibly slow and tedious on old hardware like the z80. The z80 doesn't have a DIVIDE instruction, you'd have to write your own division routine.
We could of course use division in BASIC, but we'll come to why that's not such a great idea in a moment.
Running the code
This should be second nature by now:
Boot your 'Beast
SLIDE the EFFECTS.BBC file from the repo across to your 'Beast's B drive
"log in" to the B drive with B:
start BBC Basic with BBCBASIC
type LOAD "EFFECTS"
inspect it with LIST
run it with RUN
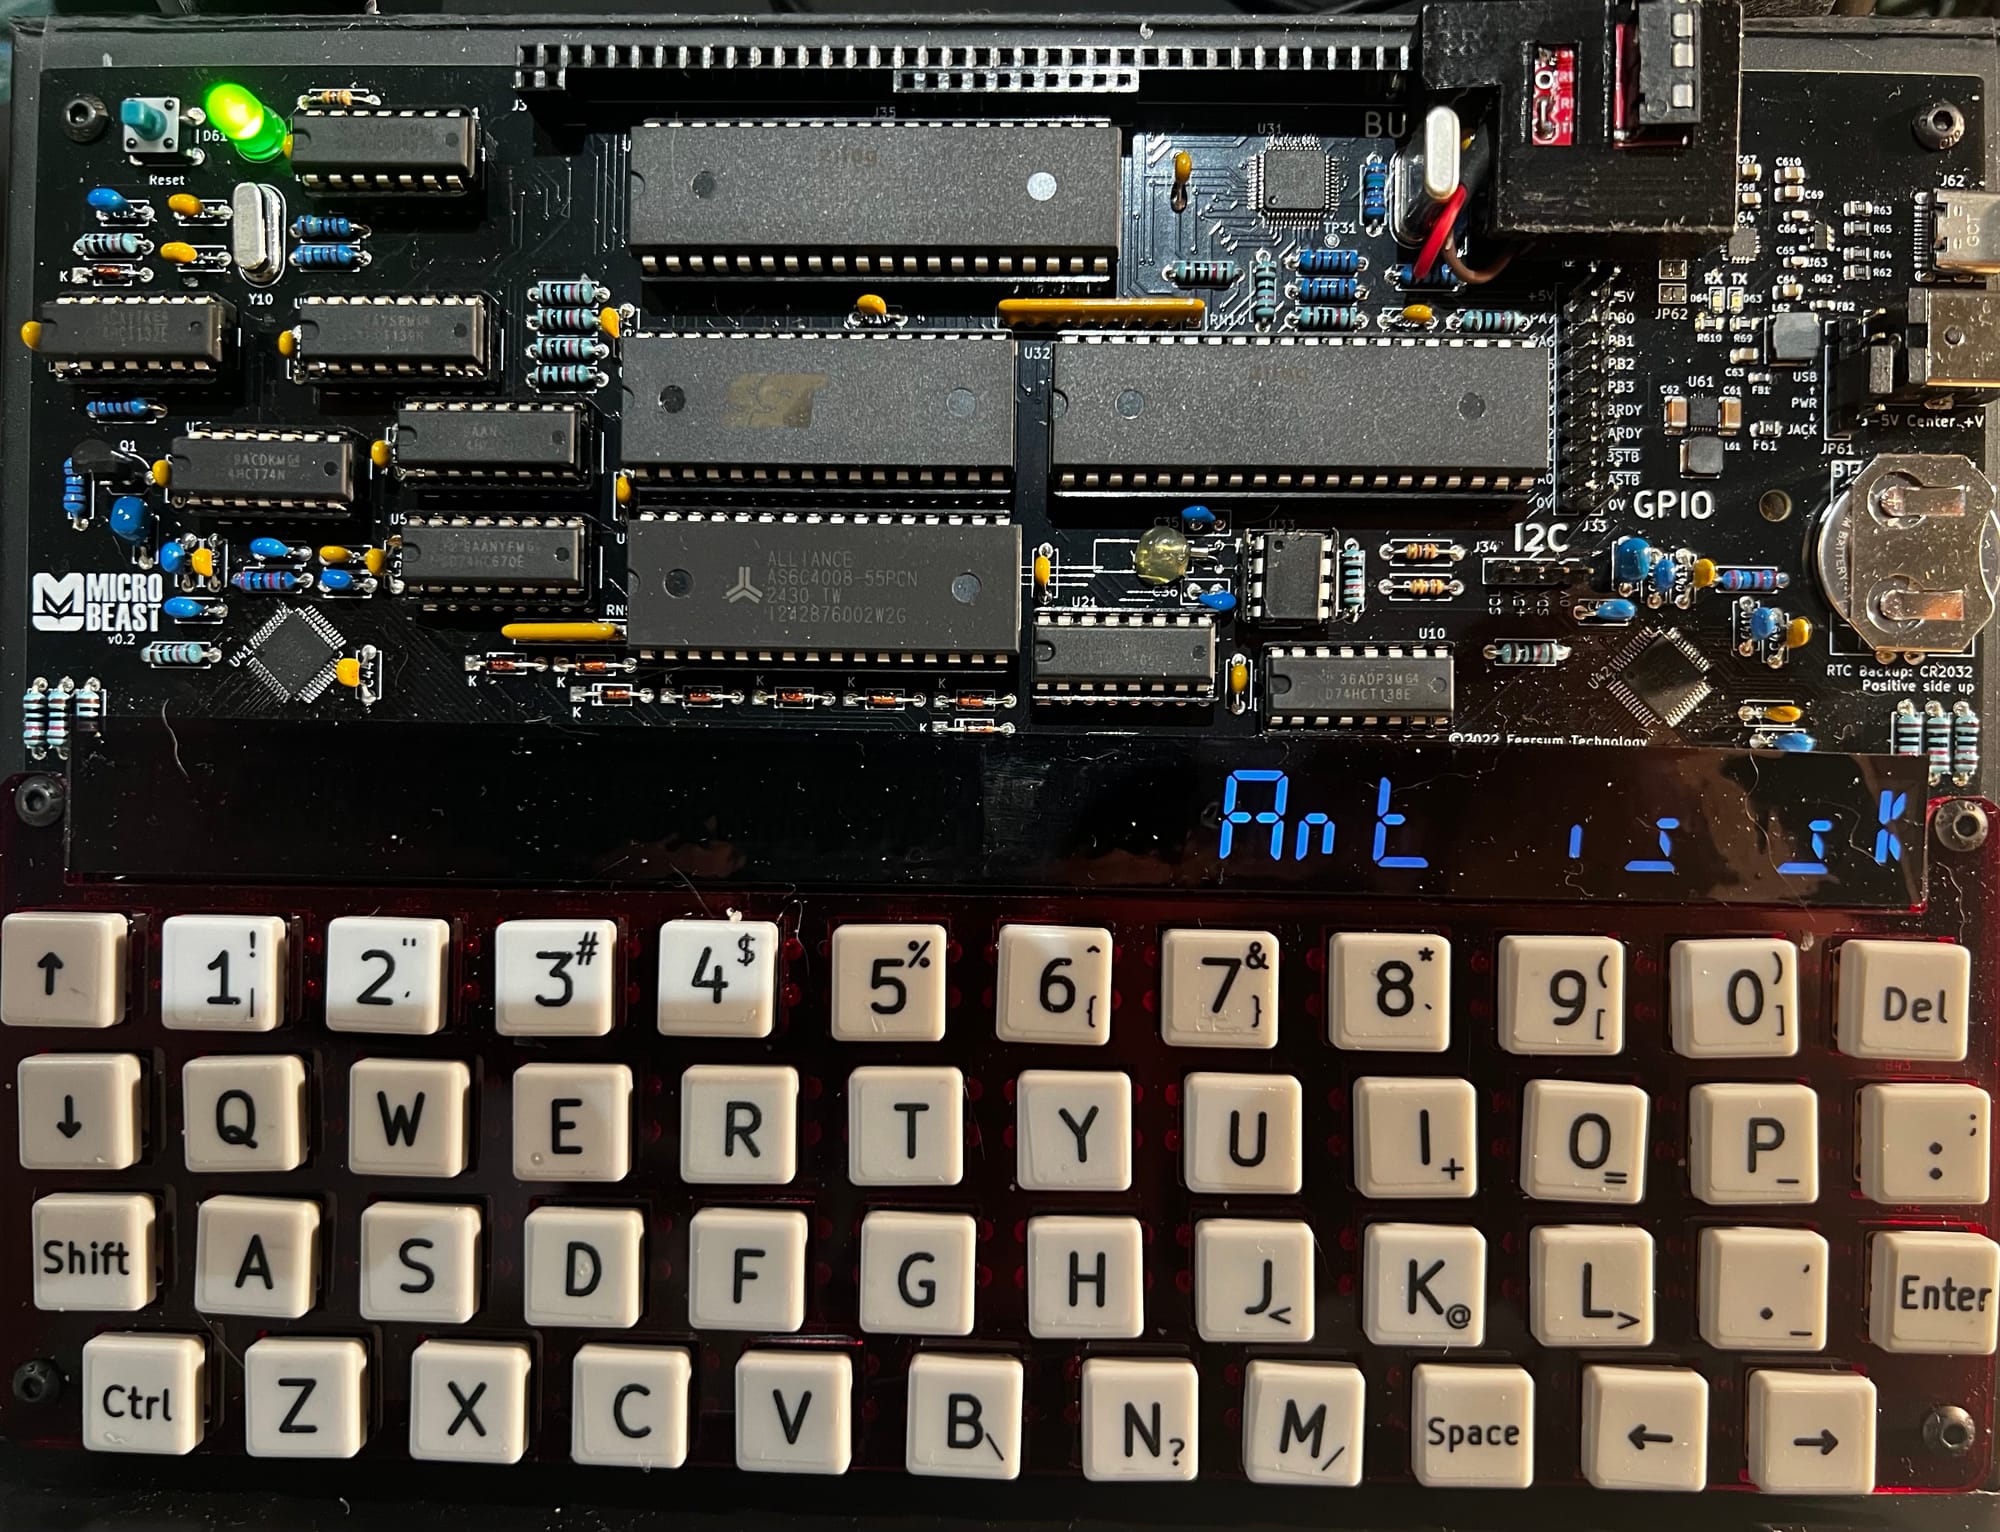
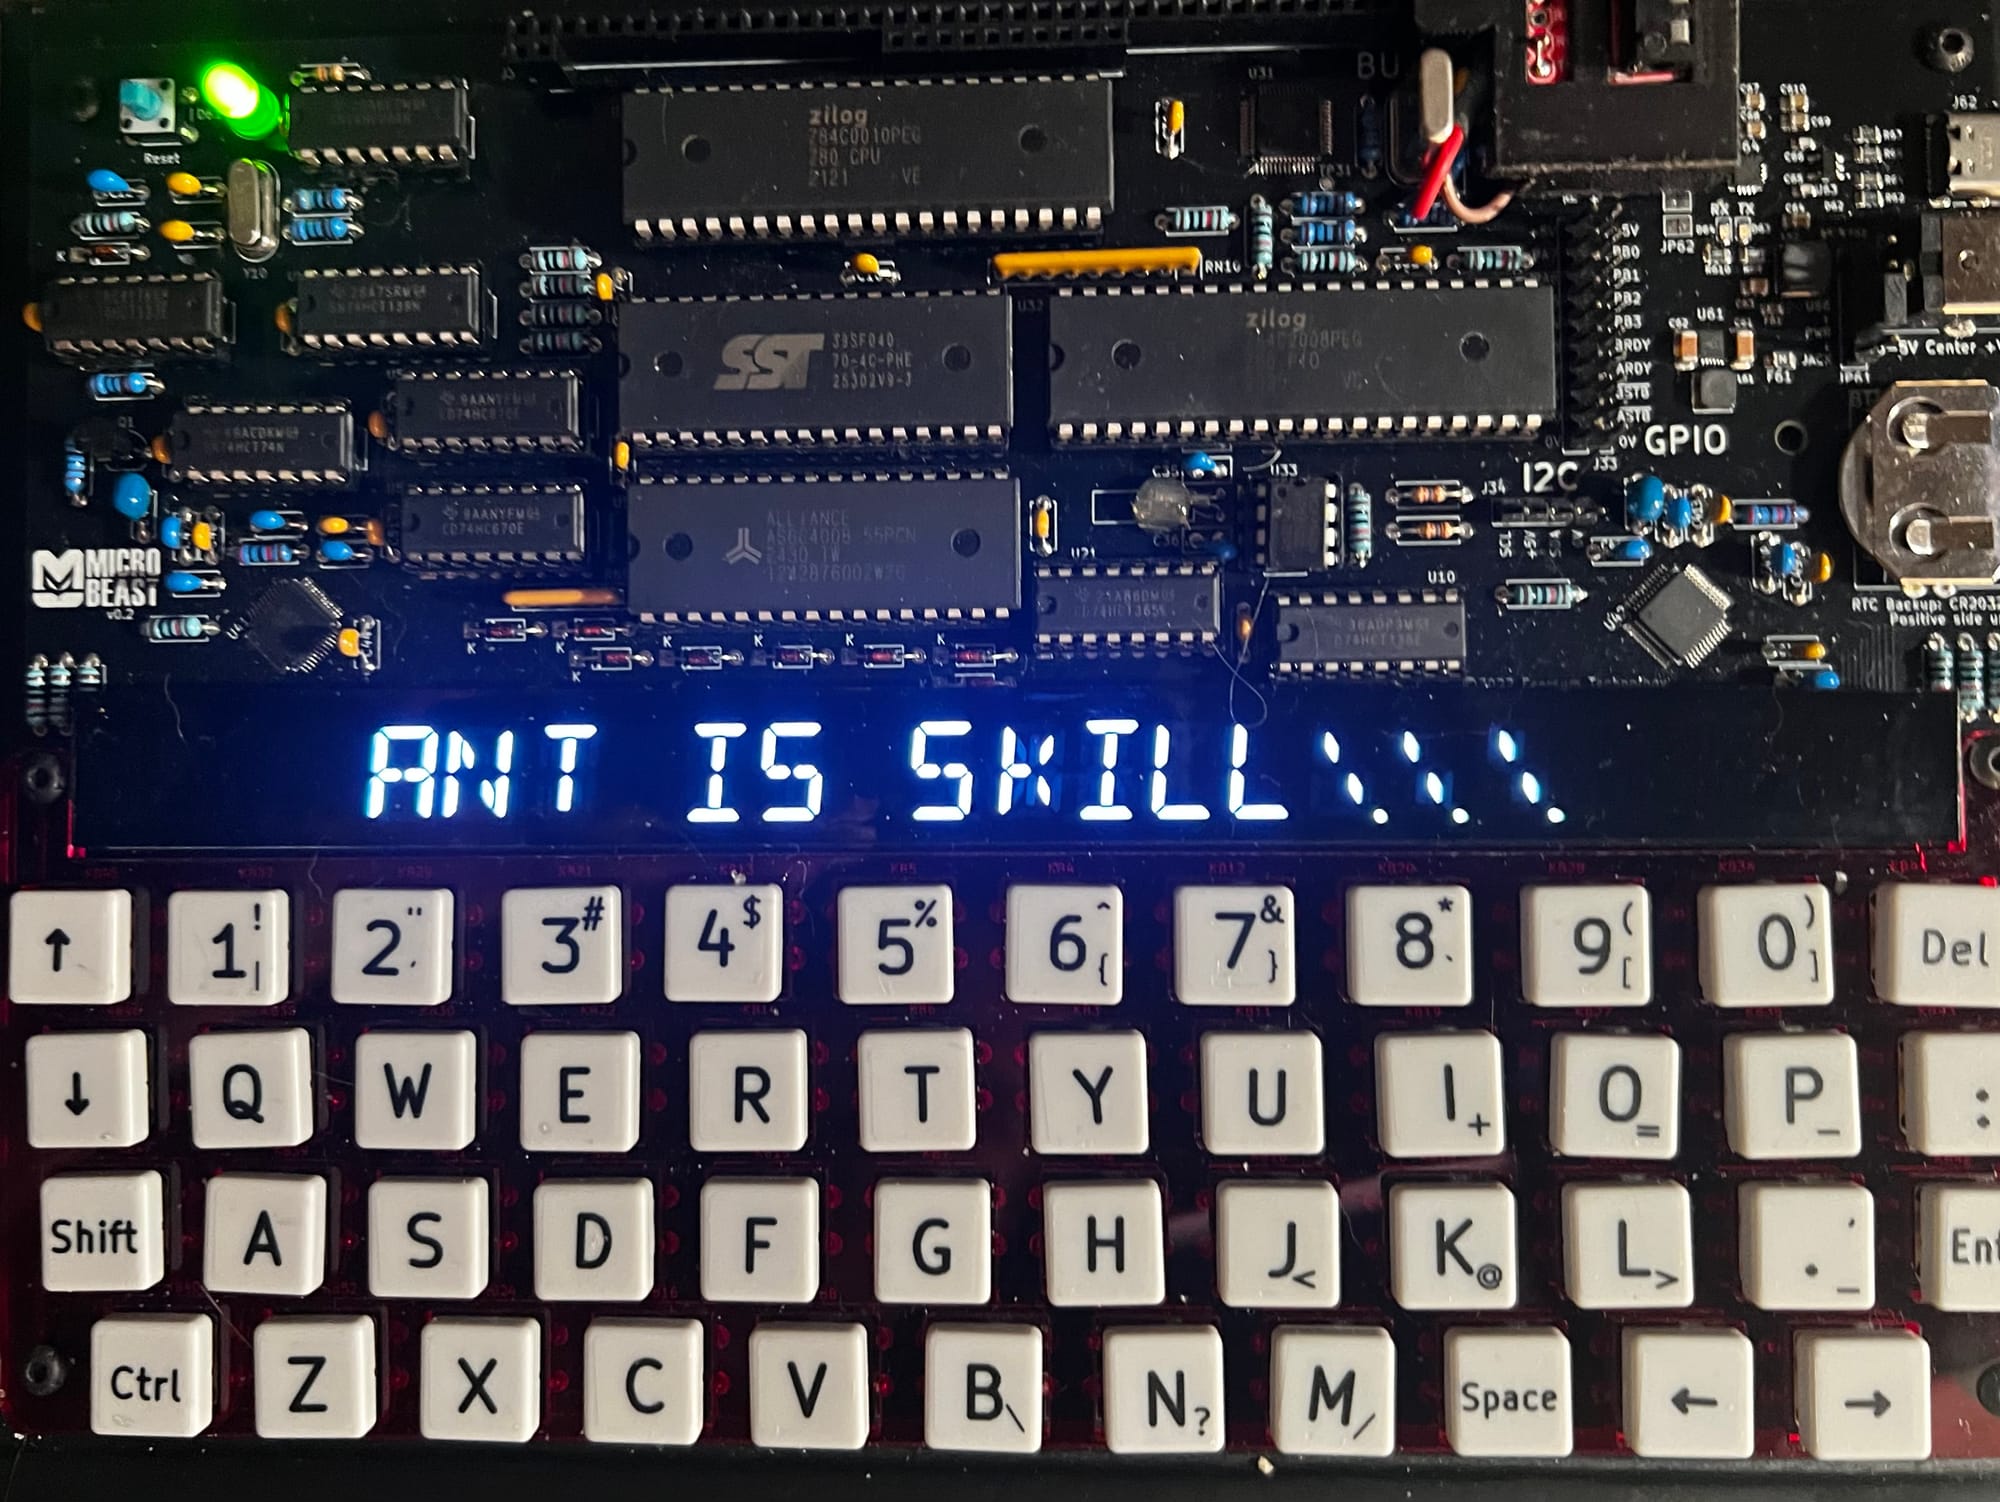
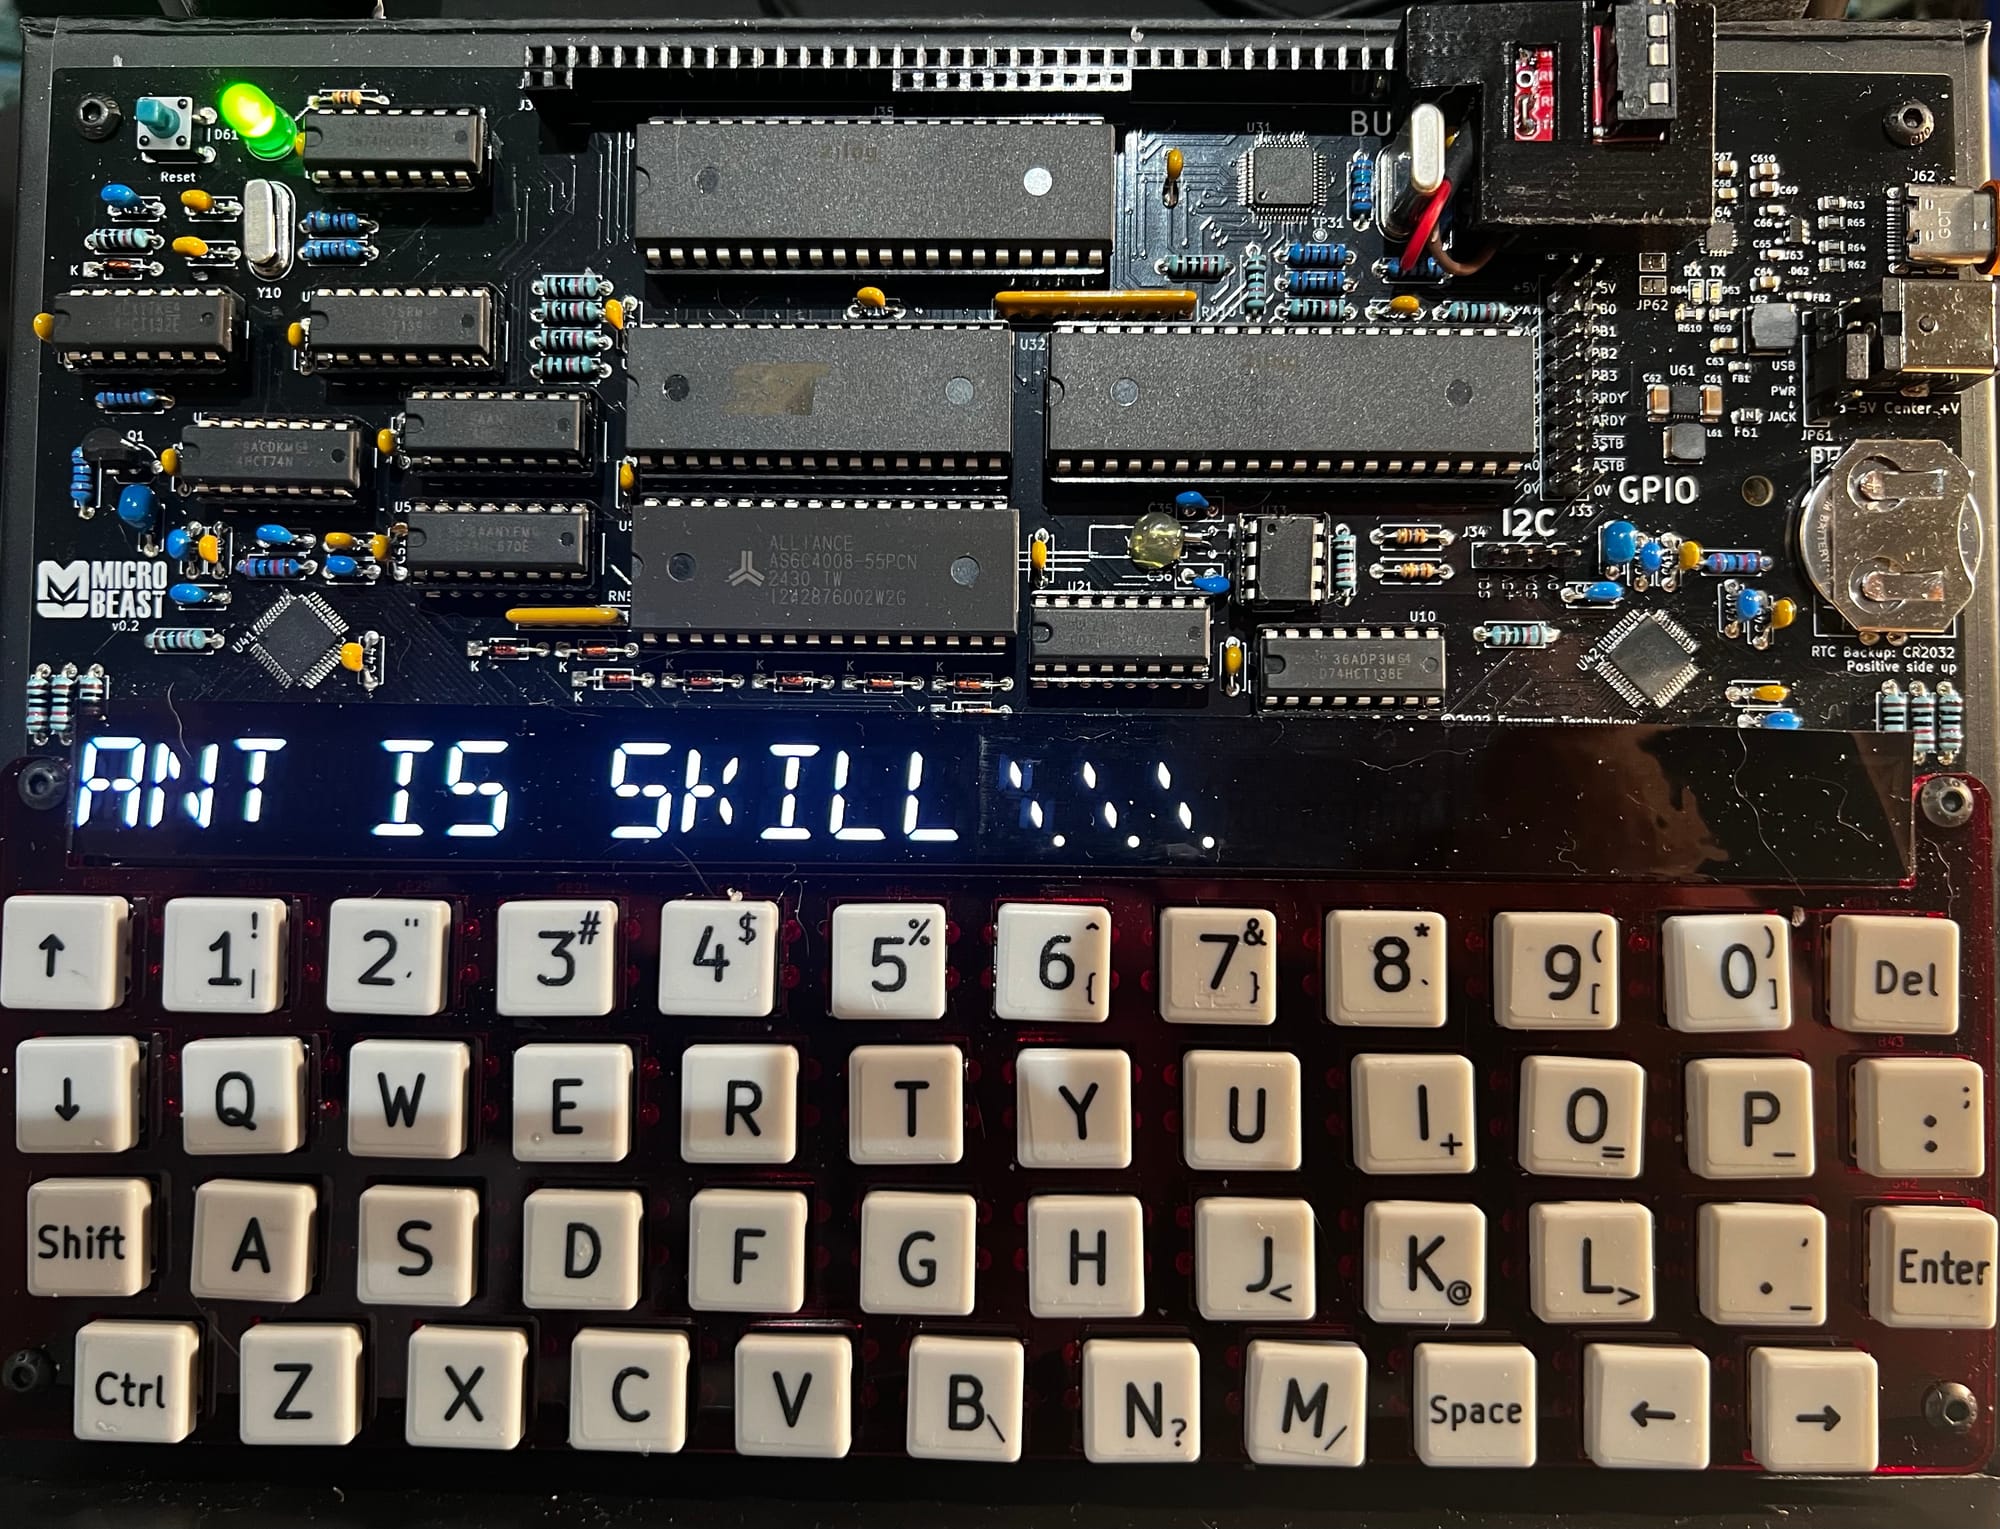
All being well, you should see this (your string might be different):
One thing you'll notice straight away is that it is monumentally slow. There's not even an artificial delay loop in there that we can tweak - this is running at full tilt! The sad truth is that while high-level languages like BASIC are great for learning how to code and writing simple programs, they squander a lot of the machine's power turning those fancy BASIC statements into machine code that the processor can execute.
To get more performance out of the processor (and believe me, it can go a lot faster!) we'll have to put aside BASIC, and like the bedroom-based game developers of yore teach ourselves z80 assembler..
Things you can try
Can you see any way to make the BASIC code quicker?
Try making the brightness wave go in the opposite direction!
It's not possible for the eye to actually discern 256 levels of brightness: how can you adjust the sine wave table so that the effect is more striking?
End of Part Six
That's it for Part Six, and also for BBC Basic!
In the next part Your name in lights! (Part 7) we'll learn some z80 assembler, by re-implementing the programs we've already written.
If you're not quite ready for that yet and want to experiment a bit further in BASIC then by all means do so: experimentation is the best way to learn!
If you want to dabble in other high-level languages you are spoilt for choice...there are CP/M implementations of Algol, COBOL, Fortran, Pascal, LISP, Forth, and C, and probably many more besides. These are easily found on the web, and most will run on the 'Beast without issue (just make sure it's the z80 + cp/m 2.2 version you're trying to run.
Well done for making it this far - the real fun is about to begin!
microbeast
Your name in lights! (Part 6) (BBC BASIC)
Last time in Your name in lights! (Part 5), we get a basic scrolltext working and were able to scroll any message of our choosing.
We're going to be building on that foundation here, so if you skipped earlier parts or are still a little shaky on the
We're going to be building on that foundation here, so if you skipped earlier parts or are still a little shaky on the fundamentals you might want to go back and read them again.
To move forward, I'm going to assume that you've got SLIDE.COM on the B: drive of your 'Beast, and that you have the corresponding PC utility installed somewhere in your PATH on your development PC. Refer to the SLIDE README if you need more help with that.
I'm also going to assume that you have BBCBASIC.COM on your B drive.
We're going to start in the scrolltext/bbc_basic/scrolltext folder.
Background info
This time around, we're going to add the ability to display strings that are longer than our display is wide (24 characters). And we'll do that by making a "scroll text" - only a portion of the message is visible at a given time. By updating which portion we display ever so slightly on a regular basis, we can give the illusion of the text scrolling by.
Imagine for a moment, that you are wearing a welding helmet and contemplating God's final message to his creation. You can't see the whole message in one go, you'd have to physically turn your head to read it (or move the message of course, but it's not so easy to move divine messages in 30 foot letters made of fire).
One way we could do this is to start by displaying our string at column 0, and then on the next iteration display it at column -1, then -2 etc. etc. The text would then appear to be moving to the left:
This sort of approach is common in many graphics systems, but the 'Beast will not take kindly to negative column values. Also, it is not a very efficient technique: if the string is very long, we will spend a lot of time trying to render characters that cannot be visible.
A better approach is to slide the display along the string:
So we start by displaying the first 24 characters of the string starting at the first (index 0), but on the next iteration we display 24 characters starting from the second position in the string (index 1) and so on. We could do some complicated maths to deal with what happens when we get to the end of the string, but it's easier to just stick 24 spaces on the end. In fact, we'll stick another 24 on the front so the string appears to enter from the right hand edge.
Here's the code we'll be running this time:
10 REM === MicroBeast LED Demo - Step 4: Scrolling Text (BBC BASIC) ===
20 REM Prompts for a string and scrolls it continuously across the
30 REM 24-character LED display. The text is padded with spaces so it
40 REM scrolls in from the right and out to the left.
50 REM
60 REM --- Load font data into an array (ASCII 32-126) ---
70 DIM font%(94)
80 FOR idx% = 0 TO 94 : READ font%(idx%) : NEXT
90 REM
100 REM --- Get user input ---
110 INPUT "Enter scroll text: " text$
120 REM
130 REM --- Build padded buffer: 24 spaces + text + 24 spaces ---
140 pad$ = "                        " : REM 24 spaces
150 buf$ = pad$ + text$ + pad$
160 buflen% = LEN(buf$)
170 REM
180 PRINT "Scrolling... press ESCAPE to stop"
190 offset% = 1 : REM scroll offset (1-based for MID$)
200 REM
210 REPEAT
220   REM Display 24 characters starting at the current offset
230   FOR col% = 0 TO 23
240     ch% = ASC(MID$(buf$, offset% + col%, 1)) - 32
250     IF ch% < 0 OR ch% > 94 THEN ch% = 0
260     PROCled(font%(ch%), col%)
270   NEXT
280   REM Delay for scroll speed (centiseconds); also lets ESCAPE break
290   dummy% = INKEY(8)
300   REM Advance scroll position, wrapping at the end
310   offset% = offset% + 1
320   IF offset% > buflen% - 23 THEN offset% = 1
330 UNTIL FALSE
340 END
350 REM
360 REM --- Write bitmask bm% to LED column col% via MBB_WRITE_LED ---
370 DEF PROCled(bm%, col%)
380 A% = col%
390 L% = bm% MOD 256
400 H% = bm% DIV 256
410 CALL &FDD6
420 ENDPROC
430 REM
440 REM --- Font DATA (ASCII 32-126, 95 entries) ---
450 DATA &0000, &4900, &0202, &12CE, &12ED, &2DE4
460 DATA &0B59, &0200, &0C00, &2100, &3FC0, &12C0
470 DATA &2000, &00C0, &4000, &2400
480 DATA &243F, &0406, &00DB, &008F, &00E6, &0869
490 DATA &00FD, &1401, &00FF, &00EF, &0040, &2200
500 DATA &0C40, &00C8, &2180, &5083
510 DATA &02BB, &00F7, &128F, &0039, &120F, &0079
520 DATA &0071, &00BD, &00F6, &1209, &001E, &0C70
530 DATA &0038, &0536, &0936, &003F
540 DATA &00F3, &083F, &08F3, &00ED, &1201, &003E
550 DATA &2430, &2836, &2D00, &00EE, &2409
560 DATA &0039, &0900, &000F, &2800, &0008
570 DATA &0100, &208C, &0878, &00D8, &208E, &2058
580 DATA &14C0, &048E, &1070, &1000, &2210
590 DATA &1E00, &1200, &10D4, &1050, &00DC
600 DATA &0170, &0486, &0050, &0888, &0078
610 DATA &001C, &2010, &2814, &2D00, &028E
620 DATA &2048, &2149, &1200, &0C89, &24C0
No surprises here. We've essentially got all the same code as last time, but now we've got a loop around our main display routine that changes the offset on each iteration: lines 220-330. The delay in line 290 is just there to slow things down a bit, lest the awesome power of BBC BASIC render our message an illegible blur.
Running the code
You know the drill:
Boot your 'Beast
SLIDE the SCROLLTEXT.BBC file from the repo across to your 'Beast's B drive (you'll need to rename it as SCROLTXT.BBC to fit the CP/M naming convention)
"log in" to the B drive with B:
start BBC Basic with BBCBASIC
type LOAD "SCROLTXT"
inspect it with LIST
run it with RUN
All being well, you should see this (your string might be different):
Things you can try
Try making the delay shorter - what's the fastest it can do?
Try making the string scroll in the opposite direction!
End of Part Five
That's it for Part Five - we built on all the understanding we've developed so far and built a reasonable scrolltext implementation.
In the next part, Your name in lights! (Part 6),we'll wrap up the BASIC section by adding some effects to our scrolltext to make it extra fancy!
microbeast
Your name in lights! (Part 5) (BBC BASIC)
Last time in Your name in lights! (Part 4) , we were able to display arbitrary short strings on the 'Beast's LED displays.
We're going to be building on that foundation here, so if you skipped earlier parts or are still a little shaky on the
We're going to be building on that foundation here, so if you skipped earlier parts or are still a little shaky on the fundamentals you might want to go back and read them again.
To move forward, I'm going to assume that you've got SLIDE.COM on the B: drive of your 'Beast, and that you have the corresponding PC utility installed somewhere in your PATH on your development PC. Refer to the SLIDE README if you need more help with that.
I'm also going to asssume that you have BBCBASIC.COM on your B drive.
We're going to start in the scrolltext/bbc_basic/strings folder.
Background info
This time, we'll modify the code we already have slightly to allow us to display longer messages, and to let us input the string we want to display dynamically, rather than hard-coding it into the source code.
Here's the code we'll be running this time:
10 REM === MicroBeast LED Demo - Step 3: String Display (BBC BASIC) ===
20 REM Prompt the user for a string and display it on the 24-char
30 REM LED display. Each character is converted to its 14-segment
40 REM bitmask via a font lookup.
50 REM
60 REM --- Load font data into an array (ASCII 32-126) ---
70 DIM font%(94)
80 FOR idx% = 0 TO 94 : READ font%(idx%) : NEXT
90 REM
100 REM --- Get user input ---
110 INPUT "Enter text (max 24 chars): " text$
120 IF LEN(text$) > 24 THEN text$ = LEFT$(text$, 24)
130 REM
140 REM --- Display the string, padding the rest with blanks ---
150 FOR col% = 0 TO 23
160   IF col% < LEN(text$) THEN ch% = ASC(MID$(text$, col%+1, 1)) - 32 ELSE ch% = 0
170   IF ch% < 0 OR ch% > 94 THEN ch% = 0
180   PROCled(font%(ch%), col%)
190 NEXT
200 PRINT "Done!"
210 END
220 REM
230 REM --- Write bitmask bm% to LED column col% via MBB_WRITE_LED ---
240 DEF PROCled(bm%, col%)
250 A% = col%
260 L% = bm% MOD 256
270 H% = bm% DIV 256
280 CALL &FDD6
290 ENDPROC
300 REM
310 REM --- Font DATA (ASCII 32-126, 95 entries) ---
320 DATA &0000, &4900, &0202, &12CE, &12ED, &2DE4
330 DATA &0B59, &0200, &0C00, &2100, &3FC0, &12C0
340 DATA &2000, &00C0, &4000, &2400
350 DATA &243F, &0406, &00DB, &008F, &00E6, &0869
360 DATA &00FD, &1401, &00FF, &00EF, &0040, &2200
370 DATA &0C40, &00C8, &2180, &5083
380 DATA &02BB, &00F7, &128F, &0039, &120F, &0079
390 DATA &0071, &00BD, &00F6, &1209, &001E, &0C70
400 DATA &0038, &0536, &0936, &003F
410 DATA &00F3, &083F, &08F3, &00ED, &1201, &003E
420 DATA &2430, &2836, &2D00, &00EE, &2409
430 DATA &0039, &0900, &000F, &2800, &0008
440 DATA &0100, &208C, &0878, &00D8, &208E, &2058
450 DATA &14C0, &048E, &1070, &1000, &2210
460 DATA &1E00, &1200, &10D4, &1050, &00DC
470 DATA &0170, &0486, &0050, &0888, &0078
480 DATA &001C, &2010, &2814, &2D00, &028E
490 DATA &2048, &2149, &1200, &0C89, &24C0
Much of this code should look familiar from last time. We've got the same machine-code stub to call our BIOS routine in lines 240-290, the same font table setup in lines 70-80, and the same (ish) character display routine in lines 150-190.
We've added some code in lines 110-120 to prompt the user for the string to be displayed:
110 INPUT "Enter text (max 24 chars): " text$
120 IF LEN(text$) > 24 THEN text$ = LEFT$(text$, 24)
INPUT is the keyword that causes the prompt to be displayed, and whatever characters you provide are stored in the variable text$ (remember that $ means "string" here).
The second line is a safety check to ensure that our string is no longer than 24 characters, because that's the maximum message size we can display on our 24-character LED display.
There's also some extra chicanery in lines 160-170 that I glossed over earlier that we should now review:
160   IF col% < LEN(text$) THEN ch% = ASC(MID$(text$, col%+1, 1)) - 32 ELSE ch% = 0
170   IF ch% < 0 OR ch% > 94 THEN ch% = 0
col% is our integer "column number" variable counting up from 0 to 23 inclusive. For each column position we extract the relevant character from the string - that's the MID$ keyword in the middle. We use ASC to get the ASCII character code for this character, and we subtract 32 from it, because we don't have font table entries for the first 32 ASCII characters as they're all control codes anyway. The first entry in our font table is the SPACE character, whose ASCII value is 32: so subtracting 32 is an easy way to convert from ASCII code to font-table index.
Line 160 is also guarding against our input string being shorter than the display width (IF col% < LEN(text$)) - if we run out of characters in text$ before we get to the end of the display we do ELSE ch% = 0 which has the effect of using entry 0 in our font table (a blank SPACE character).
Finally line 170 guards against tricksy character values that our outside the bounds of our font table: if that happens, we'll swap those out for a SPACE character too.
Running the code
You know the drill:
Boot your 'Beast
SLIDE the STRINGS.BBC file from the repo across to your 'Beast's B drive
"log in" to the A drive with A:
start BBC Basic with BBCBASIC
type LOAD "STRINGS"
inspect it with LIST
run it with RUN
All being well, you should see this (your string might be different):
Things you can try
Try displaying a string that's longer than the display
Try displaying characters that aren't in the font table
How could you adapt the code to display "User Defined Graphics" (UDGs) ? Are there are characters you can swap out in the existing font table?
What about if you wanted to extend the existing font table to offer UDGs?
End of Part Four
That's it for Part Four - another relatively short one. Next time, in Your name in lights! (Part 5) we'll look at how we can display strings that are longer than the available display width, and introduce the ancient and venerable art of ScrollTexts...
microbeast
Your name in lights! (Part 4) (BBC BASIC)
Last time, in Your name in lights! (Part 3) we really got into our stride and managed to write short (very short!) messages of our choosing to the LED display.
We're going to be building on that foundation here, so if you skipped earlier parts or are still
We're going to be building on that foundation here, so if you skipped Part One or Part Two or are still a little shaky on the fundamentals you might want to go back and read them again.
To move forward, I'm going to assume that you've got SLIDE.COM on the B: drive of your 'Beast, and that you have the corresponding PC utility installed somewhere in your PATH on your development PC. Refer to the SLIDE README if you need more help with that.
I'm also going to assume that you have BBCBASIC.COM on your B drive.
We're going to start in the scrolltext/bbc_basic/fonts folder.
Background info
This time, we'll see if we can adopt that classic time-honoured writing system: the Latin alphabet!
All of the standard characters on the 'Beast can be represented by an ASCII code: for example the letter A is character number 65 (0x41). It would be convenient to use these values when we're trying to write every-day text to our display, and only resort to codewords when we want a Space Invader, or something.
💡
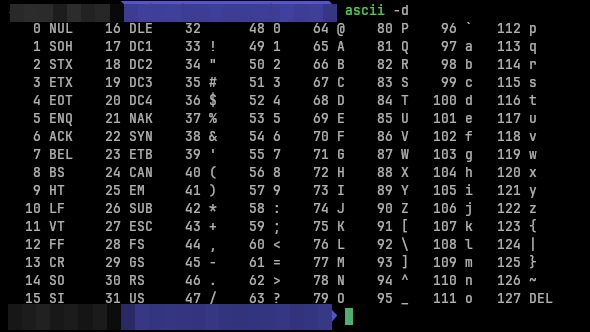
Incidentally, the ASCII standard is a supremely elegant bit of design: read this post if you want to know more!
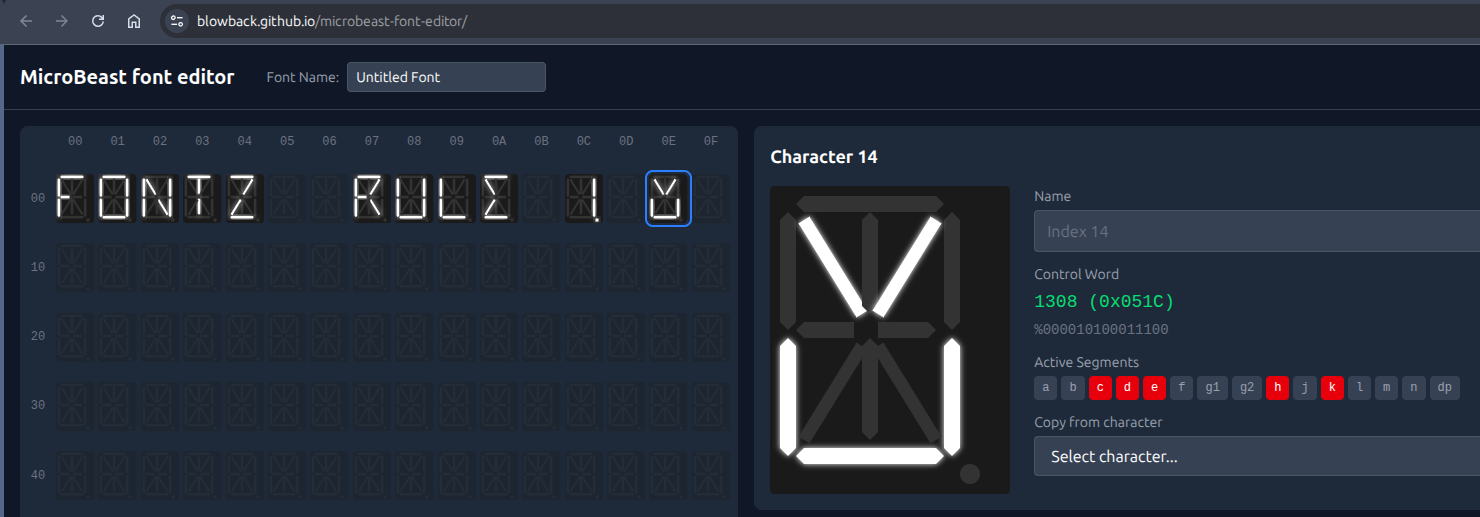
You might guess from the Font Editor I've shown you previously that this involves creating a "Font" which is simply a big table of codewords for every letter, digit or punctuation mark we wish to use, systematically organised in such a way that we can convert from ASCII codes to LED code-words.
You might also be thinking "Hold on, the 'Beast already displays characters perfectly well, surely someone has already done this work?" - and you'd be right. The 'Beast's designers have already provided a "font" that covers the 94 most exciting characters in the ASCII standard. (ASCII only defines 128 characters in total, and some of those are special control characters that can't be printed to the screen anyway).
Unfortunately, the BIOS doesn't provide a convenient way to access this font table from code running on the `Beast. We could figure out its address in the particular firmware we're using, but such an approach is brittle because there are no guarantees that the next version of the firmware will have the font table at exactly the same address, and our code would break.
The alternative is to define our own font table. Rather than mess about defining 94 characters in the Font Editor, we're just going to copy the info from the MicroBeast font table into our own code.
Here's the code we'll be running this time:
10 REM === MicroBeast LED Demo - Step 2: Font Rendering (BBC BASIC) ===
20 REM Display "HELLO" on the last 5 LED positions (columns 19-23)
30 REM using font bitmask data for the 14-segment displays.
40 REM
50 REM Each character has a 16-bit bitmask:
60 REM   Low byte  = outer segments (a,b,c,d,e,f,g1,g2)
70 REM   High byte = inner/diagonal segments (h,j,k,l,m,n)
80 REM
90 REM The font table is indexed from ASCII 32 (space) onwards:
100 REM   index = ASC(char) - 32,  bitmask = font%(index)
110 REM
120 REM --- Load font data into an array (ASCII 32-126, 95 entries) ---
130 DIM font%(94)
140 FOR idx% = 0 TO 94 : READ font%(idx%) : NEXT
150 REM
160 REM --- Display "HELLO" on columns 19-23 ---
170 text$ = "HELLO"
180 FOR pos% = 1 TO 5
190   ch% = ASC(MID$(text$, pos%, 1)) - 32
200   PROCled(font%(ch%), 18 + pos%)
210 NEXT
220 PRINT "Displayed HELLO on columns 19-23"
230 END
240 REM
250 REM --- Write bitmask bm% to LED column col% via MBB_WRITE_LED ---
260 DEF PROCled(bm%, col%)
270 A% = col%
280 L% = bm% MOD 256
290 H% = bm% DIV 256
300 CALL &FDD6
310 ENDPROC
320 REM
330 REM --- Font DATA (ASCII 32-126, 95 entries) ---
340 REM Each value is a 16-bit bitmask for the 14-segment display
350 REM
360 DATA &0000, &4900, &0202, &12CE, &12ED, &2DE4
370 DATA &0B59, &0200, &0C00, &2100, &3FC0, &12C0
380 DATA &2000, &00C0, &4000, &2400
390 DATA &243F, &0406, &00DB, &008F, &00E6, &0869
400 DATA &00FD, &1401, &00FF, &00EF, &0040, &2200
410 DATA &0C40, &00C8, &2180, &5083
420 DATA &02BB, &00F7, &128F, &0039, &120F, &0079
430 DATA &0071, &00BD, &00F6, &1209, &001E, &0C70
440 DATA &0038, &0536, &0936, &003F
450 DATA &00F3, &083F, &08F3, &00ED, &1201, &003E
460 DATA &2430, &2836, &2D00, &00EE, &2409
470 DATA &0039, &0900, &000F, &2800, &0008
480 DATA &0100, &208C, &0878, &00D8, &208E, &2058
490 DATA &14C0, &048E, &1070, &1000, &2210
500 DATA &1E00, &1200, &10D4, &1050, &00DC
510 DATA &0170, &0486, &0050, &0888, &0078
520 DATA &001C, &2010, &2814, &2D00, &028E
530 DATA &2048, &2149, &1200, &0C89, &24C0
The aim this time around is to write the word "HELLO" in the last 5 characters of the display. We won't be writing code-words either this time: we'll use ASCII characters.
You can see in line 170:
170 text$ = "HELLO"
The $ suffix means "this variable is a string", and a "string" is a sequence of ASCII characters. It's more convenient than writing out 72, 69, 76, 76, 79, but is otherwise exactly equivalent (bar some sneaky extra information that is stored to remember how long the string is).
In line 130, we have this odd looking line:
130 DIM font%(94)
This means that we're "DIMensioning" (allocating) an "array" (list or table) of 94 integers (because of the %), and we want to call this table font% for "Font Table".
In line 140 you can see where we're setting up values to go in to that table. We loop around 94 times and for each character we're performing:
140 FOR idx% = 0 TO 94 : READ font%(idx%) : NEXT
so as I% goes from 0 to 94 we'll first read a value into font%(0) (the first slot) then the next value into font%(1) and so on. That READ statement gets its data from the DATA statements starting at line 360.
The font data exactly matches the MicroBeast firmware file I showed you earlier - the hexadecimal numbers are just formatted in a slightly different way.
Running the code
We can speed through this now, as you're an old hand at running BASIC programs on the 'Beast. Try this:
Boot your 'Beast
SLIDE the FONTS.BAS file from the repo across to your 'Beast's B drive
"log in" to the A drive with A:
start BBC Basic with BBCBASIC
type LOAD "FONTS"
inspect it with LIST
run it with RUN
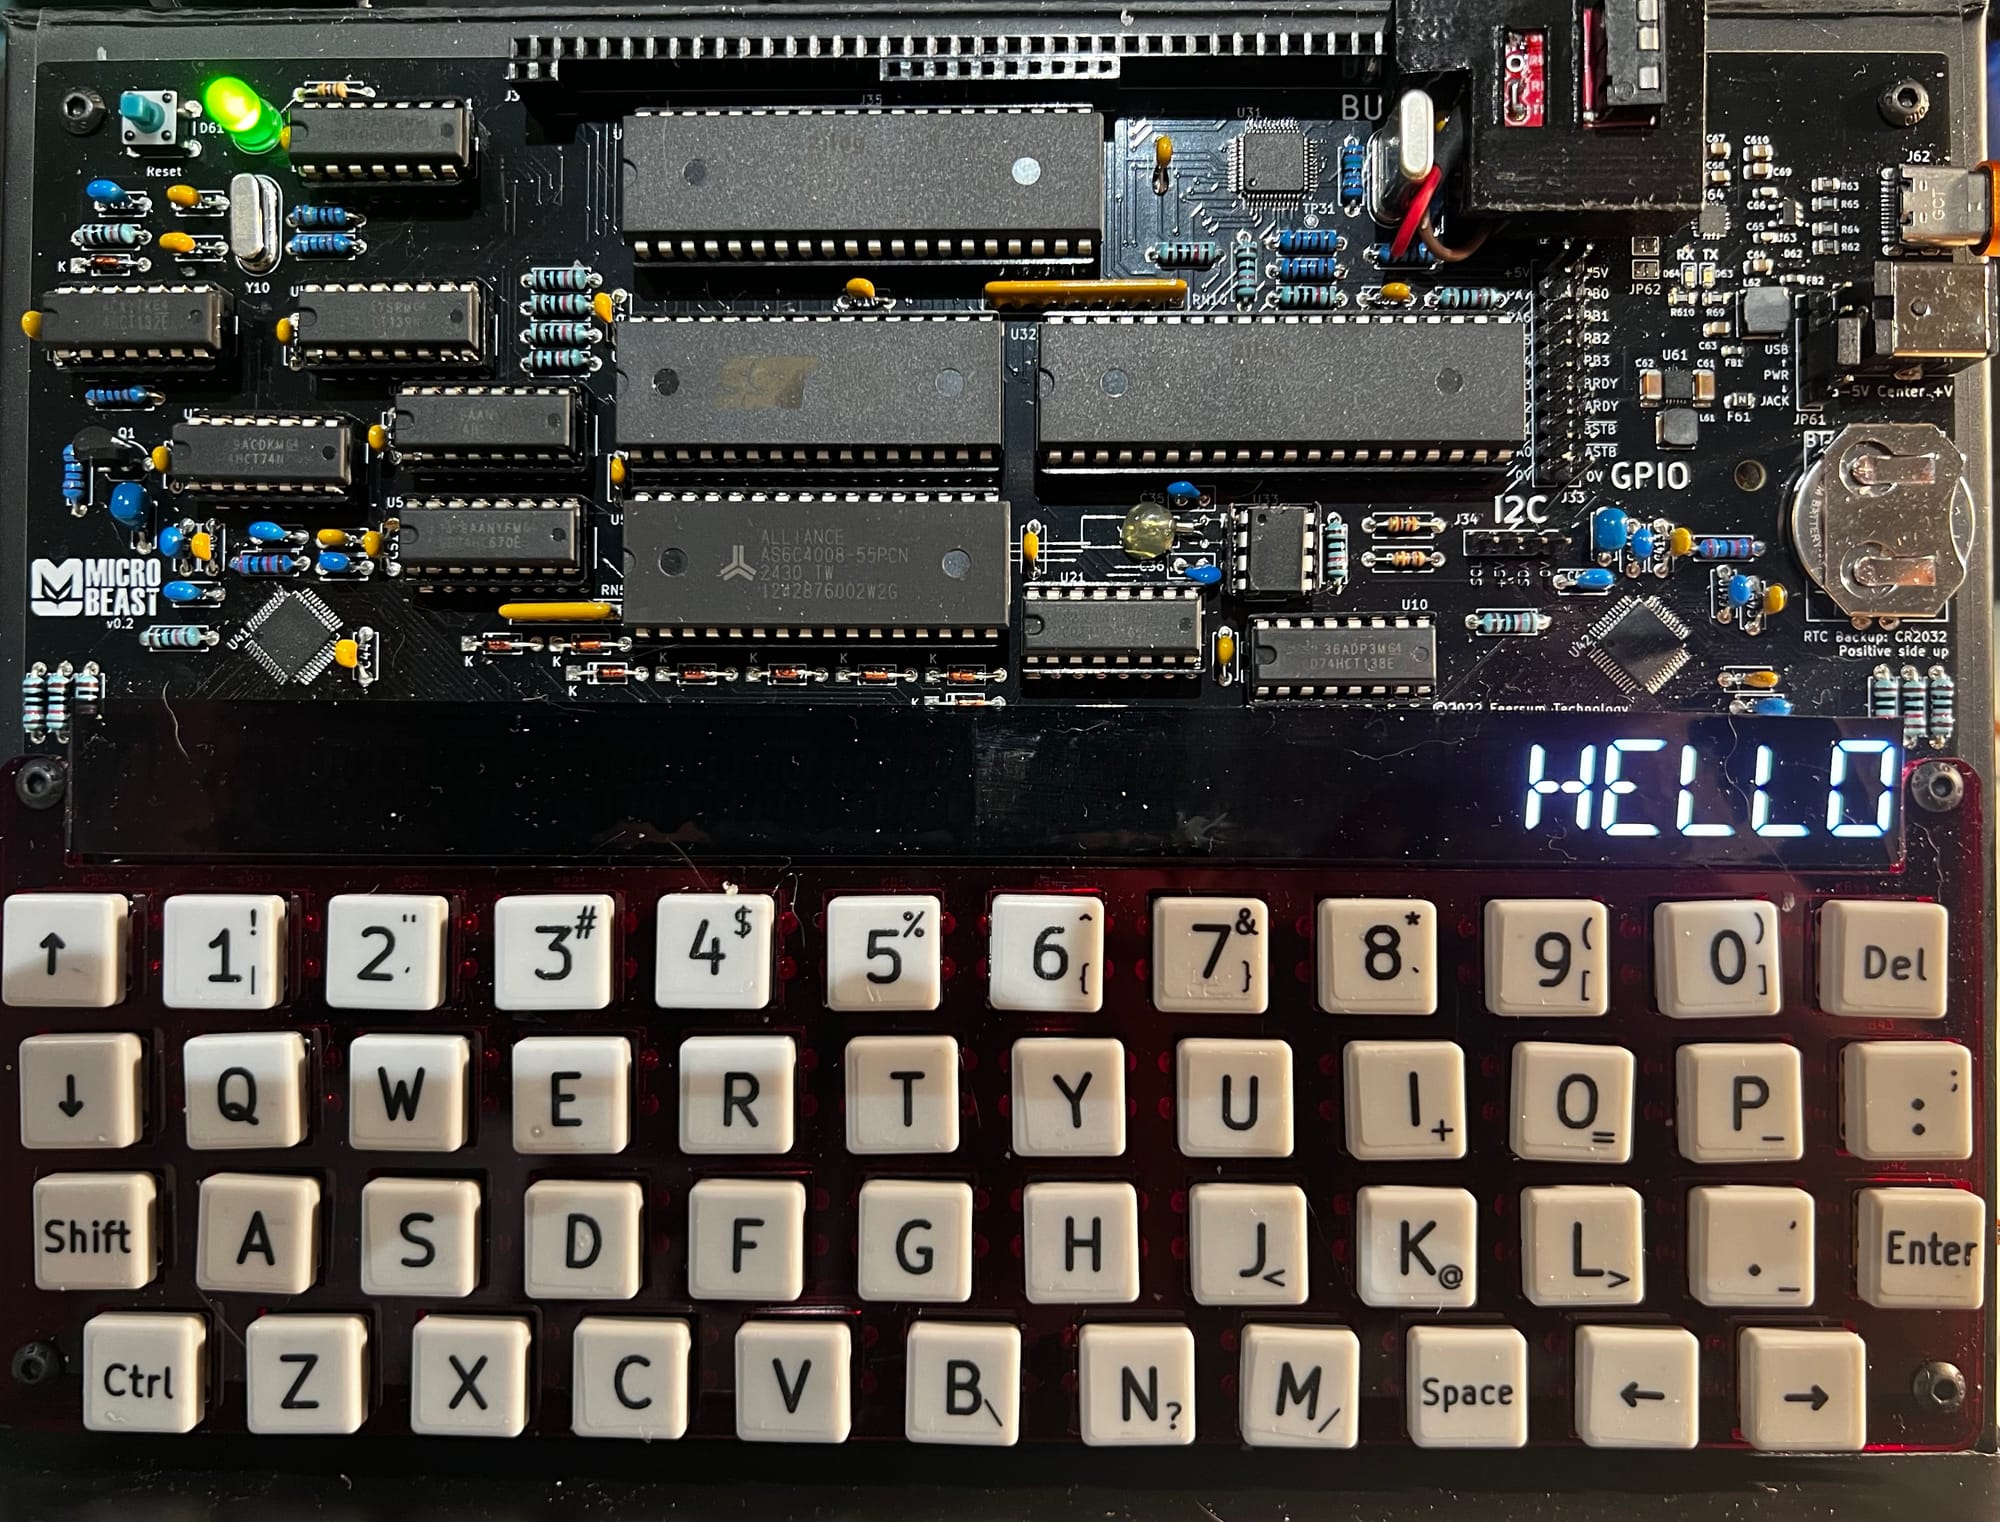
All being well, you should see this:
Things you can try
Try displaying a different 5 character string.
What happens if you try to display a longer string?
How can you adapt the code to display a longer string? What limitations do you encounter?
End of Part Three
That's it for Part Three - nice and quick this time!
Next time, in Your name in lights! (Part 4) we'll let you type in any string you like (within reason) and have that displayed on the LEDs!
microbeast
Your name in lights! (Part 3) (BBC BASIC)
Last time in Your name in lights! (Part 2) , we got to grips with BBC Basic and managed to emit some weird runes onto our LED display.
We're going to be building on that foundation here, so if you skipped Part One or Part Two or are still