Introducing BeasTTY

You've probably used a terminal emulator like Terraterm or Minicom with your 'Beast countless times, but you might be surprised to learn that it's actually designed to work with a specific terminal: the DEC VT52 circa 1975. Unlike the more well-known VT100, it's no looker. And also unlike the VT100, it is not well-supported by modern terminal emulators. The only ones I'm aware of are the one built into the Atari ST's GEM, xterm, and the open-source (Windows only) kgober/VT52.
This is a pity, because the VT52 supports a number of control codes that allow it to do exciting things like move the cursor, clear the screen, enter graphics mode and, .... well that's about it really, but you can achieve a lot with those, like:
The rudimentary game above uses VT52 control codes to move the cursor so that it can draw the bat, the ball and the score in their correct places. It's not blazingly fast, and it's a bit flickery, but it is playable!
The terminal that's being used to play that game is BeasTTY.
 blowback
BeasTTY has a number of unique features:
- it runs in the web browser, so nothing needs installing
- it has SLIDE support built in, for drag-and-drop file transfer (in both directions)
- it comes with a number of "8 bit" fonts, including the font from the original VT52 ROMs.
How to run BeasTTY
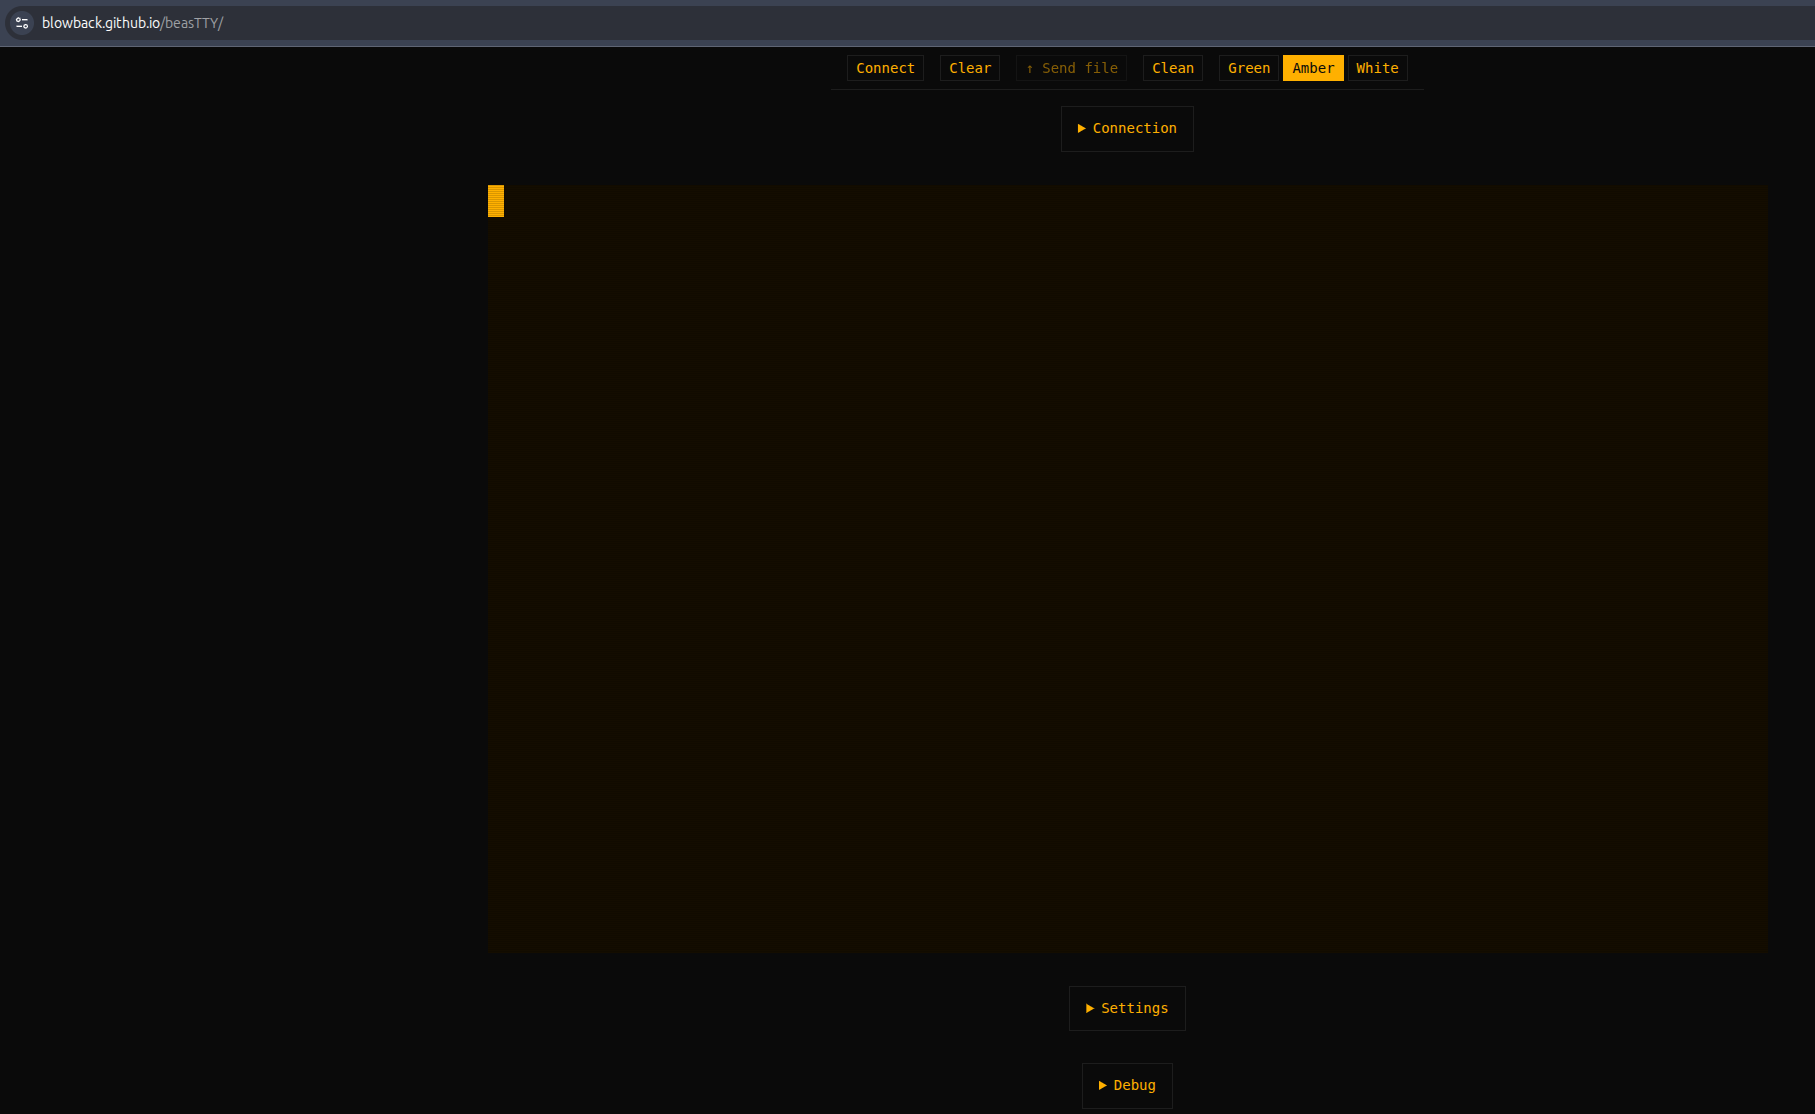
The simplest way is to click on this link which also appears top-right on the github page.
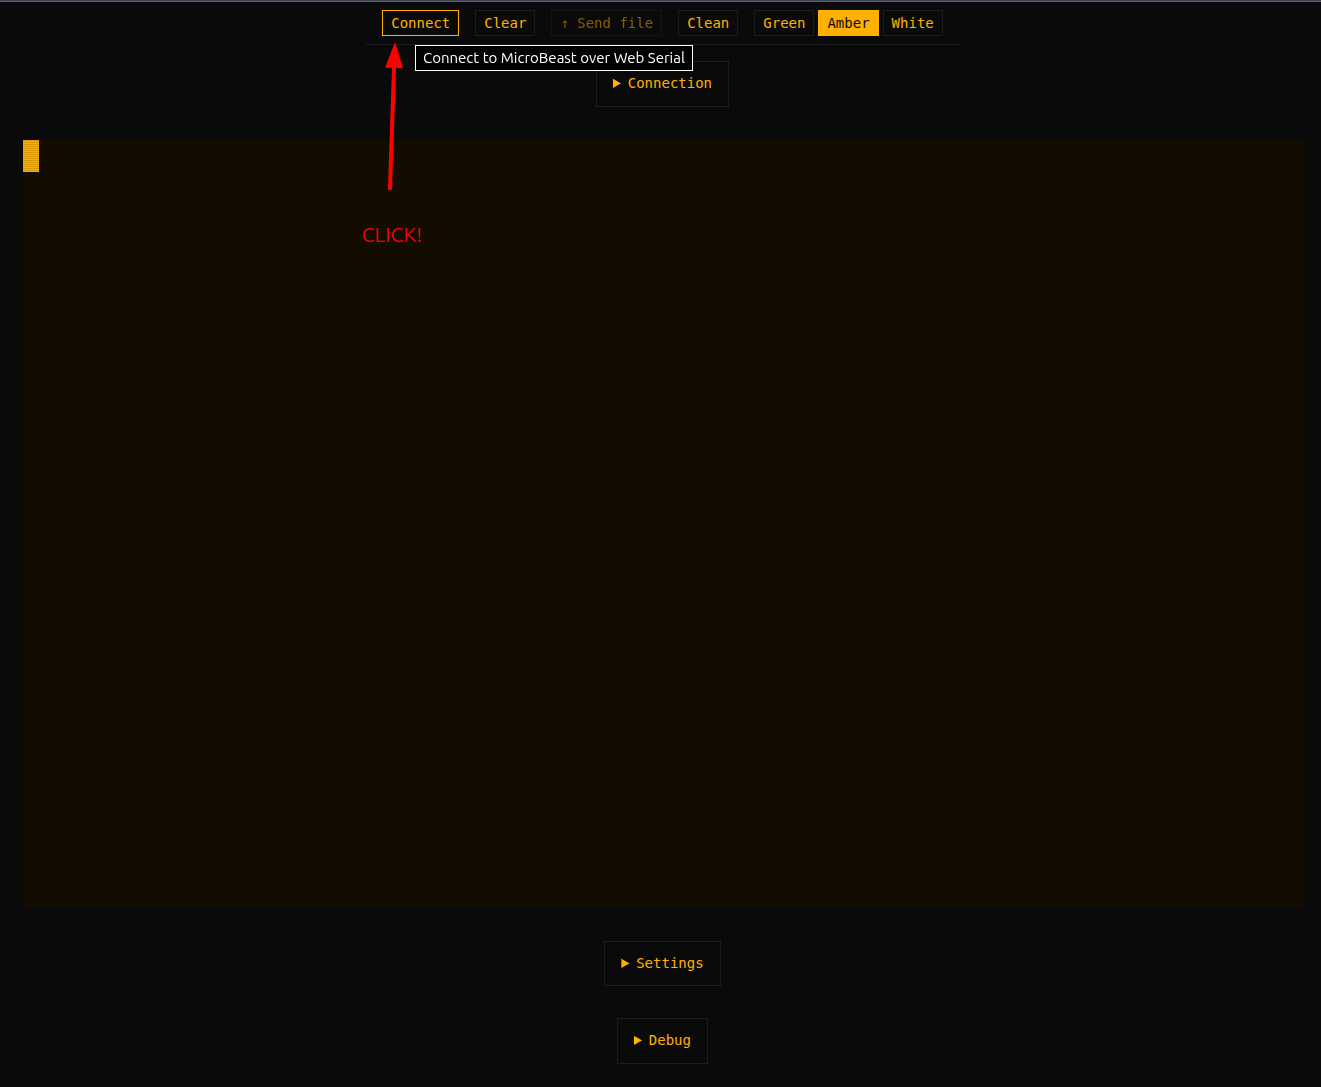
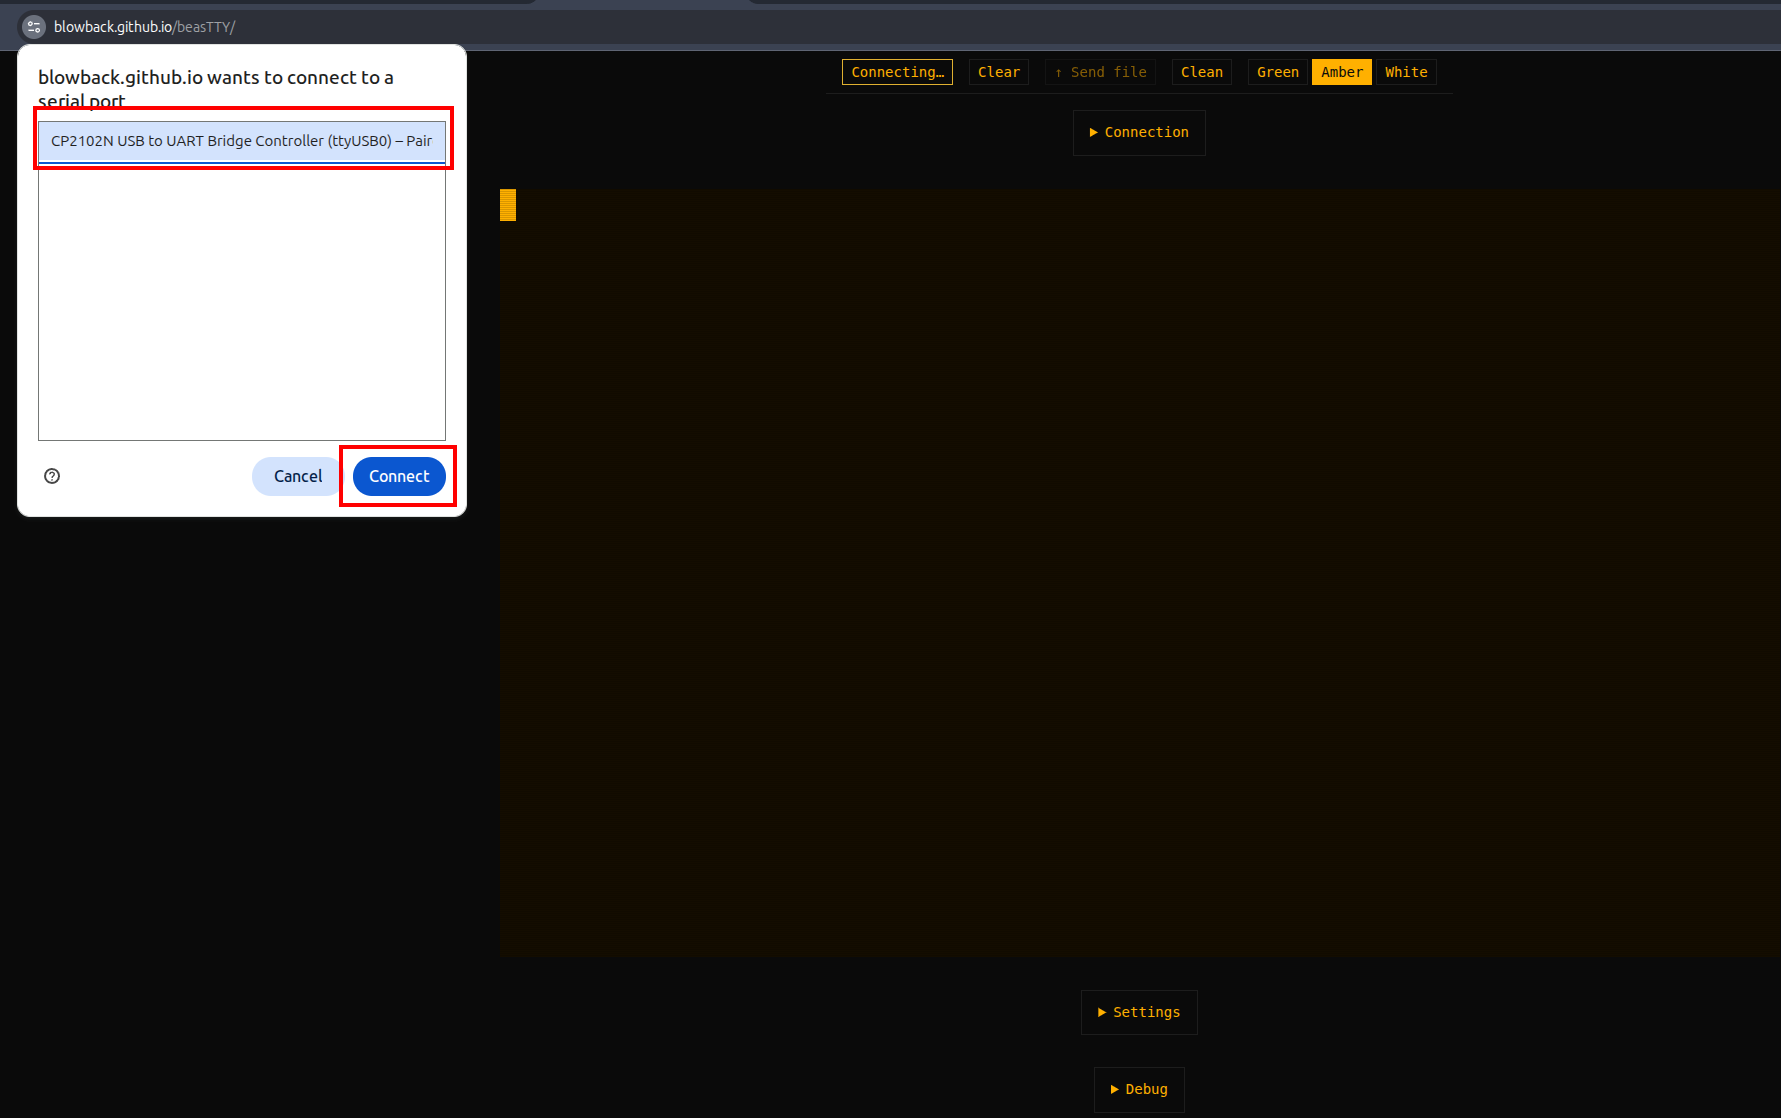
Then click on the "Connect" button at the top, and choose your 'Beast in the resulting dialogue box:
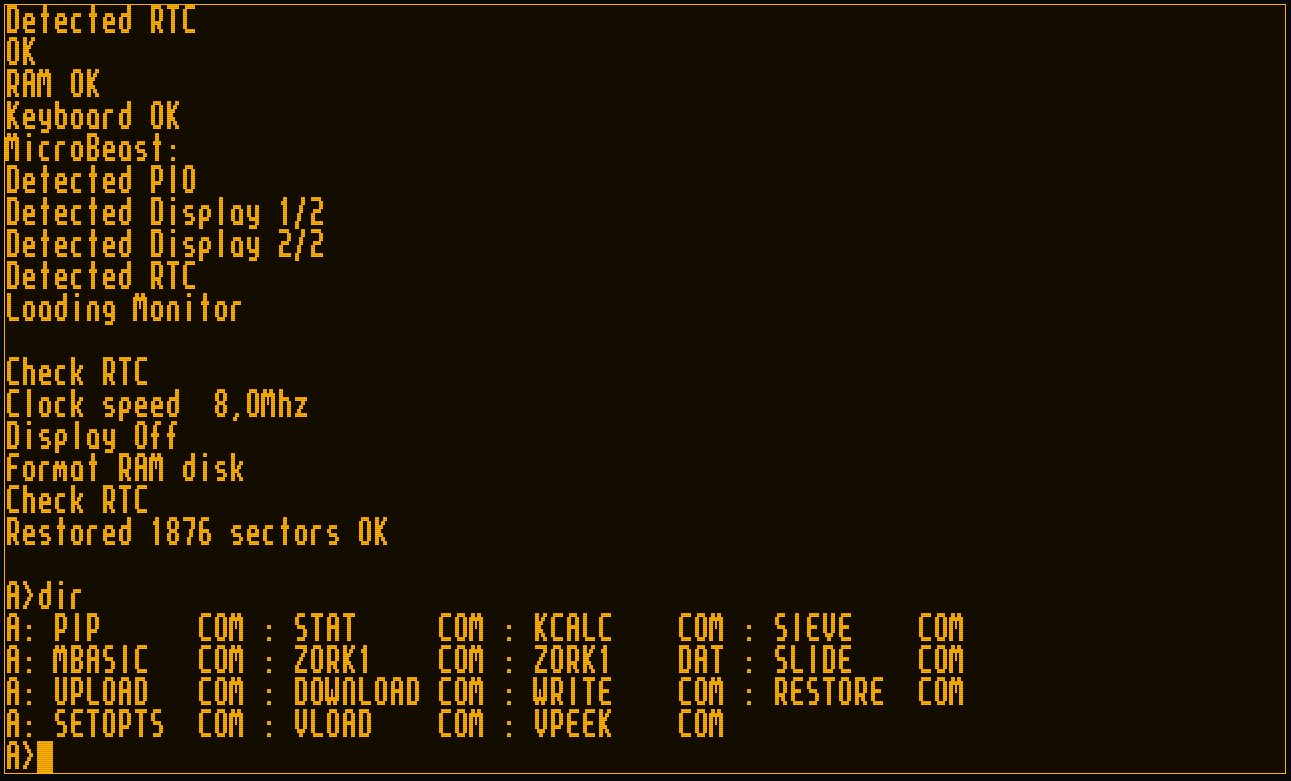
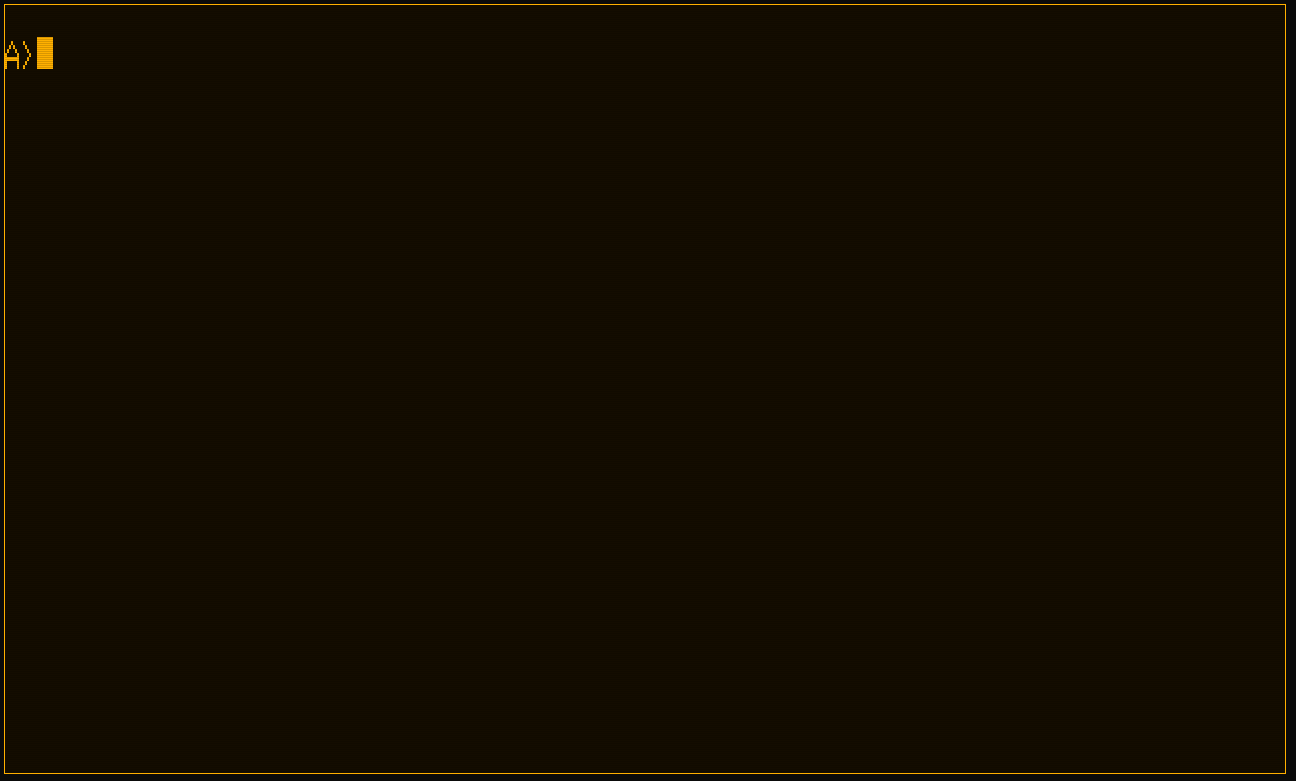
Click on the big square in the middle (so the border goes solid) and hit ENTER, and you should be rewarded with your CP/M prompt:
Type some commands to get more output:
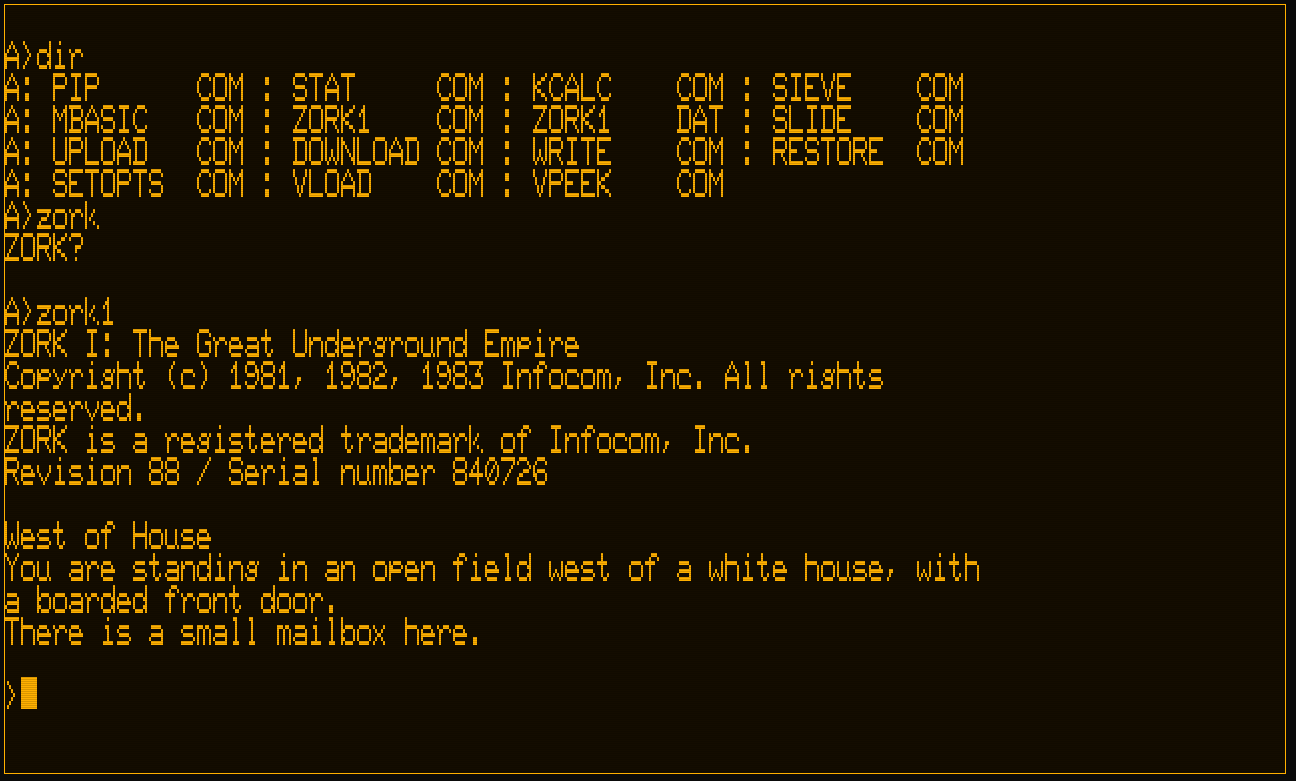
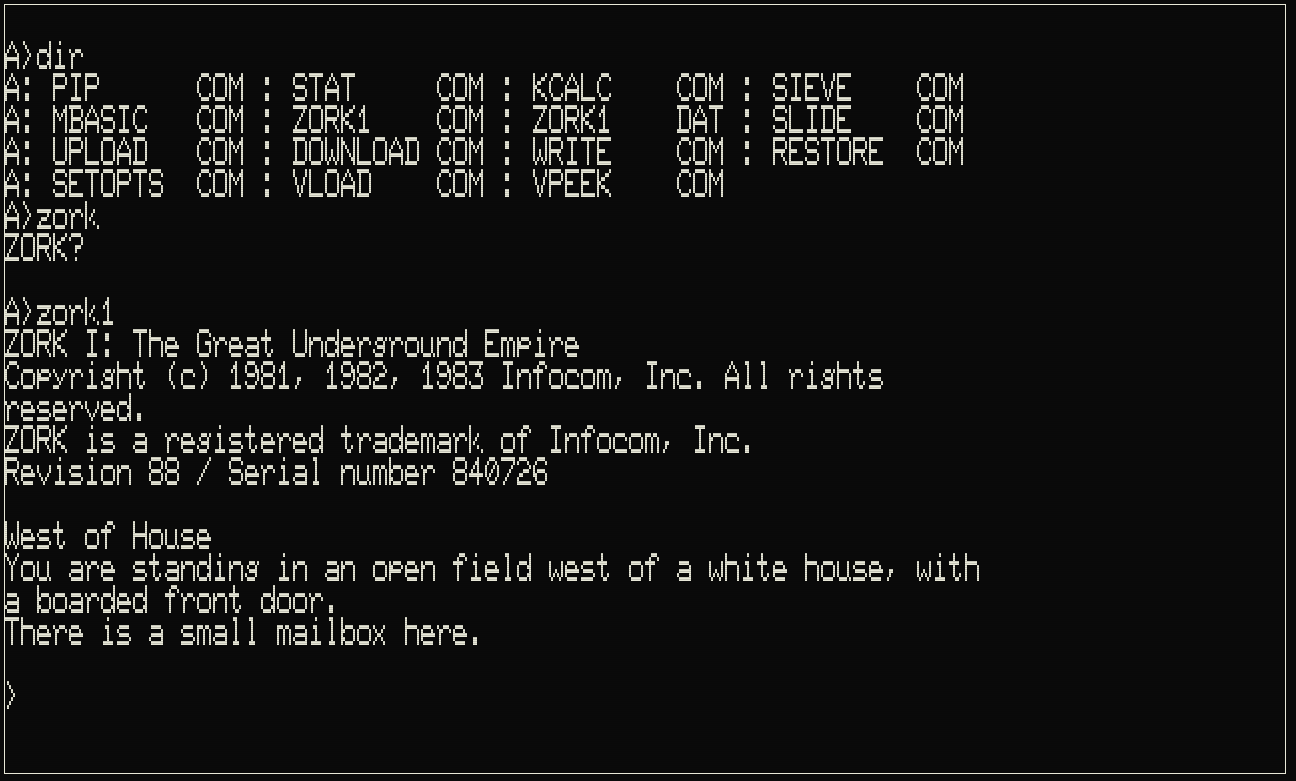
This is the "Amber CRT" display option with the original VT52 font. It looks its authentic best in white:
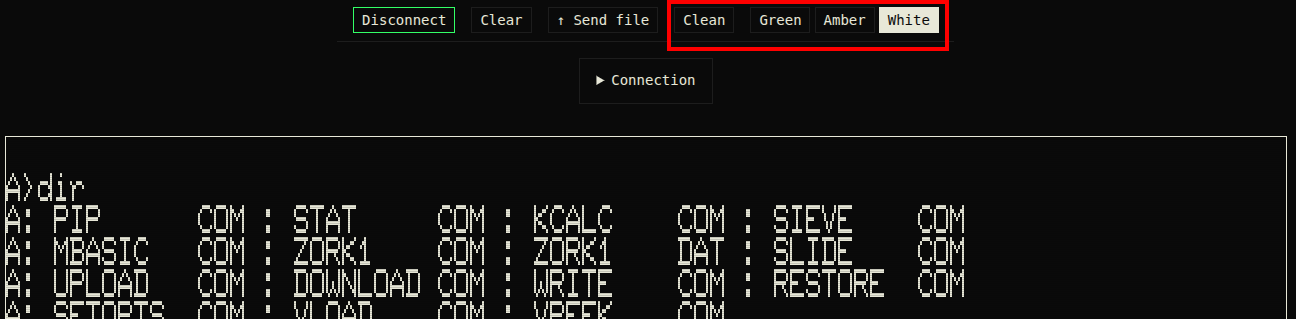
You can change the CRT colour (or switch to a modern "Clean" look) using the controls at the top of the screen:
If you want to change the font, open the "Settings" section underneath the main text window, and choose a font from the "CRT font" drop-down:
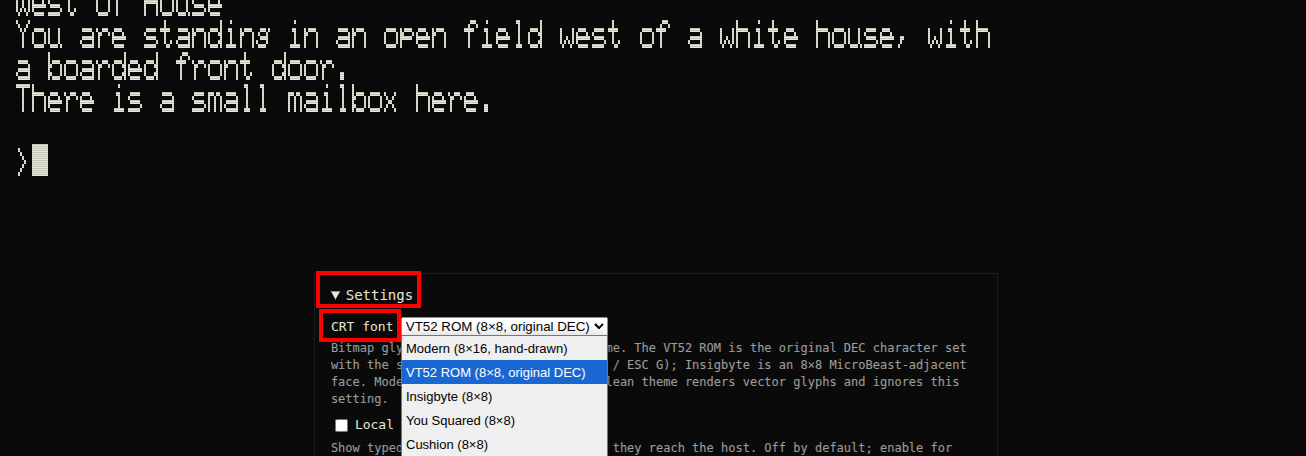
The fonts only apply in CRT mode: in "clean" mode you get a built-in monospaced font. Also note that the VT52 ROM font is the only one that supports the custom VT52 alternate graphics set (although I wouldn't get too excited, it's a pretty poor choice).
How to send a file from your PC
There are a couple of ways to send a file from your PC to your 'Beast using BeasTTY.
Drag and drop
Just find the file you want to send in your file manager, and drag it onto the central region of the BeasTTY window (make sure your 'Beast is currently logged into a writable drive (i.e. B: not A:):
Notice the "chip" top right that shows you the progress: it also gives you the option to cancel the transfer.
This works because when you drag a file into the window, BeasTTY first sends the command "B:SLIDE R\r" to your 'Beast, which executes B:SLIDE.COM R which runs the SLIDE executable in receive mode.
So for this to work, you're going to need SLIDE.COM on your B drive. You can get it from the SLIDE repo.
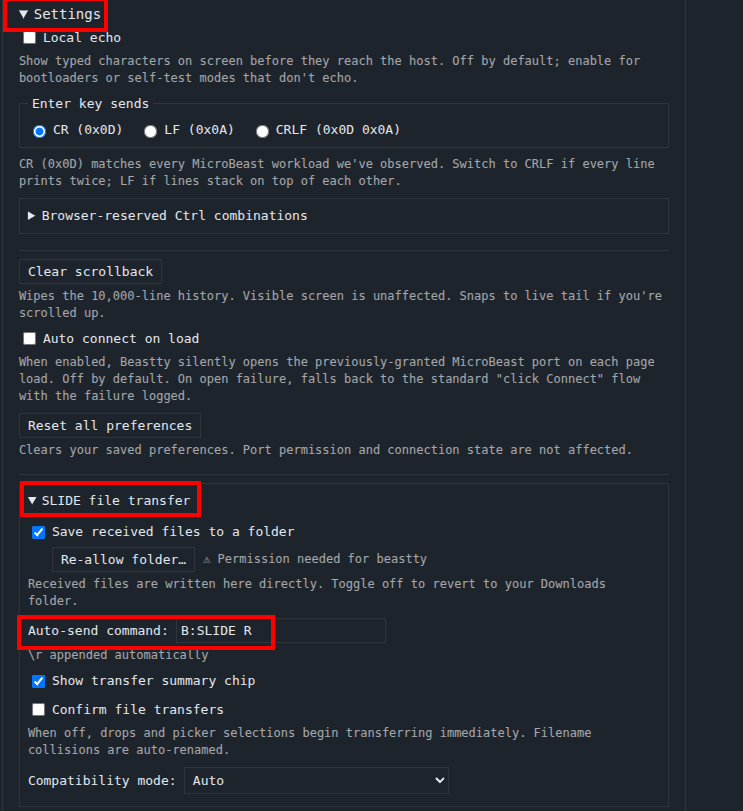
Note that versions of the MicroBeast firmware from 1.7 onwards include the SLIDE.COM binary on the A disk as standard. In this case, you need to tell BeasTTY that you want to run the A drive version - you can do this by expanding "Settings", then expanding the "SLIDE file transfer" section, then changing the "Auto-send command" option: in this case, change it to A:SLIDE R - don't forgot the 'R' at the end ("receive" mode).
Send file button
Another way to send a file is to click the "Send File" button at the top of the screen. This will give you a standard OS file picker where you can choose the file you want to send.
How to send a file from your 'Beast
Sending a file from the 'Beast is initiated from the 'Beast itself. In the terminal window, type A:SLIDE S <name-of-file> or B:SLIDE S <name-of-file> if your SLIDE.COM binary is on the B drive.
The "S" after "SLIDE" means "send".
You can see in my example that the received file is automatically saved to a folder called "INCOMING" on my hard disk. This is achieved by setting the "Save received files to a folder" option and specifying a folder with "Change folder...".
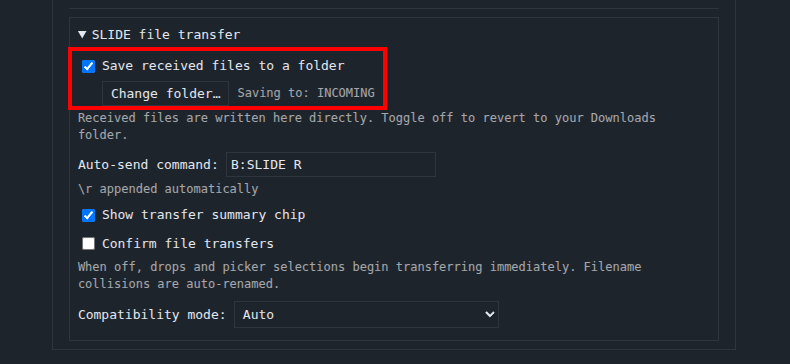
If you turn off "Save received files to a folder" then received files will use the standard browser download mechanism.
How to send multiple files from your PC
SLIDE lets you send more than one file at a time!
Drag and drop
Simply drag multiple files onto the BeasTTY window in one go. SLIDE will transfer them all individually.
Send file button
It probably doesn't come as a great surprise to hear that you can select multiple files in the file picker that appears when you click on the "Send file" button:
How to send multiple files from your 'Beast
Type SLIDE S <file1> <file2>... to send multiple files from the 'Beast to BeasTTY with SLIDE (that lone S means "Send"). You can specify as many files as you like, but remember that the whole line can only be 128 characters.
These will end up in your "Save received files to a folder" folder, as for the single file case. If you haven't set this folder, your browser will use the standard download mechanism, but it will likely prompt you first to check that it's OK to download multiple files.