We're going to be building on that foundation here, so if you skipped earlier parts or are still a little shaky on the fundamentals you might want to go back and read them again.
To move forward, I'm going to assume that you've got SLIDE.COM on the B: drive of your 'Beast, and that you have the corresponding PC utility installed somewhere in your PATH on your development PC. Refer to the SLIDE README if you need more help with that.
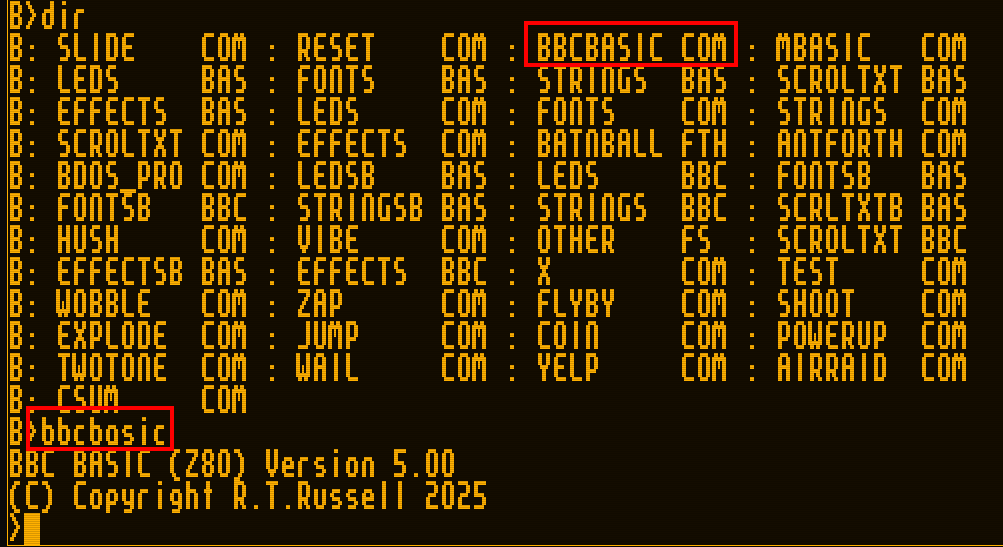
I'm also going to assume that you have BBCBASIC.COM on your B drive.
We're going to start in the scrolltext/bbc_basic/effects folder.
Background info
This time, we're going to build on our scrolltext program from before, but add a little bling.
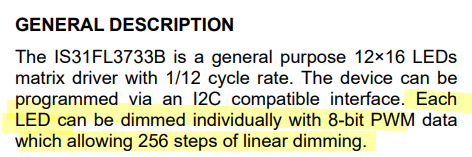
In the first installment of this series I pointed you at the LED driver datasheet and just on the off-chance that you didn't pore over this document at the time, let me quote a bit of it here:
What this is telling us is that we can change the brightness of each character on our LED display, and that each character can be set to 256 different brightness levels!
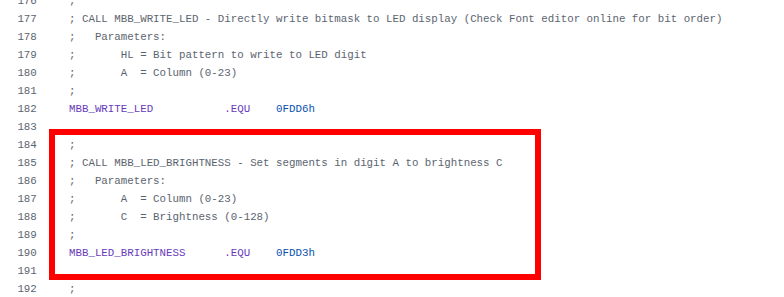
This means we can do some cool fading effects by varying the brightness. In fact you might have noticed something similar when the 'Beast first boots. The fact that the firmware is already doing this might lead you to hope that perhaps there's a BIOS routine we can call to do the heavy lifting for us, and your faith is rewarded:
I've left the familiar MBB_WRITE_LED code on there for reference. This time we're interested in MBB_LED_BRIGHTNESS, and we can see that the address this resolves to (0FDD3h) is different from MBB_WRITE_LED (&FDD6), and moreover this time the column is passed in the A register as before, but this time brightness is passed in the C register. (Note that the comment in the firmware header is wrong; there are actually 256 brightness levels, not 128.)
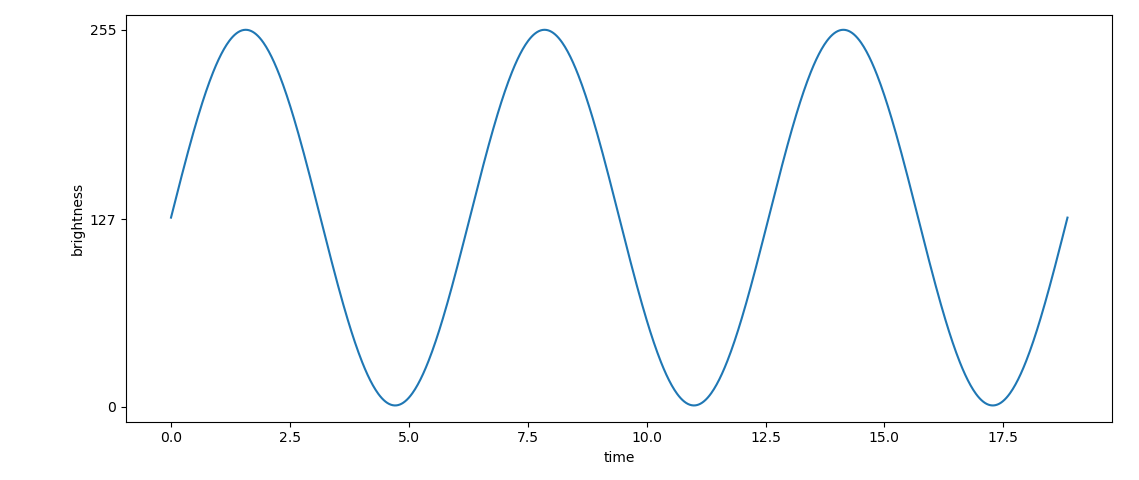
The rough plan is, we'll send lovely shimmering waves of varying brightness along our text string as it's scrolling. In order to pull this off, we'll construct a lookup table where we've pre-computed brightness levels so that they follow a sine wave pattern, like this:
We could generate this lookup table in BASIC using the SIN() function, but it's a little awkward and frankly a lot easier to generate the values and cast them to integer values in the correct range using a python script on a modern PC, so that's exactly what I did.
Here's the code we'll be running this time:
10 REM === MicroBeast LED Demo - Step 5: Sine Wave Brightness (BBC BASIC) ===
20 REM Scrolling text with a sine-wave brightness effect. The brightness
30 REM wave scrolls independently of (and faster than) the text.
40 REM
50 REM Two BIOS routines are used. BBC BASIC loads the Z80 registers
60 REM from the static integer variables A%-L% before a CALL, so each
70 REM is just a couple of lines - no machine-code stubs required:
80 REM   MBB_WRITE_LED      (&FDD6): HL = bitmask,  A = column
90 REM   MBB_LED_BRIGHTNESS (&FDD3): A  = column,   C = brightness
100 REM
110 REM --- Load font data into an array (ASCII 32-126) ---
120 DIM font%(94)
130 FOR idx% = 0 TO 94 : READ font%(idx%) : NEXT
140 REM
150 REM --- Load sine table (64 entries) ---
160 DIM sine%(63)
170 FOR idx% = 0 TO 63 : READ sine%(idx%) : NEXT
180 REM
190 REM --- Get user input ---
200 INPUT "Enter scroll text: " text$
210 REM
220 REM --- Build padded buffer: 24 spaces + text + 24 spaces ---
230 pad$ = "                        " : REM 24 spaces
240 buf$ = pad$ + text$ + pad$
250 buflen% = LEN(buf$)
260 REM
270 PRINT "Scrolling with effects... press ESCAPE to stop"
280 offset% = 1 : REM text scroll position (1-based)
290 boff% = 0   : REM brightness wave offset
300 frame% = 0  : REM frame counter
310 REM
320 REPEAT
330   REM --- Paint the 24 visible characters ---
340   FOR col% = 0 TO 23
350     ch% = ASC(MID$(buf$, offset% + col%, 1)) - 32
360     IF ch% < 0 OR ch% > 94 THEN ch% = 0
370     PROCled(font%(ch%), col%)
380   NEXT
390   REM --- Animate the brightness wave 4 times per text step ---
400   REPEAT
410     FOR col% = 0 TO 23
420       PROCbright(sine%((col% + boff%) AND 63), col%)
430     NEXT
440     boff% = (boff% + 1) AND 63
450     frame% = (frame% + 1) AND 3
460   UNTIL frame% = 0
470   REM --- Advance text position, wrapping at the end ---
480   offset% = offset% + 1
490   IF offset% > buflen% - 23 THEN offset% = 1
500 UNTIL FALSE
510 END
520 REM
530 REM --- Write bitmask bm% to LED column col% via MBB_WRITE_LED ---
540 DEF PROCled(bm%, col%)
550 A% = col% : L% = bm% MOD 256 : H% = bm% DIV 256
560 CALL &FDD6
570 ENDPROC
580 REM
590 REM --- Set brightness br% (0-255) of LED column col% via MBB_LED_BRIGHTNESS ---
600 DEF PROCbright(br%, col%)
610 A% = col% : C% = br%
620 CALL &FDD3
630 ENDPROC
640 REM
650 REM --- Font DATA (ASCII 32-126, 95 entries) ---
660 DATA &0000, &4900, &0202, &12CE, &12ED, &2DE4
670 DATA &0B59, &0200, &0C00, &2100, &3FC0, &12C0
680 DATA &2000, &00C0, &4000, &2400
690 DATA &243F, &0406, &00DB, &008F, &00E6, &0869
700 DATA &00FD, &1401, &00FF, &00EF, &0040, &2200
710 DATA &0C40, &00C8, &2180, &5083
720 DATA &02BB, &00F7, &128F, &0039, &120F, &0079
730 DATA &0071, &00BD, &00F6, &1209, &001E, &0C70
740 DATA &0038, &0536, &0936, &003F
750 DATA &00F3, &083F, &08F3, &00ED, &1201, &003E
760 DATA &2430, &2836, &2D00, &00EE, &2409
770 DATA &0039, &0900, &000F, &2800, &0008
780 DATA &0100, &208C, &0878, &00D8, &208E, &2058
790 DATA &14C0, &048E, &1070, &1000, &2210
800 DATA &1E00, &1200, &10D4, &1050, &00DC
810 DATA &0170, &0486, &0050, &0888, &0078
820 DATA &001C, &2010, &2814, &2D00, &028E
830 DATA &2048, &2149, &1200, &0C89, &24C0
840 REM
850 REM --- Sine table (64 entries, values 0-255) ---
860 DATA &0080, &008C, &0098, &00A5, &00B0, &00BC, &00C6, &00D0
870 DATA &00DA, &00E2, &00EA, &00F0, &00F5, &00FA, &00FD, &00FE
880 DATA &00FF, &00FE, &00FD, &00FA, &00F5, &00F0, &00EA, &00E2
890 DATA &00DA, &00D0, &00C6, &00BC, &00B0, &00A5, &0098, &008C
900 DATA &0080, &0073, &0067, &005A, &004F, &0043, &0039, &002F
910 DATA &0025, &001D, &0015, &000F, &000A, &0005, &0002, &0001
920 DATA &0000, &0001, &0002, &0005, &000A, &000F, &0015, &001D
930 DATA &0025, &002F, &0039, &0043, &004F, &005A, &0067, &0073
Now you can see that we've got two machine code procedures (one for displaying characters and one for setting brightness) and also two lookup tables now (one for the "font" and one for our sine-wave of brightness values).
Our character display loop (which starts at line 320) has changed quite a bit. It starts out as before, then at line 680 we have:
390   REM --- Animate the brightness wave 4 times per text step ---
400   REPEAT
410     FOR col% = 0 TO 23
420       PROCbright(sine%((col% + boff%) AND 63), col%)
430     NEXT
This goes through every column again, setting a suitable brightness value.
After that, we have this bit of chicanery:
440     boff% = (boff% + 1) AND 63
450     frame% = (frame% + 1) AND 3
What this is doing is incrementing both the brightness offset and the frame counter. When we increment the brightness offset, we AND 63 - this means that we keep only the bottom 6 bits of FC% so the effect is that whenever its value is 63 and we implement it, it wraps around to zero again.
This kind of modulo arithmetic with numbers that are a power of 2 is very, very common particularly in low level code like C or assembly language. The reason it's so ubiquitous is that a lot of maths operations in base 2 (binary) can easily be implemented with simple (and fast!) logic instructions that execute directly on the processor, like the AND we just saw. The alternative would be to do actual division and find the remainder, which is incredibly slow and tedious on old hardware like the z80. The z80 doesn't have a DIVIDE instruction, you'd have to write your own division routine.
We could of course use division in BASIC, but we'll come to why that's not such a great idea in a moment.
Running the code
This should be second nature by now:
Boot your 'Beast
SLIDE the EFFECTS.BBC file from the repo across to your 'Beast's B drive
"log in" to the B drive with B:
start BBC Basic with BBCBASIC
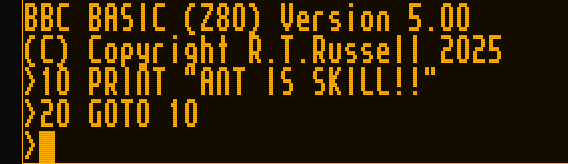
type LOAD "EFFECTS"
inspect it with LIST
run it with RUN
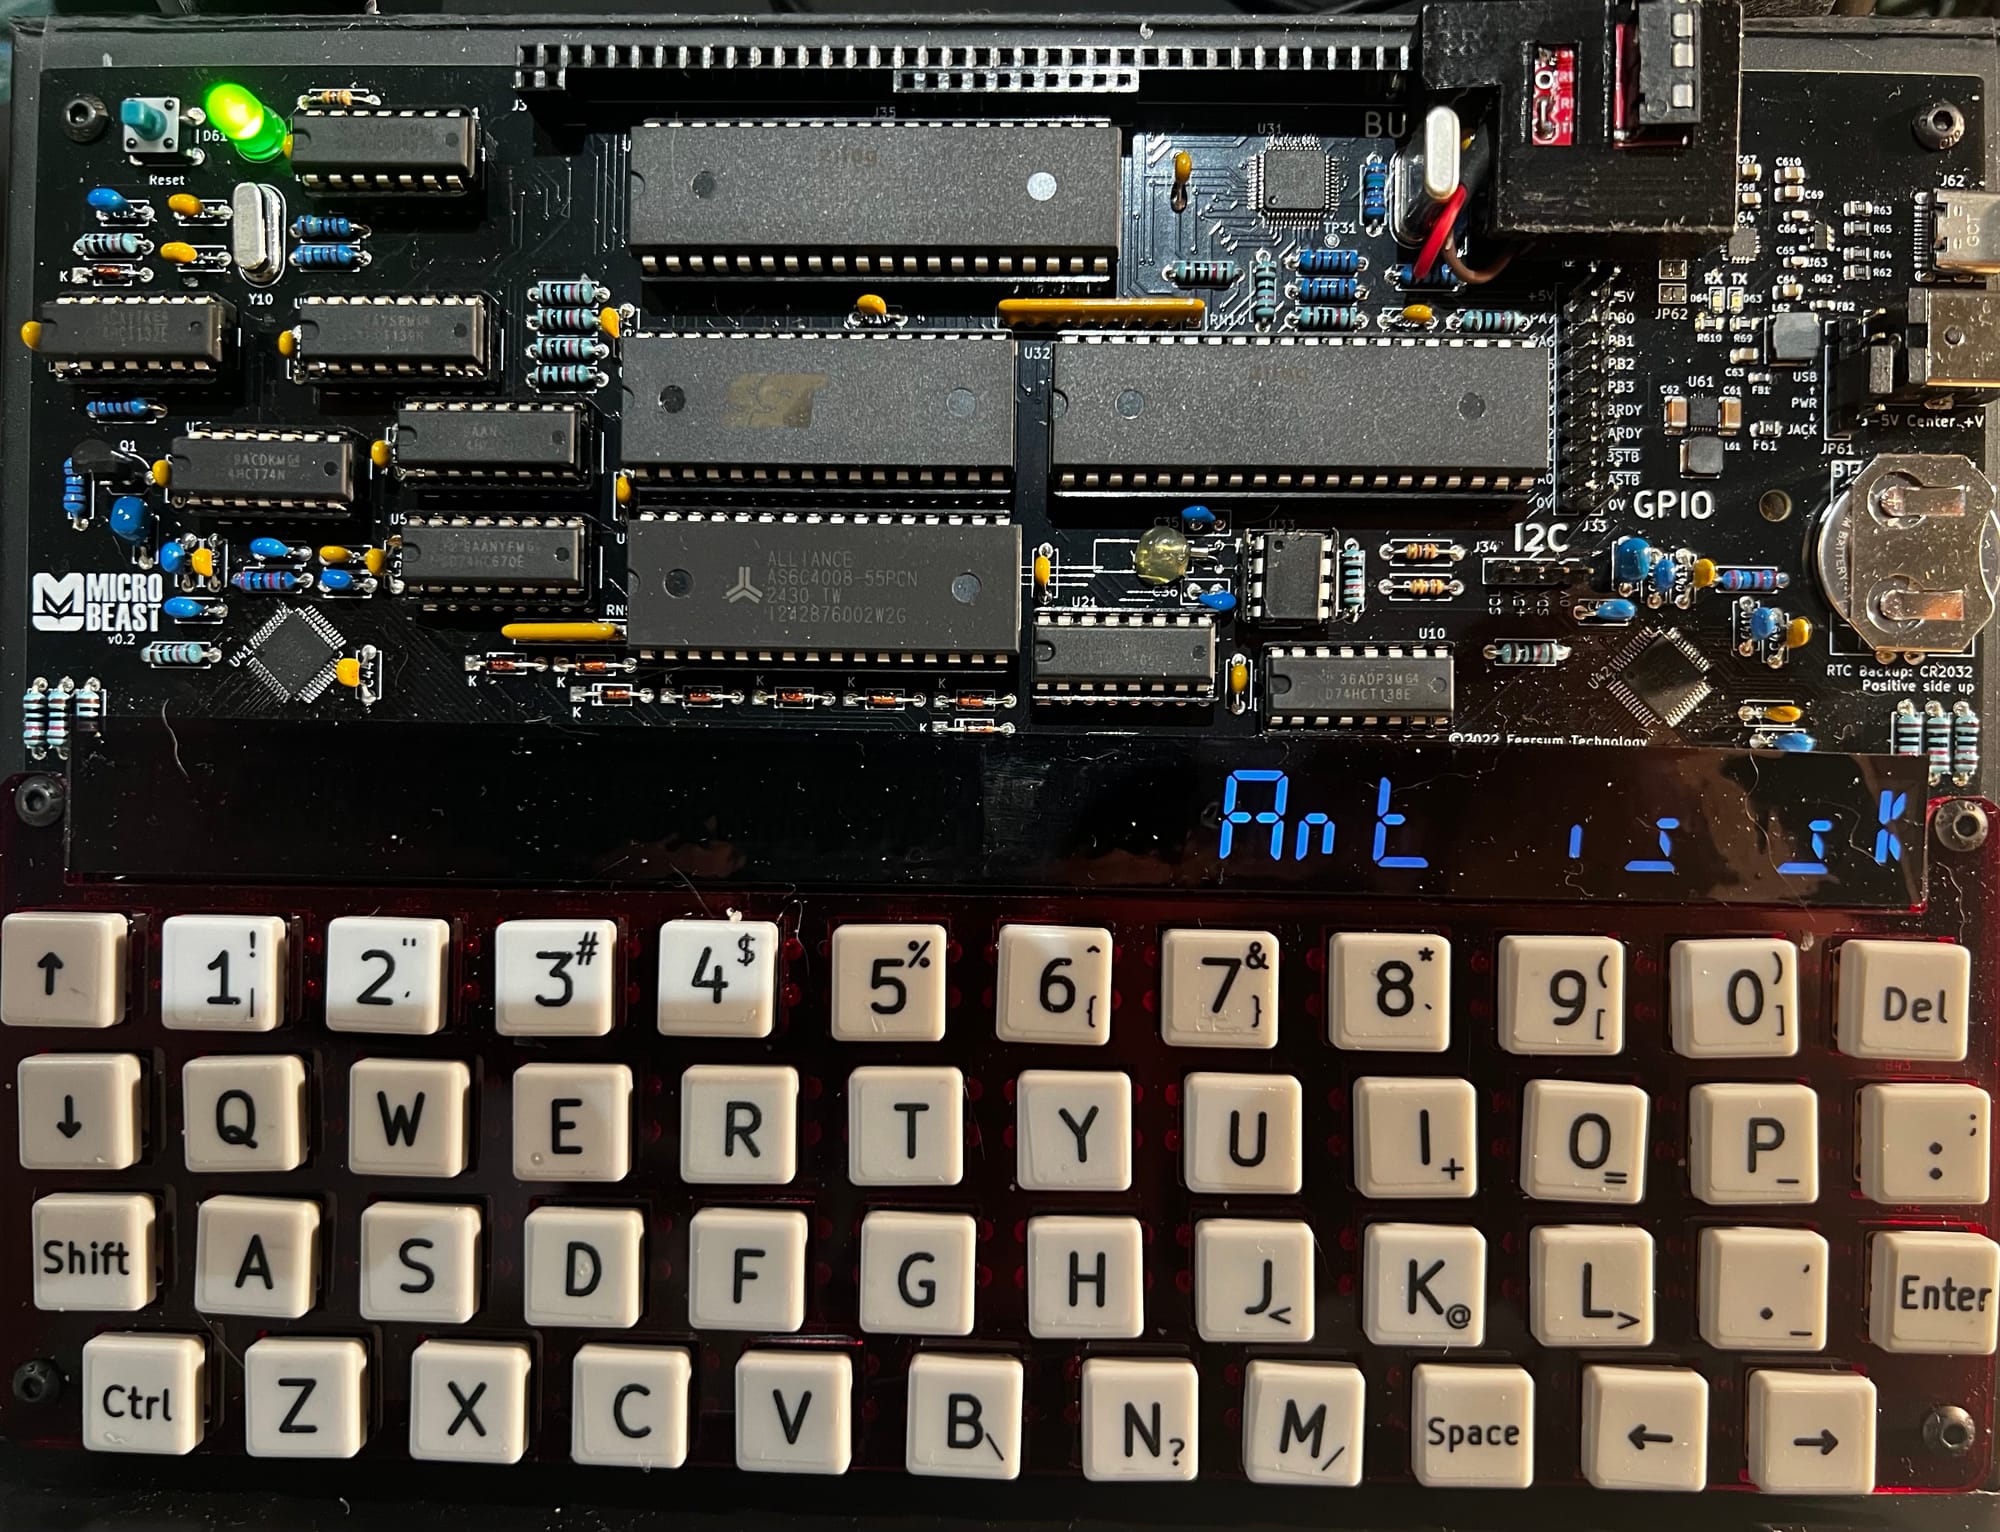
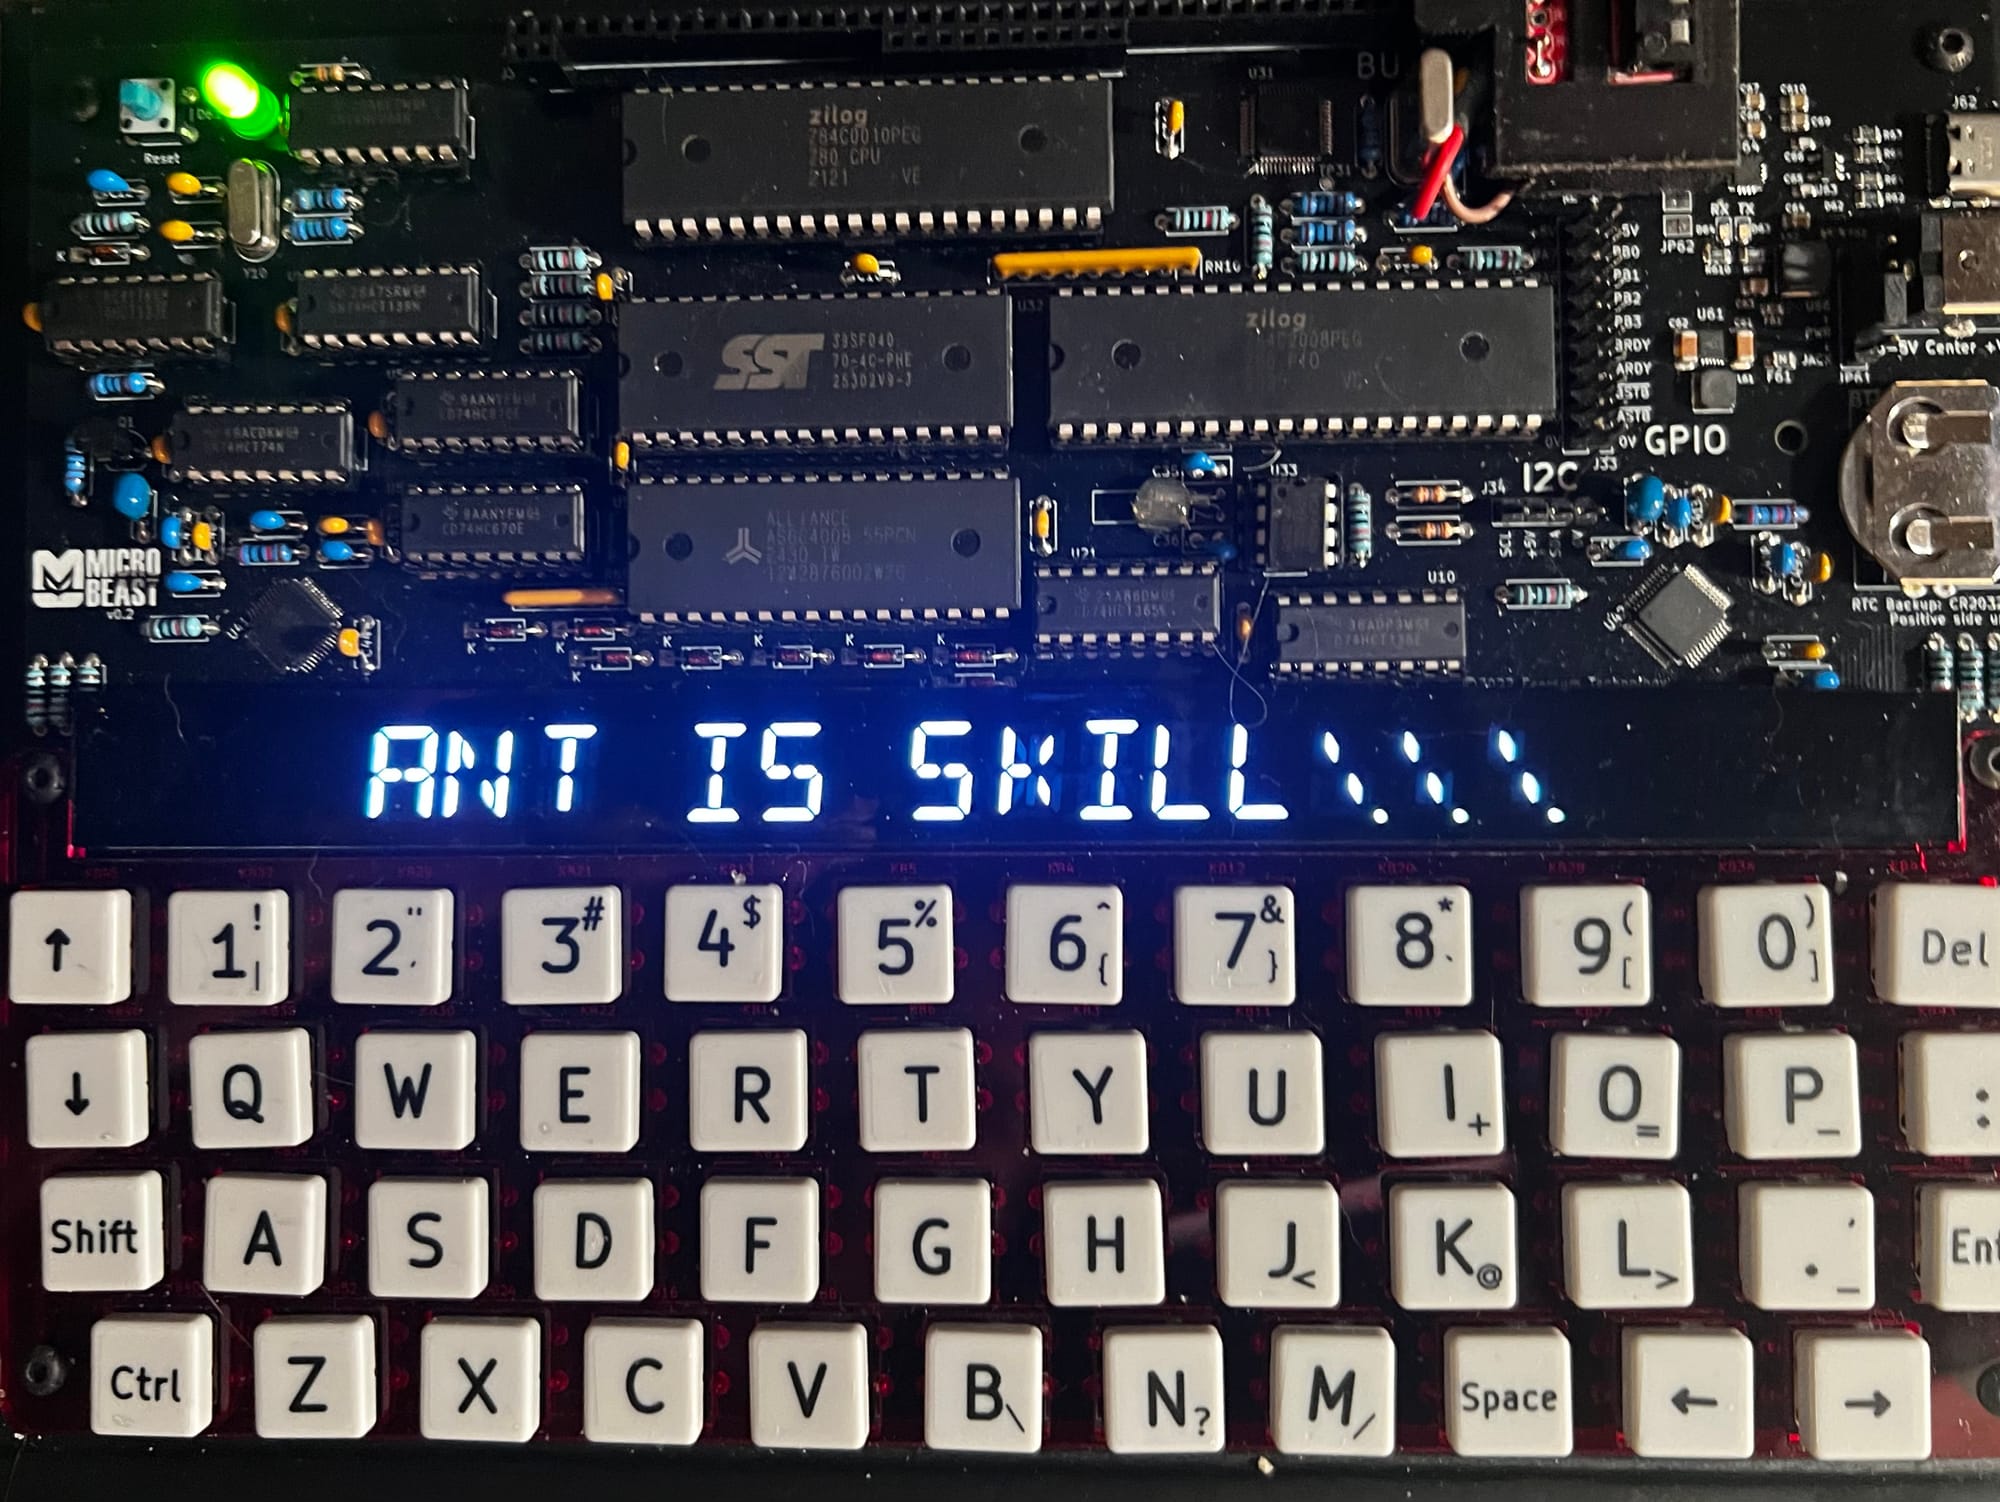
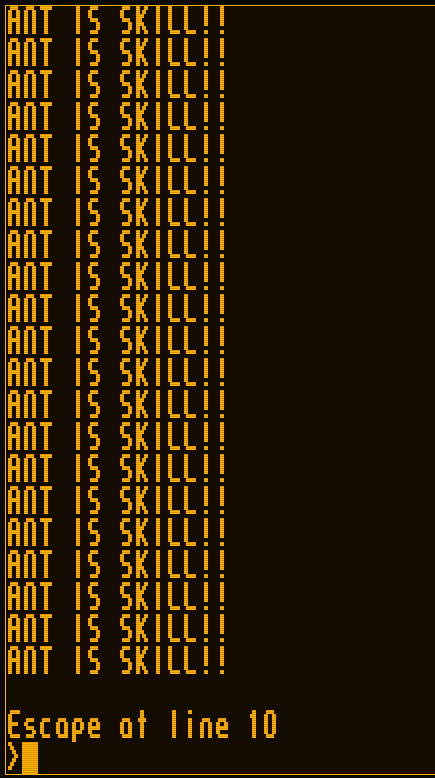
All being well, you should see this (your string might be different):
One thing you'll notice straight away is that it is monumentally slow. There's not even an artificial delay loop in there that we can tweak - this is running at full tilt! The sad truth is that while high-level languages like BASIC are great for learning how to code and writing simple programs, they squander a lot of the machine's power turning those fancy BASIC statements into machine code that the processor can execute.
To get more performance out of the processor (and believe me, it can go a lot faster!) we'll have to put aside BASIC, and like the bedroom-based game developers of yore teach ourselves z80 assembler..
Things you can try
Can you see any way to make the BASIC code quicker?
Try making the brightness wave go in the opposite direction!
It's not possible for the eye to actually discern 256 levels of brightness: how can you adjust the sine wave table so that the effect is more striking?
End of Part Six
That's it for Part Six, and also for BBC Basic!
In the next part Your name in lights! (Part 7) we'll learn some z80 assembler, by re-implementing the programs we've already written.
If you're not quite ready for that yet and want to experiment a bit further in BASIC then by all means do so: experimentation is the best way to learn!
If you want to dabble in other high-level languages you are spoilt for choice...there are CP/M implementations of Algol, COBOL, Fortran, Pascal, LISP, Forth, and C, and probably many more besides. These are easily found on the web, and most will run on the 'Beast without issue (just make sure it's the z80 + cp/m 2.2 version you're trying to run.
Well done for making it this far - the real fun is about to begin!
microbeast
Your name in lights! (Part 6) (BBC BASIC)
Last time in Your name in lights! (Part 5), we get a basic scrolltext working and were able to scroll any message of our choosing.
We're going to be building on that foundation here, so if you skipped earlier parts or are still a little shaky on the
We're going to be building on that foundation here, so if you skipped earlier parts or are still a little shaky on the fundamentals you might want to go back and read them again.
To move forward, I'm going to assume that you've got SLIDE.COM on the B: drive of your 'Beast, and that you have the corresponding PC utility installed somewhere in your PATH on your development PC. Refer to the SLIDE README if you need more help with that.
I'm also going to assume that you have BBCBASIC.COM on your B drive.
We're going to start in the scrolltext/bbc_basic/scrolltext folder.
Background info
This time around, we're going to add the ability to display strings that are longer than our display is wide (24 characters). And we'll do that by making a "scroll text" - only a portion of the message is visible at a given time. By updating which portion we display ever so slightly on a regular basis, we can give the illusion of the text scrolling by.
Imagine for a moment, that you are wearing a welding helmet and contemplating God's final message to his creation. You can't see the whole message in one go, you'd have to physically turn your head to read it (or move the message of course, but it's not so easy to move divine messages in 30 foot letters made of fire).
One way we could do this is to start by displaying our string at column 0, and then on the next iteration display it at column -1, then -2 etc. etc. The text would then appear to be moving to the left:
This sort of approach is common in many graphics systems, but the 'Beast will not take kindly to negative column values. Also, it is not a very efficient technique: if the string is very long, we will spend a lot of time trying to render characters that cannot be visible.
A better approach is to slide the display along the string:
So we start by displaying the first 24 characters of the string starting at the first (index 0), but on the next iteration we display 24 characters starting from the second position in the string (index 1) and so on. We could do some complicated maths to deal with what happens when we get to the end of the string, but it's easier to just stick 24 spaces on the end. In fact, we'll stick another 24 on the front so the string appears to enter from the right hand edge.
Here's the code we'll be running this time:
10 REM === MicroBeast LED Demo - Step 4: Scrolling Text (BBC BASIC) ===
20 REM Prompts for a string and scrolls it continuously across the
30 REM 24-character LED display. The text is padded with spaces so it
40 REM scrolls in from the right and out to the left.
50 REM
60 REM --- Load font data into an array (ASCII 32-126) ---
70 DIM font%(94)
80 FOR idx% = 0 TO 94 : READ font%(idx%) : NEXT
90 REM
100 REM --- Get user input ---
110 INPUT "Enter scroll text: " text$
120 REM
130 REM --- Build padded buffer: 24 spaces + text + 24 spaces ---
140 pad$ = "                        " : REM 24 spaces
150 buf$ = pad$ + text$ + pad$
160 buflen% = LEN(buf$)
170 REM
180 PRINT "Scrolling... press ESCAPE to stop"
190 offset% = 1 : REM scroll offset (1-based for MID$)
200 REM
210 REPEAT
220   REM Display 24 characters starting at the current offset
230   FOR col% = 0 TO 23
240     ch% = ASC(MID$(buf$, offset% + col%, 1)) - 32
250     IF ch% < 0 OR ch% > 94 THEN ch% = 0
260     PROCled(font%(ch%), col%)
270   NEXT
280   REM Delay for scroll speed (centiseconds); also lets ESCAPE break
290   dummy% = INKEY(8)
300   REM Advance scroll position, wrapping at the end
310   offset% = offset% + 1
320   IF offset% > buflen% - 23 THEN offset% = 1
330 UNTIL FALSE
340 END
350 REM
360 REM --- Write bitmask bm% to LED column col% via MBB_WRITE_LED ---
370 DEF PROCled(bm%, col%)
380 A% = col%
390 L% = bm% MOD 256
400 H% = bm% DIV 256
410 CALL &FDD6
420 ENDPROC
430 REM
440 REM --- Font DATA (ASCII 32-126, 95 entries) ---
450 DATA &0000, &4900, &0202, &12CE, &12ED, &2DE4
460 DATA &0B59, &0200, &0C00, &2100, &3FC0, &12C0
470 DATA &2000, &00C0, &4000, &2400
480 DATA &243F, &0406, &00DB, &008F, &00E6, &0869
490 DATA &00FD, &1401, &00FF, &00EF, &0040, &2200
500 DATA &0C40, &00C8, &2180, &5083
510 DATA &02BB, &00F7, &128F, &0039, &120F, &0079
520 DATA &0071, &00BD, &00F6, &1209, &001E, &0C70
530 DATA &0038, &0536, &0936, &003F
540 DATA &00F3, &083F, &08F3, &00ED, &1201, &003E
550 DATA &2430, &2836, &2D00, &00EE, &2409
560 DATA &0039, &0900, &000F, &2800, &0008
570 DATA &0100, &208C, &0878, &00D8, &208E, &2058
580 DATA &14C0, &048E, &1070, &1000, &2210
590 DATA &1E00, &1200, &10D4, &1050, &00DC
600 DATA &0170, &0486, &0050, &0888, &0078
610 DATA &001C, &2010, &2814, &2D00, &028E
620 DATA &2048, &2149, &1200, &0C89, &24C0
No surprises here. We've essentially got all the same code as last time, but now we've got a loop around our main display routine that changes the offset on each iteration: lines 220-330. The delay in line 290 is just there to slow things down a bit, lest the awesome power of BBC BASIC render our message an illegible blur.
Running the code
You know the drill:
Boot your 'Beast
SLIDE the SCROLLTEXT.BBC file from the repo across to your 'Beast's B drive (you'll need to rename it as SCROLTXT.BBC to fit the CP/M naming convention)
"log in" to the B drive with B:
start BBC Basic with BBCBASIC
type LOAD "SCROLTXT"
inspect it with LIST
run it with RUN
All being well, you should see this (your string might be different):
Things you can try
Try making the delay shorter - what's the fastest it can do?
Try making the string scroll in the opposite direction!
End of Part Five
That's it for Part Five - we built on all the understanding we've developed so far and built a reasonable scrolltext implementation.
In the next part, Your name in lights! (Part 6),we'll wrap up the BASIC section by adding some effects to our scrolltext to make it extra fancy!
microbeast
Your name in lights! (Part 5) (BBC BASIC)
Last time in Your name in lights! (Part 4) , we were able to display arbitrary short strings on the 'Beast's LED displays.
We're going to be building on that foundation here, so if you skipped earlier parts or are still a little shaky on the
We're going to be building on that foundation here, so if you skipped earlier parts or are still a little shaky on the fundamentals you might want to go back and read them again.
To move forward, I'm going to assume that you've got SLIDE.COM on the B: drive of your 'Beast, and that you have the corresponding PC utility installed somewhere in your PATH on your development PC. Refer to the SLIDE README if you need more help with that.
I'm also going to asssume that you have BBCBASIC.COM on your B drive.
We're going to start in the scrolltext/bbc_basic/strings folder.
Background info
This time, we'll modify the code we already have slightly to allow us to display longer messages, and to let us input the string we want to display dynamically, rather than hard-coding it into the source code.
Here's the code we'll be running this time:
10 REM === MicroBeast LED Demo - Step 3: String Display (BBC BASIC) ===
20 REM Prompt the user for a string and display it on the 24-char
30 REM LED display. Each character is converted to its 14-segment
40 REM bitmask via a font lookup.
50 REM
60 REM --- Load font data into an array (ASCII 32-126) ---
70 DIM font%(94)
80 FOR idx% = 0 TO 94 : READ font%(idx%) : NEXT
90 REM
100 REM --- Get user input ---
110 INPUT "Enter text (max 24 chars): " text$
120 IF LEN(text$) > 24 THEN text$ = LEFT$(text$, 24)
130 REM
140 REM --- Display the string, padding the rest with blanks ---
150 FOR col% = 0 TO 23
160   IF col% < LEN(text$) THEN ch% = ASC(MID$(text$, col%+1, 1)) - 32 ELSE ch% = 0
170   IF ch% < 0 OR ch% > 94 THEN ch% = 0
180   PROCled(font%(ch%), col%)
190 NEXT
200 PRINT "Done!"
210 END
220 REM
230 REM --- Write bitmask bm% to LED column col% via MBB_WRITE_LED ---
240 DEF PROCled(bm%, col%)
250 A% = col%
260 L% = bm% MOD 256
270 H% = bm% DIV 256
280 CALL &FDD6
290 ENDPROC
300 REM
310 REM --- Font DATA (ASCII 32-126, 95 entries) ---
320 DATA &0000, &4900, &0202, &12CE, &12ED, &2DE4
330 DATA &0B59, &0200, &0C00, &2100, &3FC0, &12C0
340 DATA &2000, &00C0, &4000, &2400
350 DATA &243F, &0406, &00DB, &008F, &00E6, &0869
360 DATA &00FD, &1401, &00FF, &00EF, &0040, &2200
370 DATA &0C40, &00C8, &2180, &5083
380 DATA &02BB, &00F7, &128F, &0039, &120F, &0079
390 DATA &0071, &00BD, &00F6, &1209, &001E, &0C70
400 DATA &0038, &0536, &0936, &003F
410 DATA &00F3, &083F, &08F3, &00ED, &1201, &003E
420 DATA &2430, &2836, &2D00, &00EE, &2409
430 DATA &0039, &0900, &000F, &2800, &0008
440 DATA &0100, &208C, &0878, &00D8, &208E, &2058
450 DATA &14C0, &048E, &1070, &1000, &2210
460 DATA &1E00, &1200, &10D4, &1050, &00DC
470 DATA &0170, &0486, &0050, &0888, &0078
480 DATA &001C, &2010, &2814, &2D00, &028E
490 DATA &2048, &2149, &1200, &0C89, &24C0
Much of this code should look familiar from last time. We've got the same machine-code stub to call our BIOS routine in lines 240-290, the same font table setup in lines 70-80, and the same (ish) character display routine in lines 150-190.
We've added some code in lines 110-120 to prompt the user for the string to be displayed:
110 INPUT "Enter text (max 24 chars): " text$
120 IF LEN(text$) > 24 THEN text$ = LEFT$(text$, 24)
INPUT is the keyword that causes the prompt to be displayed, and whatever characters you provide are stored in the variable text$ (remember that $ means "string" here).
The second line is a safety check to ensure that our string is no longer than 24 characters, because that's the maximum message size we can display on our 24-character LED display.
There's also some extra chicanery in lines 160-170 that I glossed over earlier that we should now review:
160   IF col% < LEN(text$) THEN ch% = ASC(MID$(text$, col%+1, 1)) - 32 ELSE ch% = 0
170   IF ch% < 0 OR ch% > 94 THEN ch% = 0
col% is our integer "column number" variable counting up from 0 to 23 inclusive. For each column position we extract the relevant character from the string - that's the MID$ keyword in the middle. We use ASC to get the ASCII character code for this character, and we subtract 32 from it, because we don't have font table entries for the first 32 ASCII characters as they're all control codes anyway. The first entry in our font table is the SPACE character, whose ASCII value is 32: so subtracting 32 is an easy way to convert from ASCII code to font-table index.
Line 160 is also guarding against our input string being shorter than the display width (IF col% < LEN(text$)) - if we run out of characters in text$ before we get to the end of the display we do ELSE ch% = 0 which has the effect of using entry 0 in our font table (a blank SPACE character).
Finally line 170 guards against tricksy character values that our outside the bounds of our font table: if that happens, we'll swap those out for a SPACE character too.
Running the code
You know the drill:
Boot your 'Beast
SLIDE the STRINGS.BBC file from the repo across to your 'Beast's B drive
"log in" to the A drive with A:
start BBC Basic with BBCBASIC
type LOAD "STRINGS"
inspect it with LIST
run it with RUN
All being well, you should see this (your string might be different):
Things you can try
Try displaying a string that's longer than the display
Try displaying characters that aren't in the font table
How could you adapt the code to display "User Defined Graphics" (UDGs) ? Are there are characters you can swap out in the existing font table?
What about if you wanted to extend the existing font table to offer UDGs?
End of Part Four
That's it for Part Four - another relatively short one. Next time, in Your name in lights! (Part 5) we'll look at how we can display strings that are longer than the available display width, and introduce the ancient and venerable art of ScrollTexts...
microbeast
Your name in lights! (Part 4) (BBC BASIC)
Last time, in Your name in lights! (Part 3) we really got into our stride and managed to write short (very short!) messages of our choosing to the LED display.
We're going to be building on that foundation here, so if you skipped earlier parts or are still
We're going to be building on that foundation here, so if you skipped Part One or Part Two or are still a little shaky on the fundamentals you might want to go back and read them again.
To move forward, I'm going to assume that you've got SLIDE.COM on the B: drive of your 'Beast, and that you have the corresponding PC utility installed somewhere in your PATH on your development PC. Refer to the SLIDE README if you need more help with that.
I'm also going to assume that you have BBCBASIC.COM on your B drive.
We're going to start in the scrolltext/bbc_basic/fonts folder.
Background info
This time, we'll see if we can adopt that classic time-honoured writing system: the Latin alphabet!
All of the standard characters on the 'Beast can be represented by an ASCII code: for example the letter A is character number 65 (0x41). It would be convenient to use these values when we're trying to write every-day text to our display, and only resort to codewords when we want a Space Invader, or something.
💡
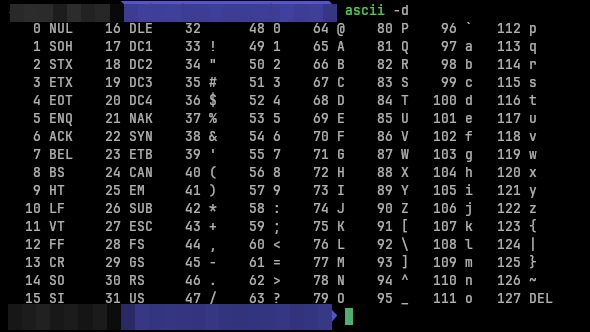
Incidentally, the ASCII standard is a supremely elegant bit of design: read this post if you want to know more!
You might guess from the Font Editor I've shown you previously that this involves creating a "Font" which is simply a big table of codewords for every letter, digit or punctuation mark we wish to use, systematically organised in such a way that we can convert from ASCII codes to LED code-words.
You might also be thinking "Hold on, the 'Beast already displays characters perfectly well, surely someone has already done this work?" - and you'd be right. The 'Beast's designers have already provided a "font" that covers the 94 most exciting characters in the ASCII standard. (ASCII only defines 128 characters in total, and some of those are special control characters that can't be printed to the screen anyway).
Unfortunately, the BIOS doesn't provide a convenient way to access this font table from code running on the `Beast. We could figure out its address in the particular firmware we're using, but such an approach is brittle because there are no guarantees that the next version of the firmware will have the font table at exactly the same address, and our code would break.
The alternative is to define our own font table. Rather than mess about defining 94 characters in the Font Editor, we're just going to copy the info from the MicroBeast font table into our own code.
Here's the code we'll be running this time:
10 REM === MicroBeast LED Demo - Step 2: Font Rendering (BBC BASIC) ===
20 REM Display "HELLO" on the last 5 LED positions (columns 19-23)
30 REM using font bitmask data for the 14-segment displays.
40 REM
50 REM Each character has a 16-bit bitmask:
60 REM   Low byte  = outer segments (a,b,c,d,e,f,g1,g2)
70 REM   High byte = inner/diagonal segments (h,j,k,l,m,n)
80 REM
90 REM The font table is indexed from ASCII 32 (space) onwards:
100 REM   index = ASC(char) - 32,  bitmask = font%(index)
110 REM
120 REM --- Load font data into an array (ASCII 32-126, 95 entries) ---
130 DIM font%(94)
140 FOR idx% = 0 TO 94 : READ font%(idx%) : NEXT
150 REM
160 REM --- Display "HELLO" on columns 19-23 ---
170 text$ = "HELLO"
180 FOR pos% = 1 TO 5
190   ch% = ASC(MID$(text$, pos%, 1)) - 32
200   PROCled(font%(ch%), 18 + pos%)
210 NEXT
220 PRINT "Displayed HELLO on columns 19-23"
230 END
240 REM
250 REM --- Write bitmask bm% to LED column col% via MBB_WRITE_LED ---
260 DEF PROCled(bm%, col%)
270 A% = col%
280 L% = bm% MOD 256
290 H% = bm% DIV 256
300 CALL &FDD6
310 ENDPROC
320 REM
330 REM --- Font DATA (ASCII 32-126, 95 entries) ---
340 REM Each value is a 16-bit bitmask for the 14-segment display
350 REM
360 DATA &0000, &4900, &0202, &12CE, &12ED, &2DE4
370 DATA &0B59, &0200, &0C00, &2100, &3FC0, &12C0
380 DATA &2000, &00C0, &4000, &2400
390 DATA &243F, &0406, &00DB, &008F, &00E6, &0869
400 DATA &00FD, &1401, &00FF, &00EF, &0040, &2200
410 DATA &0C40, &00C8, &2180, &5083
420 DATA &02BB, &00F7, &128F, &0039, &120F, &0079
430 DATA &0071, &00BD, &00F6, &1209, &001E, &0C70
440 DATA &0038, &0536, &0936, &003F
450 DATA &00F3, &083F, &08F3, &00ED, &1201, &003E
460 DATA &2430, &2836, &2D00, &00EE, &2409
470 DATA &0039, &0900, &000F, &2800, &0008
480 DATA &0100, &208C, &0878, &00D8, &208E, &2058
490 DATA &14C0, &048E, &1070, &1000, &2210
500 DATA &1E00, &1200, &10D4, &1050, &00DC
510 DATA &0170, &0486, &0050, &0888, &0078
520 DATA &001C, &2010, &2814, &2D00, &028E
530 DATA &2048, &2149, &1200, &0C89, &24C0
The aim this time around is to write the word "HELLO" in the last 5 characters of the display. We won't be writing code-words either this time: we'll use ASCII characters.
You can see in line 170:
170 text$ = "HELLO"
The $ suffix means "this variable is a string", and a "string" is a sequence of ASCII characters. It's more convenient than writing out 72, 69, 76, 76, 79, but is otherwise exactly equivalent (bar some sneaky extra information that is stored to remember how long the string is).
In line 130, we have this odd looking line:
130 DIM font%(94)
This means that we're "DIMensioning" (allocating) an "array" (list or table) of 94 integers (because of the %), and we want to call this table font% for "Font Table".
In line 140 you can see where we're setting up values to go in to that table. We loop around 94 times and for each character we're performing:
140 FOR idx% = 0 TO 94 : READ font%(idx%) : NEXT
so as I% goes from 0 to 94 we'll first read a value into font%(0) (the first slot) then the next value into font%(1) and so on. That READ statement gets its data from the DATA statements starting at line 360.
The font data exactly matches the MicroBeast firmware file I showed you earlier - the hexadecimal numbers are just formatted in a slightly different way.
Running the code
We can speed through this now, as you're an old hand at running BASIC programs on the 'Beast. Try this:
Boot your 'Beast
SLIDE the FONTS.BAS file from the repo across to your 'Beast's B drive
"log in" to the A drive with A:
start BBC Basic with BBCBASIC
type LOAD "FONTS"
inspect it with LIST
run it with RUN
All being well, you should see this:
Things you can try
Try displaying a different 5 character string.
What happens if you try to display a longer string?
How can you adapt the code to display a longer string? What limitations do you encounter?
End of Part Three
That's it for Part Three - nice and quick this time!
Next time, in Your name in lights! (Part 4) we'll let you type in any string you like (within reason) and have that displayed on the LEDs!
microbeast
Your name in lights! (Part 3) (BBC BASIC)
Last time in Your name in lights! (Part 2) , we got to grips with BBC Basic and managed to emit some weird runes onto our LED display.
We're going to be building on that foundation here, so if you skipped Part One or Part Two or are still
In Your name in lights! we got to grips with the 'Beast and its hardware and got comfortable transferring disk images onto the 'Beast using Y-Modem.
We're going to be building on that foundation here, so if you skipped Part One or are still a little shaky on the fundamentals you might want to go back and read it again.
To move forward, I'm going to assume that you've got SLIDE.COM on the B: drive of your 'Beast, and that you have the corresponding PC utility installed somewhere in your PATH on your development PC. Refer to the SLIDE README if you need more help with that.
We're going to start in the scrolltext/bbc_basic/leds folder.
Background info
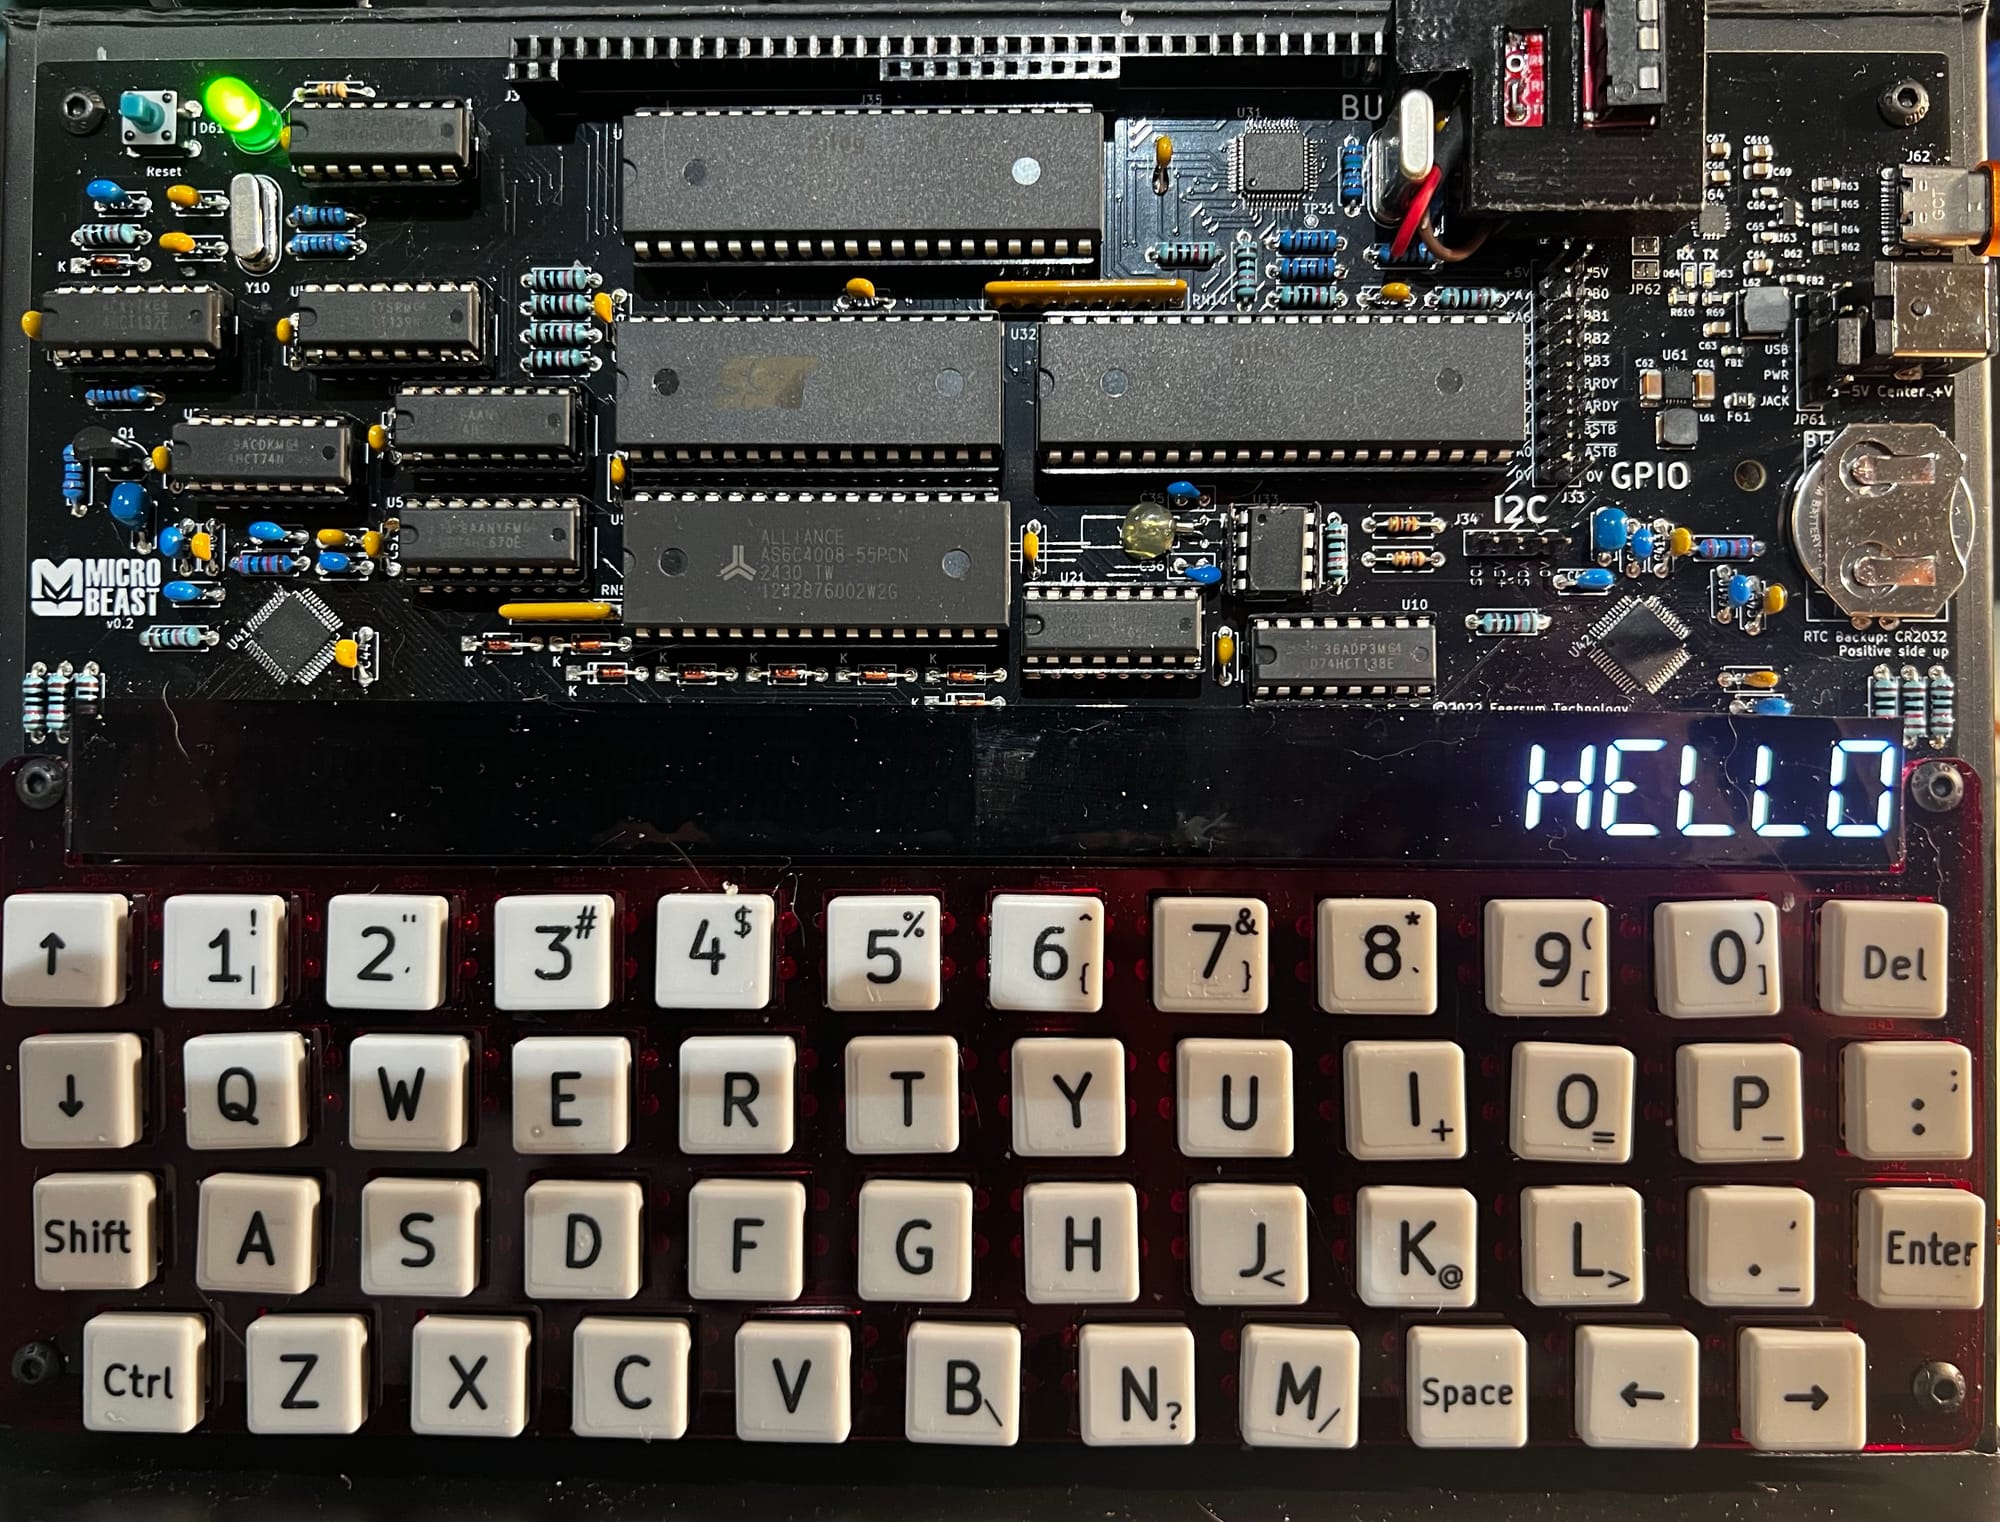
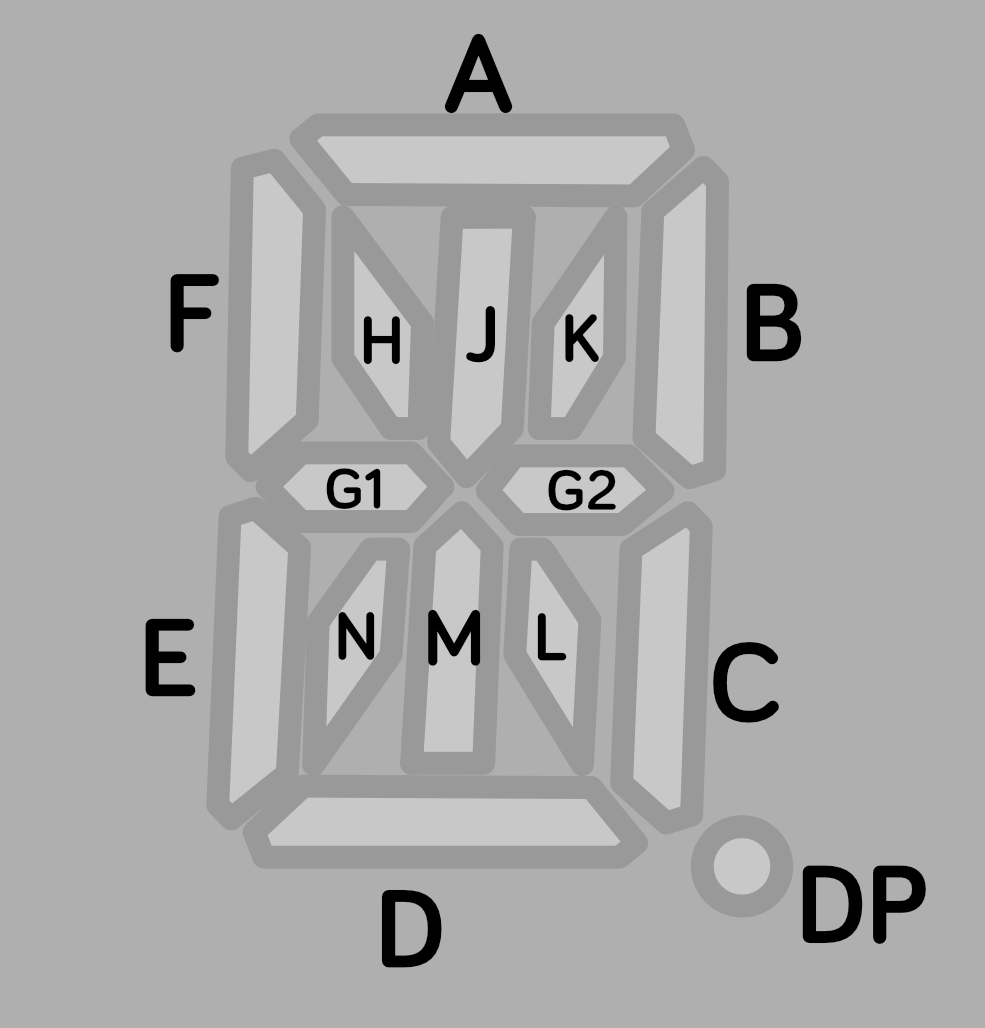
I already briefly mentioned the LEDs on the 'Beast. To recap, there are 24 characters, and each character is made of 15 different LEDs that we can light individually, to make a symbol that we recognize as a letter, numeral, or punctuation.
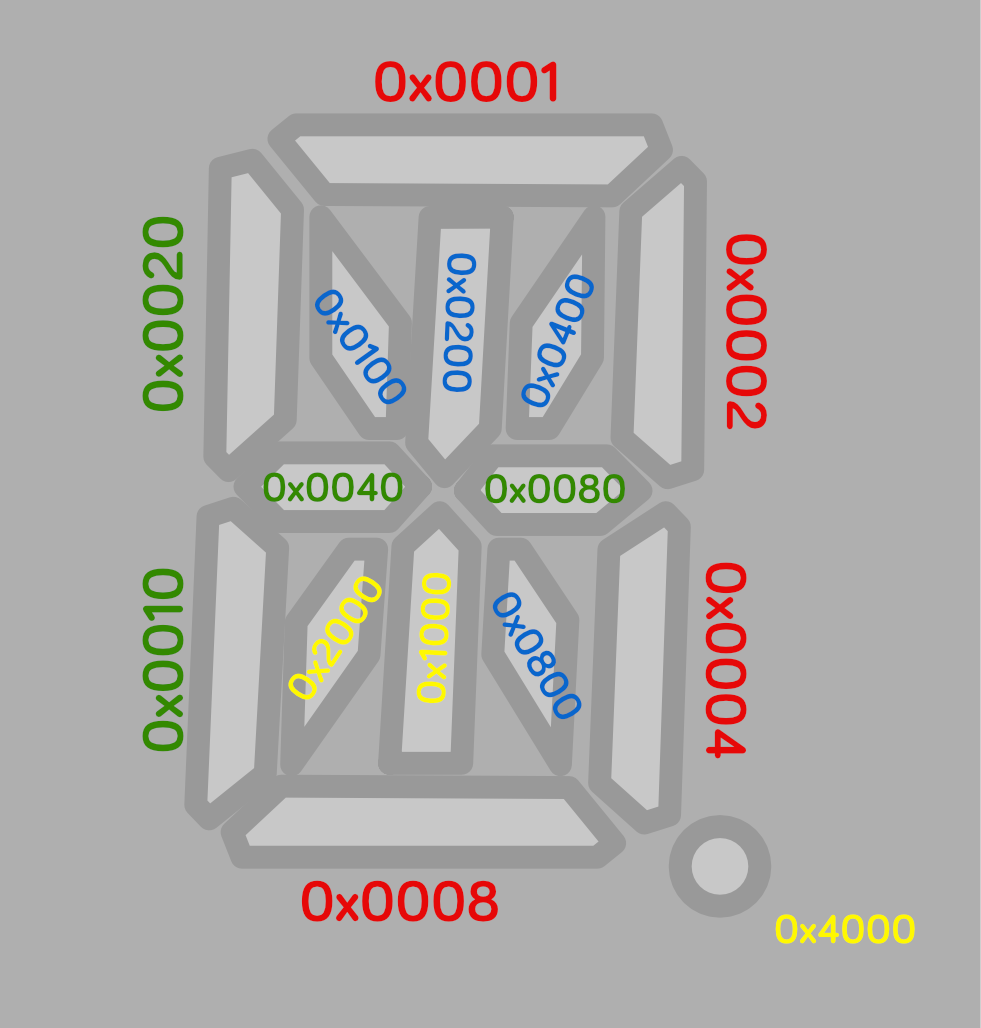
In other words there are 15 different LEDs that are either on or off for each of the 24 characters. So we can represent one character as a 16-bit word where each bit controls an LED, and we can represent the whole character array as a table or list of 24 16-bit words.
Here are the bit values that will activate each LED segment:
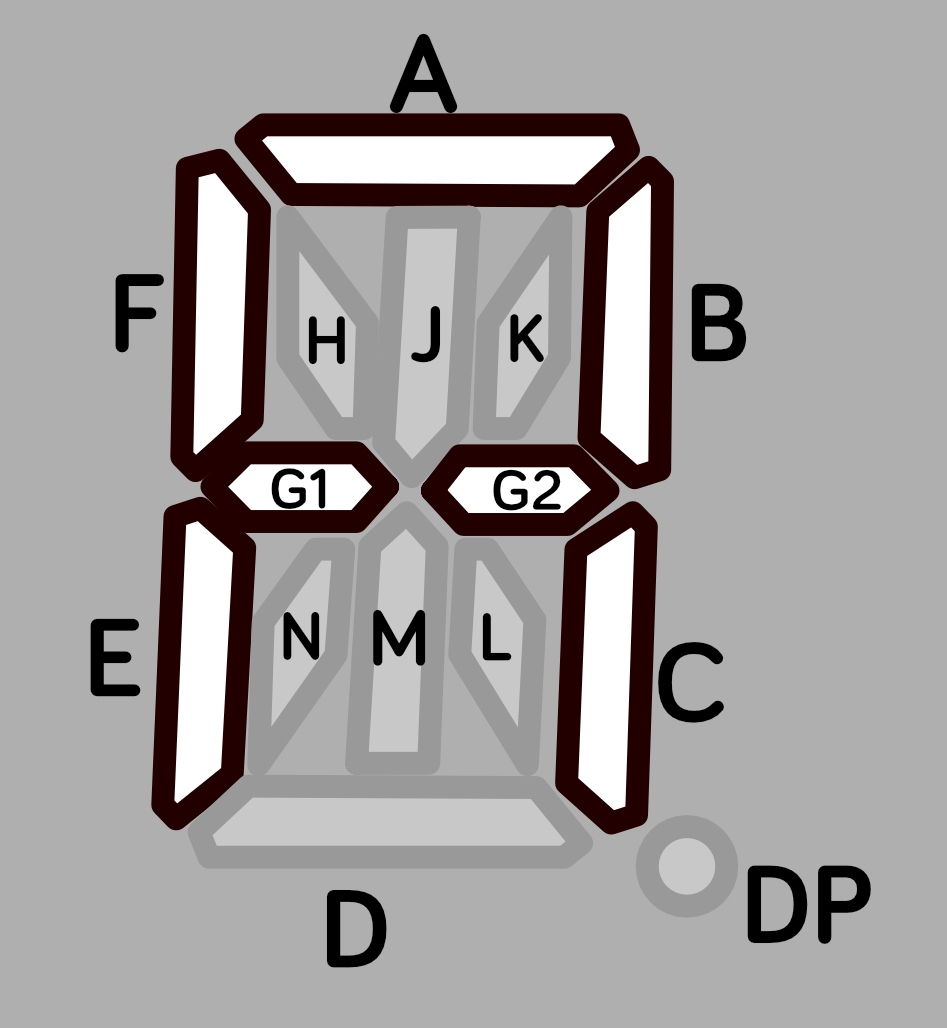
To light multiple segments, we combine their bits. This is technically an OR operation, but you can think of it as simply adding them altogether to come up with a number that represents the symbol we want.
You're not limited to the standard boring ANSI fare: you can have any symbol that you can dream up, subject to the (rather restrictive!) geometry of the LEDs themselves.
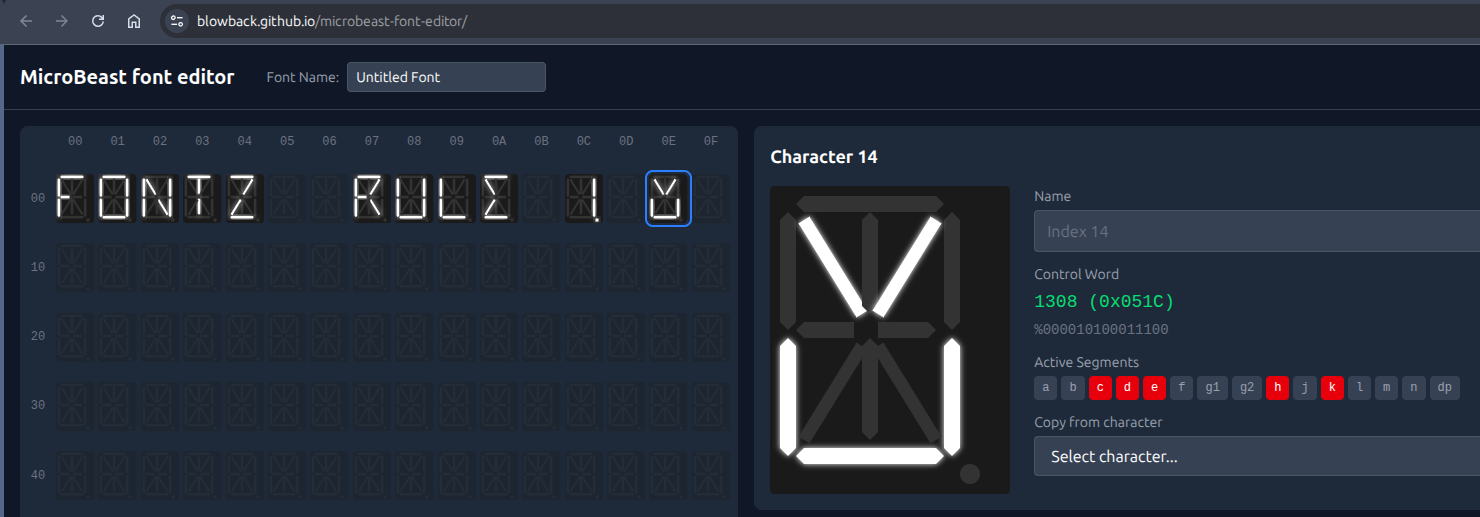
You can use my MicroBeast Font Editor to play with this ( instructions ) and see how symbols get turned into 16-bit words. If you come up with something that really tickles your fancy, make a note of its "control word" and use that in the examples that follow instead of the default value I'll be giving you.
Once we know the value for our symbol, what do we do with it? How do we get it on the display? Luckily, the designers of your 'Beast have got your back: they provide a BIOS call that takes a word describing the symbol and a column number as parameters, and does a lot of complicated hardware manipulation behind the scenes. We can treat it as a "black box": we know precisely what it does, and we know what inputs (parameters) it needs to accomplish this, but we don't care how it does it.
This is a machine code routine, so to pass parameters (the symbol we want and the column we want it in) we have to set up some z80 registers to contain those values. One of these is called HL - it contains the 16-bit word that describes the symbol - and the other is called A - it contains the column number, a value between 0 and 23 (because there are 24 columns on the LED display, and we start counting at 0).
Don't worry about what registers are, and why some of them have single character names and some of them have two character names - we'll get into that later. For now, just think of them as variables you can set, before calling the BIOS routine (think of it as a procedure or a function or even a GOSUB that does the work). So we're essentially saying:
set HL to the 16-bit word that describes the symbol we want
set A to the column that we want to show it in
make the processor jump to MBB_WRITE_LED (0xFDD6) to do the work
This kind of encapsulation and re-use is fundamental to pretty much all forms of software development; often described as the DRY principal: Don't Repeat Yourself. (The opposite, of course, is Write Everything Twice...)
BBC BASIC Z80
The disk image I've provided contains BBCBASIC.COM Which is Russel T. Davis' BBC BASIC Z80 v5.0, from 2025! We can go ahead and type BBCBASIC to start it up:
You can have a little play, if you like:
Type RUN to execute the program (and hit Escape when you want it to stop):
There was a period in the 1980s when every display in every computer shop in Bedford town centre looked exactly like this!
By the way, to get out of BASIC and get back to CP/M, type *QUIT and hit ENTER.
Calling BIOS routines from BASIC
You might imagine that calling the BIOS routine we're interested in is as simple as setting up our HL and A variables and using some sort of keyword that means "call some machine code at an address I specify":
REM this is not real code
HL = 65535
A = 0
CALL 0xFDD6
and BBC Basic does indeed provide a CALL keyword that does exactly this, with a couple of caveats:
The registers A, B, C, D, E, F, H and L are initialised to the least significant words of the integer variables A%, B%, C%, D%, E%, F%, H% and L% respectively.
Hex values are preceded with & in BBC BASIC, so &FDD6.
So unlike Microsoft BASIC, we don't need to write any special machine code routines to act as a stub - we can set all the z80 registers directly.
This makes the examples vastly simpler and easier to understand with all that added clutter.
In lines 120 to 140 of LEDS.BBC we're looping over columns 20 to 23 (that's the four right-most ones on the display) and writing our funky symbol to them. PROCled(bm%, col%) is a procedure (named subroutine) that wraps our machine code call, which is line 230. The CALL &ffD6 is the bit that calls the BIOS routine directly: the procedure already setup the A%, H%, and L% variables, which will get passed to the A, H, and L registers.
Let's give it a go!
Running our first BASIC program
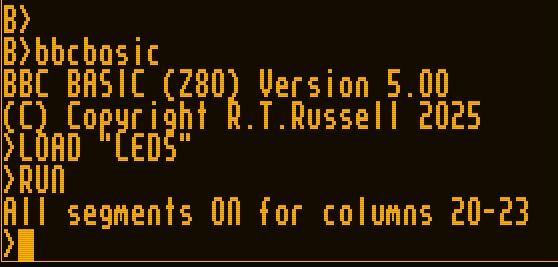
Fire up your 'Beast and SLIDE LEDS.BBC over to your B: drive. Make sure you're "logged in" to the A: drive (that's CP/M jargon that means your prompt says A> - if it doesn't type A: and hit ENTER). Type BBCBASIC to start the BASIC interpreter, and then type LOAD "B:LEDS" to load the demo program. You can type LIST to examine it if you like, and when you're ready type RUN and hit ENTER:
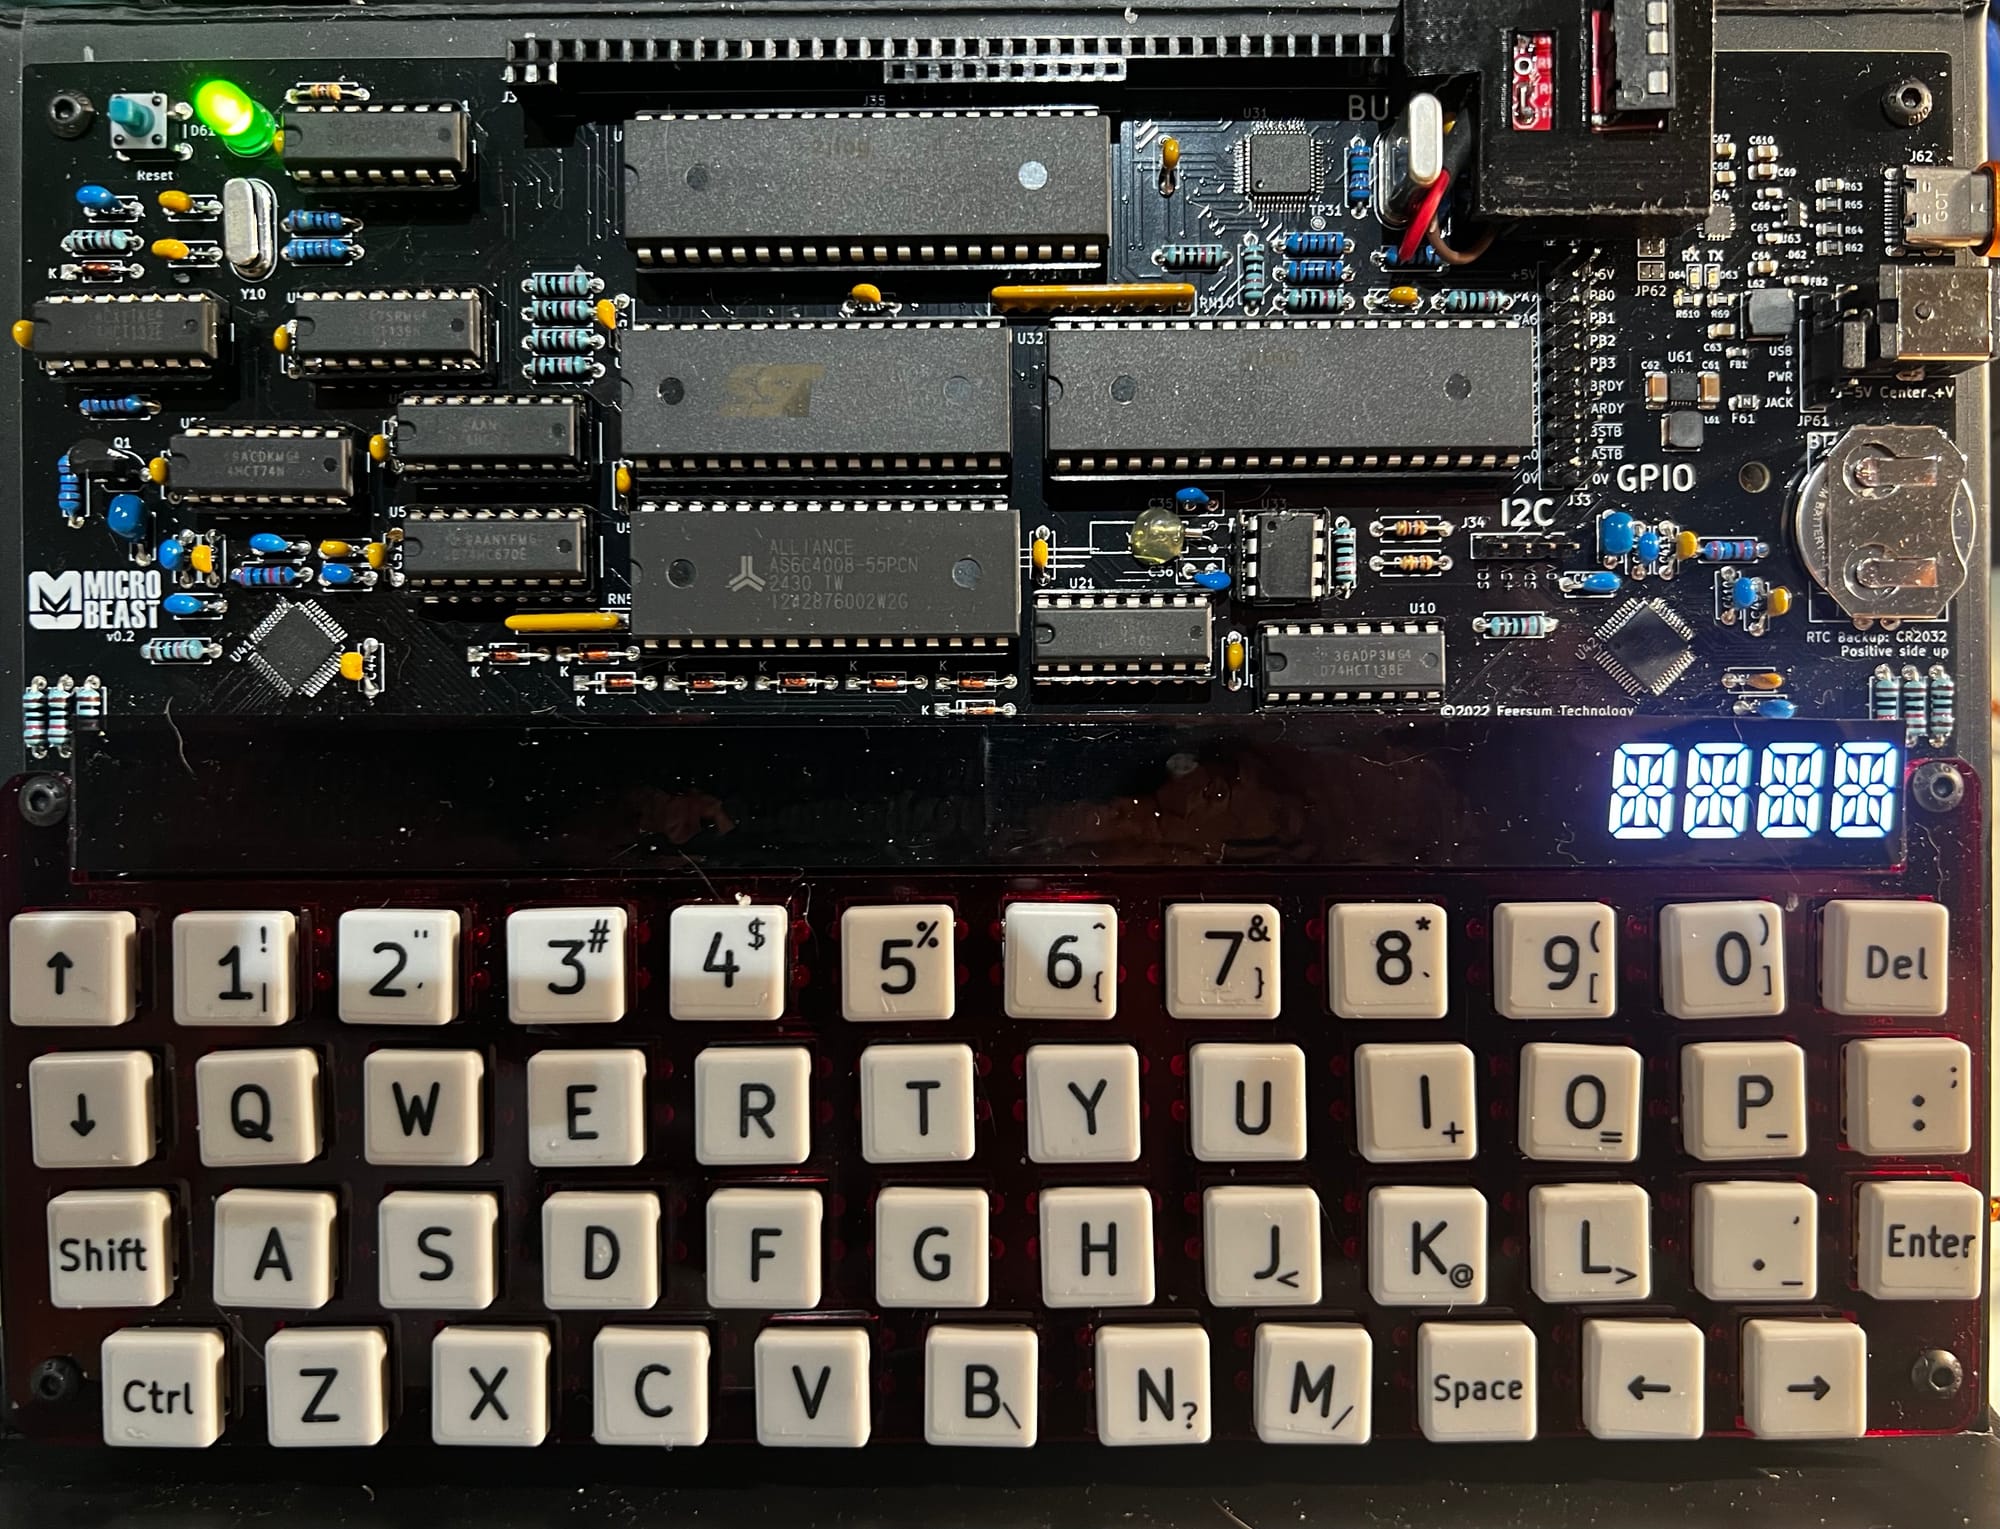
You should be rewarded with this splendid display:
Things you can try
Try changing the code-word to display a different symbol. You can replace line 130 by typing e.g. 130 PROCled(..., col%) and inserting your new value. Type RUN to try it.
Try writing to all the columns, from column 0 on the left to column 23 on the right. Be aware that the console output might over-right the leftmost columns (that's why I chose the rightmost ones for my demo!).
Try writing a different symbol to each column.
When you're done, remember that *QUIT exits BBC Basic and returns you to CP/M.
End of Part Two
So far so good - we learned a lot of stuff about BBC Basic and actually managed to write some code and run it on the 'Beast! But funky symbols can only keep us amused for so long.
In Your name in lights! we got to grips with the 'Beast and its hardware and got comfortable transferring disk images onto the 'Beast using Y-Modem.
We're going to be building on that foundation here, so if you skipped Part One or are still a little
I had a cunning idea about how to utilise all the available memory of the MicroBeast from AntForth. It was quite a simple concept, that I thought would take a few days. It ended up taking a few weeks of solid LLM coding! I'll let Paige, the BMAD technical author agent tell it in her own words...
A Z80 can only see 64 KB at once. The MicroBeast retro computer has 512 KB of RAM. Phase 4 of AntForth was about closing that gap: letting a single Forth session compile words into, and call words across, banks of memory that don't all fit in the processor's address space at the same time.
This post is the story of that phase. It ships as antforth v3.0.7, the first feature release since v2.0. I'll lead with the architecture and the things that went wrong (there were a few good ones), and weave in how we used BMAD — an agentic, spec-driven development method — to orchestrate the whole thing without losing the thread.
If you write Forth or Z80 machine code, there are deeper sidebars for you. If you're here for the "how do you actually build something complex with AI agents" angle, the connective tissue is the BMAD loop, and you can skip the hex.
The idea: a window, not a map
The naive way to use more memory is a flat map — every byte has one address. That's impossible here: 512 KB doesn't fit in 16 bits.
The MicroBeast's MMU solves this the classic 8-bit way. The Z80's 64 KB is divided into four 16 KB slots. Each slot displays one 16 KB page chosen from a 6-bit page space (64 pages × 16 KB = 1 MB of addressable pages, of which 512 KB is real RAM). Change a slot's page register and the same Z80 addresses now read and write different physical memory.
flowchart LR
subgraph Z80["Z80 address space (64 KB)"]
S0["Slot 0 $0000-$3FFF kernel (fixed)"]
S1["Slot 1 $4000-$7FFF kernel (fixed)"]
S2["Slot 2 $8000-$BFFF THE WINDOW"]
S3["Slot 3 $C000-$FFFF stacks/CCP/BDOS/BIOS"]
end
S2 -.maps one of.-> B0["page 0x22 = bank 0"]
S2 -.maps one of.-> B5["page 0x39 = bank 5"]
S2 -.maps one of.-> BN["...up to 29 banks"]
Three slots stay nailed down: the kernel lives in slots 0 and 1, and the stacks, the CP/M residency, BDOS and BIOS live in slot 3. Slot 2 ($8000–$BFFF) is the window. Banking is, fundamentally, the discipline of deciding which page is in the window right now, and making the Forth dictionary behave sanely as that page changes underneath it.
The default configuration gives you 12 banks (192 KB). Sacrifice the virtual console and the RAM disk and you can push to a theoretical 29 banks (464 KB) — all surfaced to the user through one word, BANK!.
5 BANK!        \ map page for bank 5 into the window
: GREET ." hi from bank 5" ;
0 BANK!        \ back to bank 0
GREET          \ still works — prints "hi from bank 5"
That last line is the whole problem in miniature. When you type GREET from bank 0, its code isn't currently mapped in. Something has to notice, swap bank 5 into the window, run it, and swap back — without the user ever knowing. How we got there is the rest of this story.
The architecture: a portal, a triple, and a pile of stubs
Reclaiming memory nobody was using
Banking needs bookkeeping memory that's always visible regardless of which bank is in the window. Phase 4's first real decision (Epic 16) was where to put it. The answer, verified on real hardware: evict the CP/M CCP.
The CCP — the command-line shell — sits at $D400–$DBFF and is reloaded from disk on every warm boot anyway. That's 2 KB of fixed memory we could take for free. Story 16.1 confirmed on silicon that consuming it is safe (warm-boot reloads it), which unlocked everything downstream.
flowchart TD
subgraph Fixed["Fixed memory (always mapped, slot 3)"]
BT["bank-table[] $D400, 29 x 6 bytes"]
AP["active-pages[] $D4AE, 29 bytes"]
ST["descriptor-stub allocator $D4CB-$DBFF = 1845 B = 461 stubs"]
end
subgraph Window["Slot-2 window ($8000-$BFFF)"]
BANK["whichever bank is mapped now"]
end
BT -.tracks per-bank state for.-> BANK
ST -.routes cross-bank calls into.-> BANK
```
The per-bank "triple" — and the one thing it deliberately leaves out
Each bank has its own dictionary growing inside the window. So each bank needs its own copy of three Forth pointers:
HERE — where the next compiled byte goes
LATEST — the most recently defined word
the wordlist head — the start of the search chain
We call this the triple. On BANK!, antforth saves the live triple into bank-table[old] and loads bank-table[new]. Standard stuff.
Sidebar — the invariant that saved us repeatedly. The triple is only those three pointers. The hash bucket array that FIND walks is global and shared — it is not swapped per bank. This sounds like a bug waiting to happen, and reviewers kept "finding" it. It's actually the load-bearing correctness property of the whole design: because the buckets are shared and FIND's page-in is address-conditioned (any address below $8000 is fixed memory, so it's reachable without paging), a word linked into the chain stays findable from every bank. Swaps move the triple; they never touch findability. Internalising this turned a class of scary-looking "triple corruption" review findings into empirically-refutable non-issues — more on that below.
Calling across the gap: descriptor stubs
When you define a word in bank 5, you can't just store its address — that address ($8000-something) means a different physical location depending on what's in the window. So every banked word gets a 4-byte descriptor stub in fixed memory. The stub records "I live in bank 5 at offset X." Executing the word routes through its stub, which maps the right page in, runs the body, and restores the window.
The dictionary pointers that reach these words are 24-bit fat pointers: two bytes of address plus one byte of bank ([addr:2][bank:1]). That one extra byte per link is what lets FIND know whether a hit lives in fixed memory or out in a bank — and it's the single biggest line item in the byte budget (Epic 20, below).
The BMAD loop: how the work actually got made
Here's the connective tissue. antforth isn't built in a freewheeling "chat until it compiles" style. Every increment runs through a structured, auditable loop:
flowchart LR
SP["sprint-status.yaml (source of truth)"] --> CS["create-story (rich, spec'd ACs)"]
CS --> DEV["dev-story (implement + gates)"]
DEV --> CR["adversarial code-review (fresh context, often a different model)"]
CR --> HW["hardware UAT (real MicroBeast)"]
HW --> DONE["status -> done"]
DONE --> RETRO["retrospective (per epic + per phase)"]
RETRO --> SP
A few things make this work at the scale of a 38-story phase:
Stories carry their own context. A create-story pass doesn't just list acceptance criteria — it pre-reads the live source, pins down exact file:line citations, and surfaces findings the dev pass must not re-discover. Several Phase-4 stories opened with five or six "load-bearing findings resolved at draft time." That front-loading is why dev passes land cleanly.
Code review is adversarial and isolated. It runs in a fresh context, frequently on a different model, with an explicit mandate: reviews must find things; an empty review is suspect. This is not ceremony — across Phase 4 it caught a real silent-corruption defect on nearly every pass (a return-stack overflow, an EVALUATE source-id leak, a bucket-scrub bug). The discipline is to refute findings empirically — run the code, watch the pointers — rather than argue.
Hardware is a gate, not an afterthought. Every binary-delta story gets a UAT on a real MicroBeast before it's marked done. Emulators lie (ours modelled a write-only MMU port as readable, which cost us a debugging detour); silicon doesn't.
Retrospectives close the loop. One per epic, one per phase, each checking the previous retro's action items. Phase 4 ran 4-for-4 and 5-for-5 on follow-through in its last two epics — the accountability ledger is the clearest signal the loop is paying rent.
The human (the project lead) stays in the loop at exactly the decision points that matter: mechanism elections, envelope dispositions, tag application. The agents do the reading, drafting, implementing, and reviewing; the human makes the calls that need judgement.
The war stories
No interesting phase is monotonic. Here are the three detours worth remembering.
1. The cross-bank call that wouldn't return cleanly
The first dispatch design (Epic 18) used a sentinel trampoline: a cross-bank call pushed a fake return address that pointed at a little fixed-memory routine, which would restore the window when the word "returned" to it. It worked in the emulator. It was also fragile in a way that took an entire interlude to understand.
The symptom was intermittent hangs. The suspected cause cycled through "kernel too big," "emulator quirk," "trampoline layout." The actual root cause (ADR 19.5) was something else entirely: portal-window dictionary aliasing. When a word's body sat above $8000and a foreign bank was mapped, a dictionary lookup could walk the shared bucket chain through the window and read a foreign page. The trampoline was innocent. The kernel size was never causal.
This earned its own stabilization interlude — Epic 19.5 — rather than being smuggled into a feature epic. That framing decision mattered: the interlude got its own stories, its own retro, and its own release tag (v3.0.4), which is why the whole downstream version mapping shifted by one and Phase 4 ended on v3.0.7 instead of v3.0.6.
2. Replacing the trampoline with nothing
The fix was elegant in the way good 8-bit code often is: make the cost disappear. The sentinel trampoline was replaced by an RST $28 self-dispatching stub. Each banked word's stub is its own dispatcher; the inner interpreter's NEXT doesn't need a discriminator added to it at all.
Sidebar — 0 T-states per NEXT. The headline result (Epic-19.5 DR-2): cross-bank dispatch adds zero cycles to the inner loop. The plain "pop and continue" path is the only path. A BANK! itself costs around 425 T-states (most of it the triple swap and one MMU port write); an intra-bank call costs exactly one extra JP versus a flat build. For a mechanism that lets you address half a megabyte, the steady-state overhead is essentially a rounding error.
3. Stop poking the MMU directly
Midway through, antforth was writing MMU page registers with direct OUT instructions. On real hardware this fought the BIOS, which keeps its own shadow of the page state and re-pages under interrupt. The MMU page ports turned out to be write-only by design — any attempt to read them back floats.
The pivot (the "BIOS-MBB" change) was to stop poking ports and route every page change through two blessed BIOS entry points: MBB_SET_PAGE ($FDDF) and MBB_GET_PAGE ($FDDC). The BIOS keeps the shadow coherent and survives interrupts. This is the kind of correction that only shows up on silicon, and it's the reason the hardware-UAT gate is non-negotiable.
What we ended up with
A Forth where banking is both real and legible. The final epic (Epic 22) added no new mechanism — it made the mechanism observable.
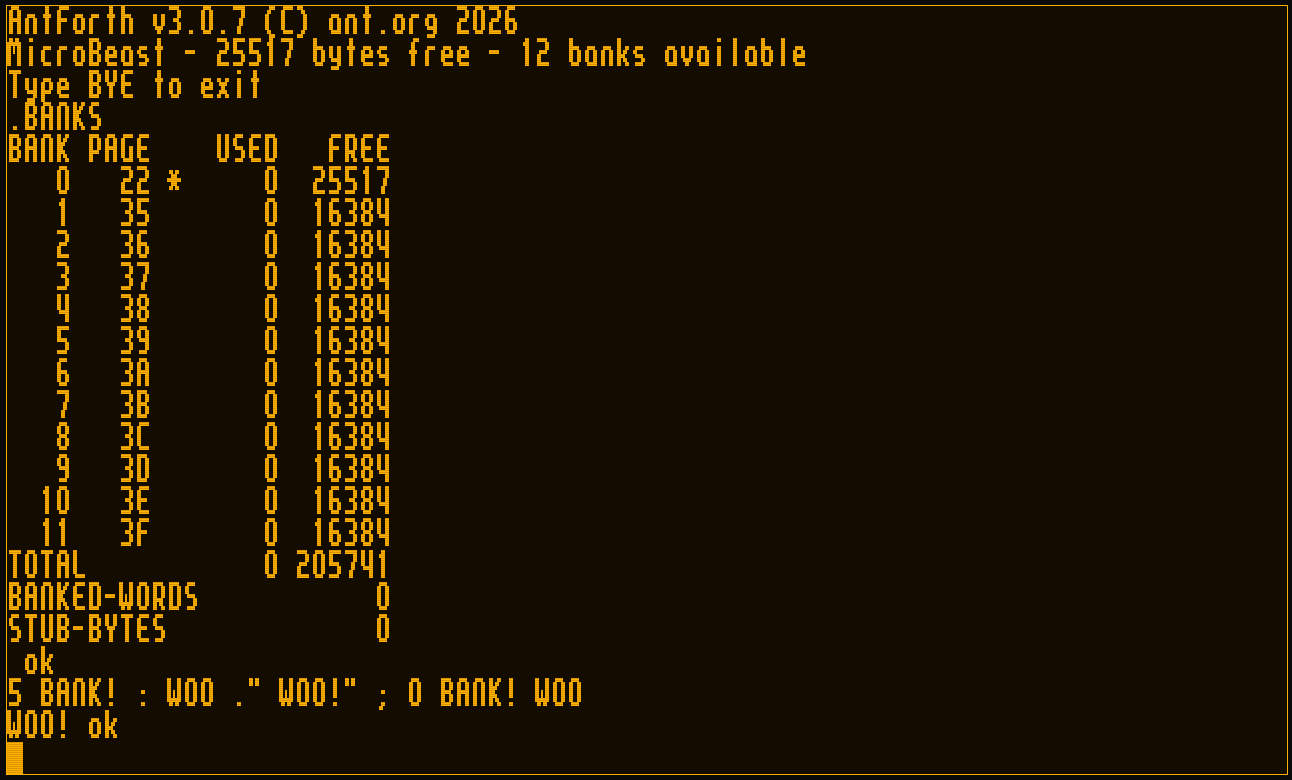
.BANKS
\ BANK PAGE    USED   FREE
\    0  22 *    1843  25685     <- bank 0 = kernel dictionary
\    5  39         0  16384
\  ...
\ TOTAL          1843 205909
\ BANKED-WORDS      0
\ STUB-BYTES        0
The REPL can show which bank you're about to type into (opt-in, so the classic prompt is untouched for everyone else):
-1 PROMPT-SHOW-BANK    \ enable the indicator
5 BANK!
[5] ok                 \ the prompt now tells you where you are
0 BANK!
ok                     \ bank 0 is suppressed — a [0] prompt is just noise
And the cross-bank machinery is end-to-end: : lands its body in the current bank and auto-emits a stub; CREATE/DOES> work across banks; MARKER/FORGET revert per-bank dictionary tails and reclaim stubs; ABORT and THROW restore your interactive bank instead of stranding you; and CODE words are redirected to fixed memory so assembler words stay callable from anywhere.
The byte ledger
Every byte was measured from a clean rebuild and accepted (or questioned) at its own story close. The phase grew the kernel by +3,504 bytes. Each row below is a fresh clean build of that release tag; the deltas sum to the total:
Milestone
Tag
Kernel size
Δ vs prev
Highlight
Phase-3 close
v2.0.0
24,995 B
—
flat-memory baseline
Epic 17
v3.0.1
26,228 B
+1,233 B
bank table, BANK@/BANK!, CL parser
Epic 18
v3.0.2
26,477 B
+249 B
descriptor-stub allocator + trampoline
Epic 19
v3.0.3
26,834 B
+357 B
per-bank HERE, bank-aware : / CREATE
Epic 19.5
v3.0.4
26,945 B
+111 B
RST-$28 self-dispatch; trampoline retired
Epic 20
v3.0.5
27,888 B
+943 B
24-bit fat pointers (FIND / WORDS)
Epic 21
v3.0.6
28,049 B
+161 B
MARKER / FORGET / state restore
Epic 22
v3.0.7
28,499 B
+450 B
.BANKS, prompt, CODE redirect
Sidebar — the envelope multiplier. Pure-addition stories in Phase 4 reliably overran their first-cut byte estimates by roughly 2.4× — enough that we started budgeting with the multiplier. The exception proves the rule: Epic 20's +943 B (the table's biggest single jump) overran its estimate by about 3.4×, because swapping 16-bit dictionary links for 24-bit fat pointers was a mechanism substitution that rippled through every lookup path — not a pure addition. "Substitution voids the multiplier" became a planning rule, carried in project memory and validated when the pure-addition epics that followed tracked close to their estimates again.
The total banking infrastructure — code plus the reclaimed-CCP structures — is 5,552 bytes, comfortably inside the ~6 KB target at the default 12 banks and well under the 8 KB cap at 29. The descriptor-stub region holds 461 slots and sits at 0/461 at boot: stubs are a runtime/lifecycle cost, not a fixed tax.
How long it took
These are actual elapsed calendar dates pulled from git history — not effort estimates. Phase 4 ran from the first Epic-16 commit on 2026-05-13 to the v3.0.7 tag on 2026-06-14: 32 days, 38 stories across 8 sub-tracks.
The calendar was anything but evenly spread, and its shape retells the same story the war-stories did:
The foundations were fast. Epics 16–18 — the memory map, the entire banking core, and the dispatch scaffold — landed in 5 days (May 13–18).
Cross-bank dispatch ate the calendar. Epic 19 and the Epic-19.5 interlude it spawned together ran May 18 – June 10 — more than two-thirds of the phase — for what is, on paper, "make a call return to the right page." Getting that correct on silicon, not just green in the emulator, was the whole job. The war stories above are where those weeks went.
Once dispatch was solid, the rest fell quickly. Find, lifecycle, and the entire polish-and-close epic — three epics, 10 stories — took 4 days (June 10–14). A correct foundation makes everything built on top of it cheap.
The lopsidedness is the lesson: in a banked-memory port, the hard part isn't the breadth of the wordset — it's the one mechanism everything else stands on.
The takeaways
Three things I'd carry into any phase like this:
Find the invariant and defend it relentlessly. The "triple excludes the shared bucket array" property is the spine of the whole design. Once it was explicit, half the scary review findings became one-command refutations.
Name your interludes. When Epic 19 turned out to rest on a fragile dispatch design, splitting the stabilization work into its own epic — with its own retro and tag — kept the feature epics honest and the history legible. Smuggling stabilization into a feature epic hides the cost.
Keep the adversary cranked. A code review that finds nothing is the rare exception, not licence to relax. Phase 4's reviews caught a genuine silent-corruption bug on nearly every pass; the one clean pass (Epic 22) was clean because a settled mechanism gave it little to attack — not because the work was beyond reproach.
Phase 4 was a rocky road with an easy finish. The bet — that a 64 KB Z80 could be taught to use half a megabyte through one honest little window, and that an AI-orchestrated, spec-driven loop could build it correctly on real silicon — paid off. antforth v3.0.7 is on the MicroBeast, addressing all of it.
antforth
AntForth with half a megabyte of RAM
How we added banked-RAM support to a CP/M Forth on the MicroBeast — the architecture, the war stories, and the AI-orchestrated process that held it together.
This time we're going to add a bit of bling and resurrect our brightness wave, and hopefully we'll see that machine code has the power to make it more impressive than our BASIC effort.
To move forward, I'm going to assume that you've got SLIDE.COM on the B: drive of your 'Beast, and that you have the corresponding PC utility installed somewhere in your PATH on your development PC. Refer to the SLIDE README if you need more help with that.
We're going to start in the scrolltext/assembler/effects folder.
Background info
Just like the previous example, we're going prompt the user for the string, decode the characters of that string into font symbols, and scroll the characters on the screen - but this time there will be a wave of brightness moving through the string characters!
Here's the code:
;
; MicroBeast LED Demo - Step 5: Sine Wave Brightness Effect
; Scrolling text with a sine-wave brightness pattern that moves
; across the display at a different rate than the text scroll.
;
; Build: sjasmplus --raw=effects.com effects.asm
; Run:   effects.com under CP/M on MicroBeast
;

            ORG     0x100

            INCLUDE "../bios.inc"

; --- Print prompt ---
            LD      DE, prompt
            LD      C, C_WRITESTR
            CALL    BDOS

; --- Read user input ---
            LD      DE, inbuf
            LD      C, C_READSTR
            CALL    BDOS

            LD      DE, crlf
            LD      C, C_WRITESTR
            CALL    BDOS

; --- Build padded buffer: 24 spaces + text + 24 spaces ---
            LD      HL, padbuf
            LD      BC, 303
            LD      A, ' '
clrbuf:
            LD      (HL), A
            INC     HL
            DEC     BC
            LD      A, B
            OR      C
            LD      A, ' '
            JR      NZ, clrbuf

            LD      A, (inbuf+1)
            OR      A
            JR      Z, startloop
            LD      B, A
            LD      HL, inbuf+2
            LD      DE, padbuf+24
copytxt:
            LD      A, (HL)
            LD      (DE), A
            INC     HL
            INC     DE
            DJNZ    copytxt

startloop:
            ; Calculate scroll positions: textlen + 25 (16-bit)
            LD      A, (inbuf+1)
            LD      L, A
            LD      H, 0
            LD      BC, 25
            ADD     HL, BC
            LD      (buflen), HL

            LD      DE, scrollmsg
            LD      C, C_WRITESTR
            CALL    BDOS

            ; Initialize counters
            LD      HL, 0
            LD      (scrollpos), HL
            XOR     A
            LD      (brightpos), A
            LD      (framecnt), A

; --- Paint characters for current scroll position ---
painttext:
            LD      HL, (scrollpos)
            LD      DE, padbuf
            ADD     HL, DE
            LD      (winptr), HL

            LD      C, 0           ; column counter
paintloop:
            LD      A, C
            CP      24
            JR      Z, brightloop

            PUSH    BC

            LD      HL, (winptr)
            LD      E, C
            LD      D, 0
            ADD     HL, DE
            LD      A, (HL)        ; ASCII character

            SUB     0x20
            CP      95
            JR      C, validch
            XOR     A
validch:
            ADD     A, A
            LD      E, A
            LD      D, 0
            LD      HL, font
            ADD     HL, DE
            LD      A, (HL)
            INC     HL
            LD      H, (HL)
            LD      L, A           ; HL = bitmask

            LD      A, C
            CALL    MBB_WRITE_LED

            POP     BC
            INC     C
            JR      paintloop

; --- Update brightness every frame ---
brightloop:
            LD      C, 0           ; column counter
brightcol:
            LD      A, C
            CP      24
            JR      Z, brightdone

            PUSH    BC

            LD      A, (brightpos)
            ADD     A, C           ; A = column + brightpos
            AND     63             ; modulo 64
            LD      E, A
            LD      D, 0
            LD      HL, sine64
            ADD     HL, DE
            LD      A, (HL)        ; A = brightness value

            LD      B, A           ; save brightness in B
            LD      A, C           ; A = column
            LD      C, B           ; C = brightness
            CALL    MBB_LED_BRIGHTNESS

            POP     BC
            INC     C
            JR      brightcol

brightdone:
; --- Delay ---
            LD      HL, DELAY_COUNT
delay:
            DEC     HL
            LD      A, H
            OR      L
            JR      NZ, delay

; --- Check for keypress ---
            LD      C, C_STAT
            CALL    BDOS
            OR      A
            JR      NZ, exit

; --- Advance brightness offset every frame ---
            LD      A, (brightpos)
            INC     A
            AND     63
            LD      (brightpos), A

; --- Advance text scroll every 4th frame ---
            LD      A, (framecnt)
            INC     A
            AND     3
            LD      (framecnt), A
            JR      NZ, brightloop ; no text change, just update brightness

            ; Advance scroll position (16-bit)
            LD      HL, (scrollpos)
            INC     HL
            LD      DE, (buflen)
            OR      A              ; clear carry
            SBC     HL, DE
            JR      C, nowrap
            LD      HL, 0
            JR      savescroll
nowrap:
            ADD     HL, DE         ; restore scrollpos
savescroll:
            LD      (scrollpos), HL
            JP      painttext

exit:
            ; Read key to clear it
            LD      C, C_READ
            CALL    BDOS
            JP      P_TERMCPM

; --- Constants ---
DELAY_COUNT EQU     0x4000          ; faster than scrolltext (brightness updates more often)

; --- Data ---
prompt:     DB      'Enter scroll text: $'
scrollmsg:  DB      'Scrolling with effects... press any key to stop', 13, 10, '$'
crlf:       DB      13, 10, '$'

inbuf:      DB      255
            DB      0
            DS      256            ; +1 for CR terminator

scrollpos:  DW      0              ; 16-bit scroll offset
brightpos:  DB      0
framecnt:   DB      0
buflen:     DW      0              ; 16-bit scroll position count
winptr:     DW      0

padbuf:     DS      303            ; 24 + 255 + 24

            INCLUDE "../font.asm"
            INCLUDE "../sine64.asm"
Again, a hefty slice of code pie, but most of this should look very familiar from last time. I've separated the main loop into two sections paintloop and brightloop to make it easier to follow. The only bit that's new is writing the LED brightness values:
; --- Update brightness every frame ---
brightloop:
            LD      C, 0           ; column counter
brightcol:
            LD      A, C
            CP      24
            JR      Z, brightdone

            PUSH    BC

            LD      A, (brightpos)
            ADD     A, C           ; A = column + brightpos
            AND     63             ; modulo 64
            LD      E, A
            LD      D, 0
            LD      HL, sine64
            ADD     HL, DE
            LD      A, (HL)        ; A = brightness value

            LD      B, A           ; save brightness in B
            LD      A, C           ; A = column
            LD      C, B           ; C = brightness
            CALL    MBB_LED_BRIGHTNESS

            POP     BC
            INC     C
            JR      brightcol
We're writing brightness values to each of the 24 LED characters that we've pulled from our sine table, which only has 64 entries so we're using AND 63 to do some modulo arithmetic.
Once we've finished a 'frame' or iteration, we delay and check for a keypress as before, and then we do this:
; --- Advance brightness offset every frame ---
            LD      A, (brightpos)
            INC     A
            AND     63
            LD      (brightpos), A

; --- Advance text scroll every 4th frame ---
            LD      A, (framecnt)
            INC     A
            AND     3
            LD      (framecnt), A
            JR      NZ, brightloop ; no text change, just update brightness

            ; Advance scroll position (16-bit)
            LD      HL, (scrollpos)
            INC     HL
            LD      DE, (buflen)
            OR      A              ; clear carry
            SBC     HL, DE
            JR      C, nowrap
            LD      HL, 0
            JR      savescroll
nowrap:
            ADD     HL, DE         ; restore scrollpos
savescroll:
            LD      (scrollpos), HL
            JP      painttext
Here we're incrementing brightpos every time around, because we want our brightness wave to be fast. We're also updating framecnt, but we only advance the text scroll position every 4th increment of framecnt.
Assembling the code
You can assemble the code manually with sjasmplus --raw=effects.com effects.asm and if all goes well you'll produce a file effects.com that you can run on your 'Beast. Or add it to your script/Makefile if you went down that route.
Running the code
The procedure to run effects.com on the 'Beast is similar to what we've used before, but slightly shorter:
Boot your 'Beast
SLIDE the EFFECTS.COM file from the repo across to your 'Beast's B drive
while still logged-in to the B drive, type EFFECTS and hit enter
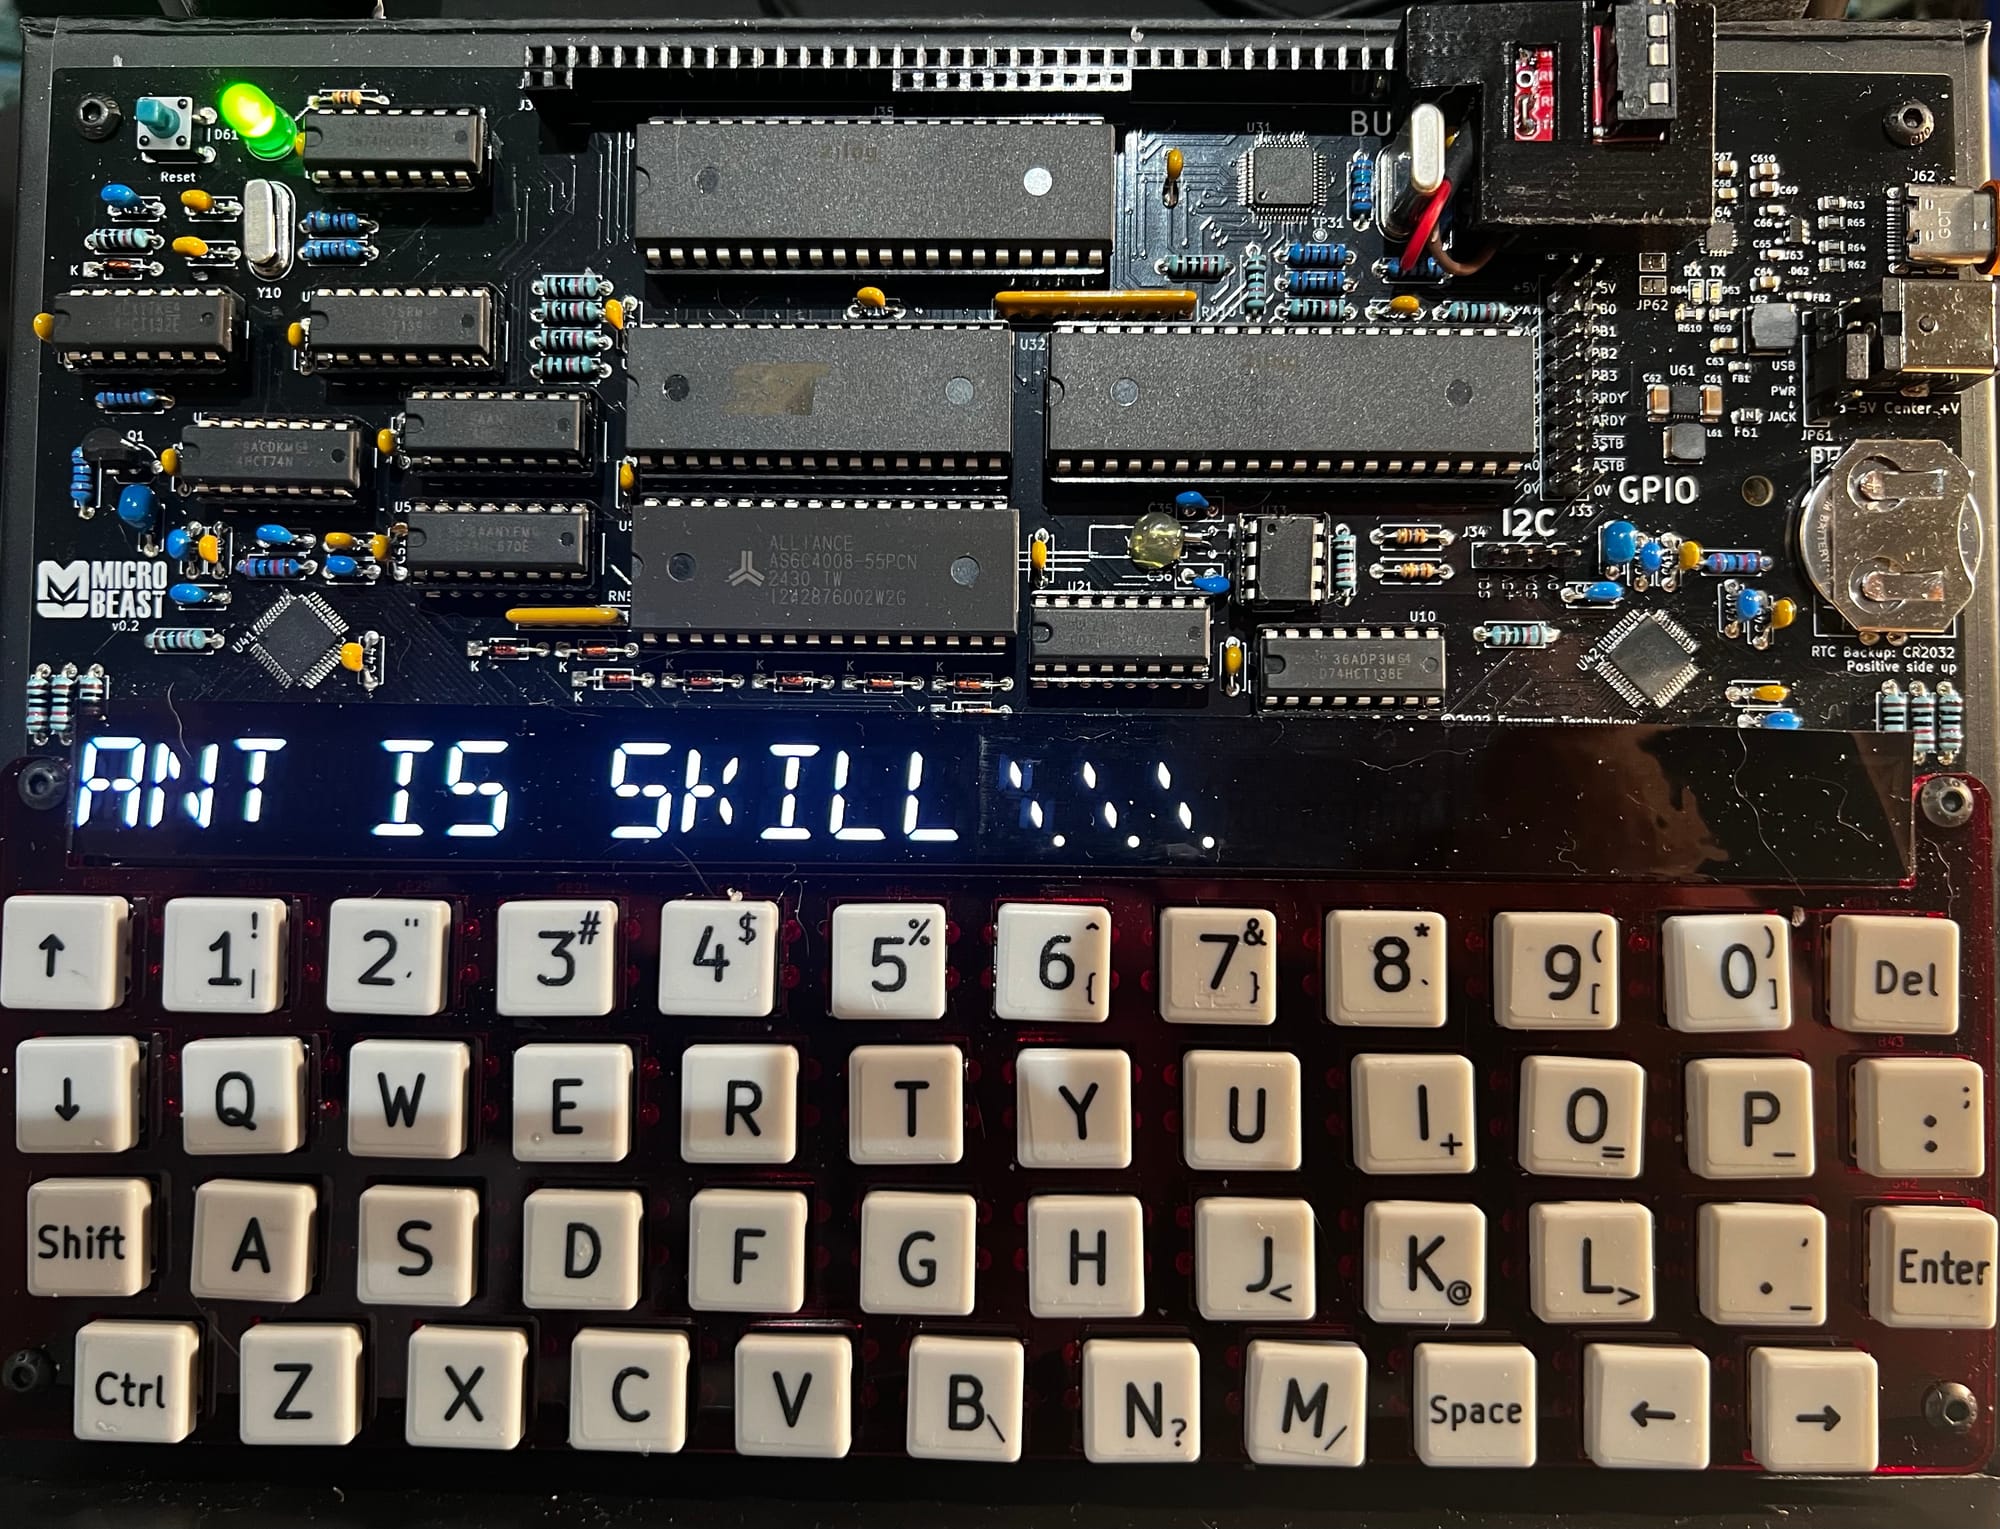
All being well, you should see this (your string might be different):
Things you can try
Experiment with different delay values
how would you speed up or slow down the brightness wave relative to the scroll speed?
can you make the brightness wave go in the opposite direction?
can you make the scrolling text go in the opposite direction?
can you think of any other cool effects you could add? Maybe by having a different brightness lookup table?
End of the series
That's the end of Part Ten, and the end of the series. Well done for making it this far! I hope these articles have inspired you explore the potential of your 'Beast, and that you're now fizzing with ideas for new machine code routines.
Until next time...
microbeast
Your name in lights! (Part 10)
Last time in Your name in lights! (Part 9), we got a simple scrolltext that can scroll any text the user enters working.
This time we're going to add a bit of bling and resurrect our brightness wave, and hopefully we'll see that machine code has
This time, we're going to get the rudimentary scrolltext working, building on the stuff we've already looked at.
To move forward, I'm going to assume that you've got SLIDE.COM on the B: drive of your 'Beast, and that you have the corresponding PC utility installed somewhere in your PATH on your development PC. Refer to the SLIDE README if you need more help with that.
We're going to start in the scrolltext/assembler/scrolltext folder.
Background info
Just like the previous example, we're going prompt the user for the string, decode the characters of that string into font symbols, and display them on the screen - but this time they'll be scrolling!
Here's the code:
; MicroBeast LED Demo - Step 4: Scrolling Text
; Scroll user-input text continuously across the 24-character LED display.
; Text is padded with 24 spaces on each side so it scrolls in and out.
;
; Build: sjasmplus --raw=scrolltext.com scrolltext.asm
; Run:   scrolltext.com under CP/M on MicroBeast
;

            ORG     0x100

            INCLUDE "../bios.inc"

; --- Print prompt ---
            LD      DE, prompt
            LD      C, C_WRITESTR
            CALL    BDOS

; --- Read user input ---
            LD      DE, inbuf
            LD      C, C_READSTR
            CALL    BDOS

            LD      DE, crlf
            LD      C, C_WRITESTR
            CALL    BDOS

; --- Build padded buffer: 24 spaces + text + 24 spaces ---
            ; Fill padbuf with 303 spaces (24 + 255 + 24)
            LD      HL, padbuf
            LD      BC, 303
            LD      A, ' '
clrbuf:
            LD      (HL), A
            INC     HL
            DEC     BC
            LD      A, B
            OR      C
            LD      A, ' '
            JR      NZ, clrbuf

            ; Copy user text into padbuf+24
            LD      A, (inbuf+1)   ; string length
            OR      A
            JR      Z, startscroll ; empty string, just scroll blanks
            LD      B, A           ; B = length (max 255)
            LD      HL, inbuf+2    ; source
            LD      DE, padbuf+24  ; destination (after 24 spaces)
copytxt:
            LD      A, (HL)
            LD      (DE), A
            INC     HL
            INC     DE
            DJNZ    copytxt

; Calculate number of scroll positions: textlen + 25 (16-bit)
startscroll:
            LD      A, (inbuf+1)
            LD      L, A
            LD      H, 0
            LD      BC, 25         ; + 24 + 1
            ADD     HL, BC
            LD      (buflen), HL

            LD      DE, scrollmsg
            LD      C, C_WRITESTR
            CALL    BDOS

; --- Main scroll loop ---
            LD      HL, 0
            LD      (scrollpos), HL

scrollloop:
; --- Display 24 characters from current scroll position ---
            LD      HL, (scrollpos)
            LD      DE, padbuf
            ADD     HL, DE         ; HL = start of visible window
            LD      (winptr), HL

            LD      C, 0           ; C = column counter (0-23)
disploop:
            LD      A, C
            CP      24
            JR      Z, dispdone

            ; Get character at window position
            LD      HL, (winptr)
            LD      E, C
            LD      D, 0
            ADD     HL, DE
            LD      A, (HL)        ; A = character

            ; Font lookup
            SUB     0x20
            CP      95
            JR      C, validchar
            XOR     A              ; invalid -> space (index 0)
validchar:
            ADD     A, A           ; * 2
            LD      E, A
            LD      D, 0
            LD      HL, font
            ADD     HL, DE
            LD      A, (HL)
            INC     HL
            LD      H, (HL)
            LD      L, A           ; HL = bitmask

            LD      A, C           ; column
            PUSH    BC             ; preserve C=column across BIOS call
            CALL    MBB_WRITE_LED
            POP     BC

            INC     C
            JR      disploop

dispdone:
; --- Delay loop for scroll speed ---
            LD      HL, DELAY_COUNT
delay:
            DEC     HL
            LD      A, H
            OR      L
            JR      NZ, delay

; --- Check for keypress (BDOS function 11 = console status) ---
            LD      C, 11
            CALL    BDOS
            OR      A
            JR      NZ, exit       ; key pressed, exit

; --- Advance scroll position (16-bit) ---
            LD      HL, (scrollpos)
            INC     HL
            LD      DE, (buflen)
            OR      A              ; clear carry
            SBC     HL, DE         ; scrollpos - buflen
            JR      C, nowrap      ; if scrollpos < buflen, keep it
            LD      HL, 0          ; wrap to start
            JR      savescroll
nowrap:
            ADD     HL, DE         ; restore: HL = scrollpos (undo the SBC)
savescroll:
            LD      (scrollpos), HL
            JR      scrollloop

exit:
            ; Read the key to clear it
            LD      C, 1
            CALL    BDOS
            JP      P_TERMCPM

; --- Constants ---
DELAY_COUNT EQU     0x8000          ; tune this for scroll speed

; --- Data ---
prompt:     DB      'Enter scroll text: $'
scrollmsg:  DB      'Scrolling... press any key to stop', 13, 10, '$'
crlf:       DB      13, 10, '$'

inbuf:      DB      255            ; max chars
            DB      0              ; chars read
            DS      256            ; input buffer (+1 for CR terminator)

scrollpos:  DW      0              ; current scroll offset (16-bit)
buflen:     DW      0              ; number of scroll positions (16-bit)
winptr:     DW      0              ; pointer to current window start

padbuf:     DS      303            ; 24 + 255 + 24

            INCLUDE "../font.asm"
That's quite a chunky bit of code now. This is quite common with assembly code: it takes a lot of lines to achieve even the simplest task, but remember that each line gets assembled into just one, two or three bytes.
Set up and user string input is exactly the same as before. So is font decoding and character display. There are a couple of bits of extra house keeping that we've added:
            ; Fill padbuf with 303 spaces (24 + 255 + 24)
            LD      HL, padbuf
            LD      BC, 303
            LD      A, ' '
clrbuf:
            LD      (HL), A
            INC     HL
            DEC     BC
            LD      A, B
            OR      C
            LD      A, ' '
            JR      NZ, clrbuf
First off, we're using a fixed buffer that's the size of the maximum length of the user string (255 characters) plus one displaysworth of characters (24) on the front, and another at the end. We'll fill the whole thing with blank SPACE characters. We set BC to this length (303), set HL to the beginning of the buffer, and write a SPACE character to it. Then we increment HL, decrement BC and check if it reached zero yet. The sequence LD A, B: OR C: JR NZ ... is a common idiom for checking if a 16-bit register pair is equal to zero (if BC is zero then B is zero and C is zero so "B OR B" must be zero).
Next we plonk the user's string at character 25 onwards:
            ; Copy user text into padbuf+24
            LD      A, (inbuf+1)   ; string length
            OR      A
            JR      Z, startscroll ; empty string, just scroll blanks
            LD      B, A           ; B = length (max 255)
            LD      HL, inbuf+2    ; source
            LD      DE, padbuf+24  ; destination (after 24 spaces)
copytxt:
            LD      A, (HL)
            LD      (DE), A
            INC     HL
            INC     DE
            DJNZ    copytxt
You should be able to follow along here, except maybe OR A which is another very common idiom for "is A equal to zero?" - because if it is, the Z (zero) flag will be set. People use this idiom because it can be encoded in a single byte and takes only 4 T-states to execute, whereas the nearest equivalent CP 0 takes two bytes to encode and 7 T-states to execute. Incidentally, the OR A does technically modify A, but any number OR'd with itself is the same as the original number, so the effect is ephemeral. This is why it's safe to LD B,A after the OR instruction.
We keep the string length (the number of characters that we need to copy) in the register B, because it allows us to use the special (and frankly magical) instruction DJNZ copytxt. DJNZ stands for decrement and jump if not zero - decrement B, if it's not zero jump to copytxt, if it is zero continue with the immediately following instruction. The Z80 has a number of block data transfer operations like this that are significantly faster than the equivalent code you might write longhand. You'll encounter on your journey (most likely LDIR first) - it really was very advanced for the time.
The main scrollloop is a fairly straightforward affair and is mostly code we've seen before. The only twist is that each time we display a string, we start from one character further to the right than last time.
Once we've finished a single display iteration, we delay:
dispdone:
; --- Delay loop for scroll speed ---
            LD      HL, DELAY_COUNT
delay:
            DEC     HL
            LD      A, H
            OR      L
            JR      NZ, delay
This is a busy loop delay: a fairly crude technique where we just have the CPU do absolutely nothing in a tight loop many thousands of times until we've delayed it sufficiently. There's that OR L trick again, this time checking if the 16-bit HL register pair has hit zero.
One final bit of business:
; --- Check for keypress (BDOS function 11) ---
            LD      C, C_STAT
            CALL    BDOS
            OR      A
            JR      NZ, exit       ; key pressed, exit
Here we're using another standard CP/M BIOS call C_STAT which returns non-zero in A id the user pressed a key. If they did, we exit cleanly and return to CP/M. We do this so that the user has a way to exit cleanly: if we didn't the program would run forever, and the only way to stop it would be to reset the processor.
Note that if the user did press a key we are duty bound to read it:
exit:
            ; Read the key to clear it
            LD      C, C_READ
            CALL    BDOS
            JP      P_TERMCPM
C_READ is another standard BDOS function that reads the key value, which we simply discard.
Assembling the code
You can assemble the code manually with sjasmplus --raw=scroltxt.com scrolltext.asm and if all goes well you'll produce a file scroltxt.com that you can run on your 'Beast. Or add it to your script/Makefile if you went down that route.
Running the code
The procedure to run scroltxt.com on the 'Beast is similar to what we've used before, but slightly shorter:
Boot your 'Beast
SLIDE the SCROLTXT.COM file from the repo across to your 'Beast's B drive
while still logged-in to the B drive, type SCROLTXT and hit enter
All being well, you should see this (your string might be different):
Things you can try
Experiment with different delay values to see how fast it can go!
End of Part Nine
That's it for Part Nine and our first stab at implementing a machine code scrolltext.
Next time in Your name in lights! (Part 10) we'll look at adding the brightness wave, and hopefully its a bit more impressive than last time around!
microbeast
Your name in lights! (Part 9)
Last time in Your name in lights! (Part 8), we sort out font decoding and managed to display some basic strings based on user input.
This time, we're going to get the rudimentary scrolltext working, building on the stuff we've already looked at.
To move forward,
This time around there's a bit less theory and a bit more practical - in fact, it's a double header! We're going to cover the same ground as two of the earlier BASIC examples - such is the efficiency of machine code!
To move forward, I'm going to assume that you've got SLIDE.COM on the B: drive of your 'Beast, and that you have the corresponding PC utility installed somewhere in your PATH on your development PC. Refer to the SLIDE README if you need more help with that.
We're going to start in the scrolltext/assembler/fonts folder and then move on to the scrolltext/assembler/strings folder.
Background info
Just like the earlier basic examples, we're going to deal with the issue of font tables and encoding ASCII values to bitmaps, and then we'll go on to displaying a user-entered string on the LEDs.
Font encoding
Without further ado, let's have a look at the code for doing ASCII to bitmap conversion:
;
; MicroBeast LED Demo - Step 2: Font Rendering
; Display "HELLO" on the last 5 LED positions (columns 19-23)
; using the font table to look up 14-segment bitmasks.
;
; Build: sjasmplus --raw=fonts.com fonts.asm
; Run:   fonts.com under CP/M on MicroBeast
;

            ORG     0x100

            INCLUDE "../bios.inc"

; --- Display "HELLO" on columns 19-23 ---
; For each character:
;   1. Get ASCII code
;   2. Subtract 0x20 (space) to get font table index
;   3. Multiply by 2 (each entry is a 16-bit word)
;   4. Add font table base address
;   5. Load 16-bit bitmask from table into HL
;   6. Set A = column number
;   7. Call MBB_WRITE_LED

            ; 'H' = 0x48, column 19
            LD      A, 'H' - 0x20   ; font index for 'H'
            ADD     A, A            ; multiply by 2 (word size)
            LD      E, A
            LD      D, 0
            LD      HL, font
            ADD     HL, DE          ; HL = address of bitmask for 'H'
            LD      A, (HL)
            INC     HL
            LD      H, (HL)
            LD      L, A            ; HL = bitmask
            LD      A, 19           ; column 19
            CALL    MBB_WRITE_LED

            ; 'E' = 0x45, column 20
            LD      A, 'E' - 0x20
            ADD     A, A
            LD      E, A
            LD      D, 0
            LD      HL, font
            ADD     HL, DE
            LD      A, (HL)
            INC     HL
            LD      H, (HL)
            LD      L, A
            LD      A, 20
            CALL    MBB_WRITE_LED

            ; 'L' = 0x4C, column 21
            LD      A, 'L' - 0x20
            ADD     A, A
            LD      E, A
            LD      D, 0
            LD      HL, font
            ADD     HL, DE
            LD      A, (HL)
            INC     HL
            LD      H, (HL)
            LD      L, A
            LD      A, 21
            CALL    MBB_WRITE_LED

            ; 'L' = 0x4C, column 22
            LD      A, 'L' - 0x20
            ADD     A, A
            LD      E, A
            LD      D, 0
            LD      HL, font
            ADD     HL, DE
            LD      A, (HL)
            INC     HL
            LD      H, (HL)
            LD      L, A
            LD      A, 22
            CALL    MBB_WRITE_LED

            ; 'O' = 0x4F, column 23
            LD      A, 'O' - 0x20
            ADD     A, A
            LD      E, A
            LD      D, 0
            LD      HL, font
            ADD     HL, DE
            LD      A, (HL)
            INC     HL
            LD      H, (HL)
            LD      L, A
            LD      A, 23
            CALL    MBB_WRITE_LED

            JP      P_TERMCPM

            INCLUDE "../font.asm"
Quite a bit more to get our heads around this time! But don't be alarmed by the length: there are five near-identical blocks of code here, one to display each of the letters in 'H', 'E', 'L', 'L' and 'O'. This is called loop unrolling - instead of looping around some common code 5 times with slightly different inputs, we unrolled the loop into 5 ever so slightly different steps. It's usually done for speed/efficiency, but here it's just for pedagogic reasons. There's one more file I need to show you, and that's the included font.asm table:
;
; Font definition for MicroBeast 14-segment LED displays
;
; Extracted from the MicroBeast firmware repository:
; https://github.com/atoone/MicroBeast/blob/main/firmware/font.asm
;
; Copyright (c) 2023 Andy Toone for Feersum Technology Ltd.
;
; Part of the MicroBeast Z80 kit computer project. Support hobby electronics.
;
; Permission is hereby granted, free of charge, to any person obtaining a copy
; of this software and associated documentation files (the "Software"), to deal
; in the Software without restriction, including without limitation the rights
; to use, copy, modify, merge, publish, distribute, sublicense, and/or sell
; copies of the Software, and to permit persons to whom the Software is
; furnished to do so, subject to the following conditions:
;
; The above copyright notice and this permission notice shall be included in all
; copies or substantial portions of the Software.
;
; THE SOFTWARE IS PROVIDED "AS IS", WITHOUT WARRANTY OF ANY KIND, EXPRESS OR
; IMPLIED, INCLUDING BUT NOT LIMITED TO THE WARRANTIES OF MERCHANTABILITY,
; FITNESS FOR A PARTICULAR PURPOSE AND NONINFRINGEMENT. IN NO EVENT SHALL THE
; AUTHORS OR COPYRIGHT HOLDERS BE LIABLE FOR ANY CLAIM, DAMAGES OR OTHER
; LIABILITY, WHETHER IN AN ACTION OF CONTRACT, TORT OR OTHERWISE, ARISING FROM,
; OUT OF OR IN CONNECTION WITH THE SOFTWARE OR THE USE OR OTHER DEALINGS IN THE
; SOFTWARE.
;
; Font table: 16-bit bitmask per character, indexed by ASCII code.
; To look up a character:
;   1. Subtract 0x20 (space) from ASCII code
;   2. Multiply by 2 (each entry is a 16-bit word)
;   3. Add to font base address
;   4. Read 16-bit word into HL (L=outer segments, H=inner/diagonal)
;
; Format: .dw value  ; where low byte = outer segments, high byte = inner segments
;

INVALID_CHAR_BITMASK    EQU 0x04861

font:
                    dw      0x0000   ; (space)
                    dw      0x4900   ; !
                    dw      0x0202   ; "
                    dw      0x12CE   ; #
                    dw      0x12ED   ; $
                    dw      0x2DE4   ; %
                    dw      0x0B59   ; &
                    dw      0x0200   ; '
                    dw      0x0C00   ; (
                    dw      0x2100   ; )
                    dw      0x3FC0   ; *
                    dw      0x12C0   ; +
                    dw      0x2000   ; ,
                    dw      0x00C0   ; -
                    dw      0x4000   ; .
                    dw      0x2400   ; /

                    dw      0x243F   ; 0
                    dw      0x0406   ; 1
                    dw      0x00DB   ; 2
                    dw      0x008F   ; 3
                    dw      0x00E6   ; 4
                    dw      0x0869   ; 5
                    dw      0x00FD   ; 6
                    dw      0x1401   ; 7
                    dw      0x00FF   ; 8
                    dw      0x00EF   ; 9
                    dw      0x0040   ; :
                    dw      0x2200   ; ;
                    dw      0x0C40   ; <
                    dw      0x00C8   ; =
                    dw      0x2180   ; >
                    dw      0x5083   ; ?

                    dw      0x02BB   ; @
                    dw      0x00F7   ; A
                    dw      0x128F   ; B
                    dw      0x0039   ; C
                    dw      0x120F   ; D
                    dw      0x0079   ; E
                    dw      0x0071   ; F
                    dw      0x00BD   ; G
                    dw      0x00F6   ; H
                    dw      0x1209   ; I
                    dw      0x001E   ; J
                    dw      0x0C70   ; K
                    dw      0x0038   ; L
                    dw      0x0536   ; M
                    dw      0x0936   ; N
                    dw      0x003F   ; O

                    dw      0x00F3   ; P
                    dw      0x083F   ; Q
                    dw      0x08F3   ; R
                    dw      0x00ED   ; S
                    dw      0x1201   ; T
                    dw      0x003E   ; U
                    dw      0x2430   ; V
                    dw      0x2836   ; W
                    dw      0x2D00   ; X
                    dw      0x00EE   ; Y
                    dw      0x2409   ; Z
                    dw      0x0039   ; [
                    dw      0x0900   ; backslash
                    dw      0x000F   ; ]
                    dw      0x2800   ; ^
                    dw      0x0008   ; _

                    dw      0x0100   ; `
                    dw      0x208C   ; a
                    dw      0x0878   ; b
                    dw      0x00D8   ; c
                    dw      0x208E   ; d
                    dw      0x2058   ; e
                    dw      0x14C0   ; f
                    dw      0x048E   ; g
                    dw      0x1070   ; h
                    dw      0x1000   ; i
                    dw      0x2210   ; j
                    dw      0x1E00   ; k
                    dw      0x1200   ; l
                    dw      0x10D4   ; m
                    dw      0x1050   ; n
                    dw      0x00DC   ; o

                    dw      0x0170   ; p
                    dw      0x0486   ; q
                    dw      0x0050   ; r
                    dw      0x0888   ; s
                    dw      0x0078   ; t
                    dw      0x001C   ; u
                    dw      0x2010   ; v
                    dw      0x2814   ; w
                    dw      0x2D00   ; x
                    dw      0x028E   ; y
                    dw      0x2048   ; z
                    dw      0x2149   ; {
                    dw      0x1200   ; |
                    dw      0x0C89   ; }
                    dw      0x24C0   ; ~
                    dw      0x0000   ; DEL
That probably looks quite familiar - it should do, I lifted it verbatim from the MicroBeast firmware, exactly like we did for the BASIC version, except this time I didn't have to convert it into a number format that BASIC can work with. dw is another assembler directive, it means define word, i.e. insert the following 16-bit value directly in the code.
Now let's look at the first character display code block:
            ; 'H' = 0x48, column 19
            LD      A, 'H' - 0x20   ; font index for 'H'
            ADD     A, A            ; multiply by 2 (word size)
            LD      E, A
            LD      D, 0
            LD      HL, font
            ADD     HL, DE          ; HL = address of bitmask for 'H'
            LD      A, (HL)
            INC     HL
            LD      H, (HL)
            LD      L, A            ; HL = bitmask
            LD      A, 19           ; column 19
            CALL    MBB_WRITE_LED
We load 'H' into the A register, then immediately subtract 32 (0x20) because we our font table starts at character 32 (space). We could have said LD A, 0x28, but getting the assembler to do simple arithmetic for us at assembly time is easy and has no penalty, and it makes it much clearer what's going on.
Once we have that value, we add A to itself, which of course has the effect of doubling A. We're doing this because we have an index into the 16-bit entries of the table (index 0 is word 0, index 1 is word 1, etc) but we need an index into the 8-bit bytes of the table, and since there are two 8-bit bytes in a 16-bit word doubling gets us there (index 0 is byte 0, index 1 is byte 2 etc).
Now we copy A into E, and set D to zero. This has the effect that 16-bit register pair DE just contains our byte offset in its lower byte and nothing in its upper byte.
We set HL to point to our font table, and add DE to it. Now we have (in HL) a pointer to the first byte (the low byte) of our 16 bit symbol bitmask. We load that byte into A with LD A, (HL) ("load A from the address in HL"), then we increment HL and fetch the high byte into H. This means HL no longer points at our font table, but we don't care because we're done with it now anyway.
Finally we move A (low byte of symbol bitmask) into L. H already contained the high byte of our bitmask, so now HL contains the entire 16 bit symbol bitmask, with the bytes in the right order. Happily, this is exactly what the BIOS routine requires, the only extra thing we need is a column number in A, which we achieve with LD A, 19 before making the CALL MBB_WRITE_LED.
Then it's simply a matter of repeating the whole shooting match for the other letters. Each time there's a different initial ASCII value, and a different column number.
If you were paying attention last time, you may be wondering why we're not bothering with PUSH BC and POP BC around the BIOS call to prevent clobbering. To be blunt: we don't care. It doesn't matter if the BIOS clobbers our registers, as we're setting them up from first principles each time.
Assembling the code
You can assemble the code manually with sjasmplus --raw=fonts.com fonts.asm and if all goes well you'll produce a file fonts.com that you can run on your 'Beast. Or add it to your script/Makefile if you went down that route.
Running the code
The procedure to run fonts.com on the 'Beast is similar to what we've used before, but slightly shorter:
Boot your 'Beast
SLIDE the FONTS.COM file from the repo across to your 'Beast's B drive
while still logged-in to the B drive, type FONTS and hit enter
All being well, you should see this (your string might be different):
Things you can try
Change the string that's displayed
Change where it's displayed
How would you go about replacing my gloriously decadent unrolled code with a loop? What precautions will you need to take?
String-u-like
Now lets turn our attention to strings.asm:
;
; MicroBeast LED Demo - Step 3: String Display
; Prompt the user for a string and display it on the 24-char LED display.
;
; Build: sjasmplus --raw=strings.com strings.asm
; Run:   strings.com under CP/M on MicroBeast
;

            ORG     0x100

            INCLUDE "../bios.inc"

; --- Print prompt ---
            LD      DE, prompt
            LD      C, C_WRITESTR
            CALL    BDOS

; --- Read user input via BDOS function 10 (buffered input) ---
; Buffer format: byte 0 = max chars, byte 1 = chars read, bytes 2+ = string
            LD      DE, inbuf
            LD      C, C_READSTR
            CALL    BDOS

; --- Print newline ---
            LD      DE, crlf
            LD      C, C_WRITESTR
            CALL    BDOS

; --- Display string on LEDs ---
            LD      A, (inbuf+1)   ; number of characters read
            LD      B, A           ; B = string length
            LD      C, 0           ; C = current column (0-23)

; Loop through all 24 columns
disploop:
            LD      A, C
            CP      24             ; done all columns?
            JR      Z, done

            ; Check if we still have characters to display
            LD      A, C
            CP      B              ; column >= string length?
            JR      NC, blank      ; yes, write blank

            ; Look up character in font table
            LD      HL, inbuf+2
            LD      E, C
            LD      D, 0
            ADD     HL, DE         ; HL = address of character
            LD      A, (HL)        ; A = ASCII character

            ; Font lookup: index = (ASCII - 0x20) * 2
            SUB     0x20
            CP      95             ; valid range? (0-94)
            JR      NC, blank      ; invalid char, show blank
            ADD     A, A           ; * 2
            LD      E, A
            LD      D, 0
            LD      HL, font
            ADD     HL, DE
            LD      A, (HL)
            INC     HL
            LD      H, (HL)
            LD      L, A           ; HL = bitmask
            JR      writled

blank:
            LD      HL, 0x0000      ; blank (all segments off)

writled:
            LD      A, C           ; column number
            PUSH    BC             ; preserve B=length, C=column across BIOS call
            CALL    MBB_WRITE_LED
            POP     BC

            INC     C              ; next column
            JR      disploop

done:
            JP      P_TERMCPM

; --- Data ---
prompt:     DB      'Enter text (max 24 chars): $'
crlf:       DB      13, 10, '$'
inbuf:      DB      24              ; max 24 characters
            DB      0               ; chars read (filled by BDOS)
            DS      25              ; input buffer space (+1 for CR terminator)

            INCLUDE "../font.asm"
First off, we need an equivalent to BASIC's INPUT$ so we can prompt the user for the string they want to display. Luckily this is a standard feature of CP/M, provided by the BDOS (Basic Disk Operating System). Unlike the custom 'Beast BIOS calls we've been making thus far, this will work on any CP/M 2.2 computer.
Unlike BASIC's INPUT$ we have to do all the individual tasks ourselves:
print the prompt
gather the user's input
print a new line after
but BDOS can handle each of those. The way it works is, you set a BDOS function code in the C register, put any neccessary parameters in the DE register, and call the well-known BDOS entry point, which bios.inc provides for us.
The first such function code is C_WRITESTR - write a string to the output device(s). We pass the string address (prompt) in the DE register. The string must be terminated with a '$' character.
💡
You might be thinking: "wait...what?! what if I want to print a '$' character?!" and you wouldn't be the first. Quite a bizarre choice given that DR was an American company, and keen on chasing the almighty $$$ ...
Then we call a different function code C_READSTR, this time setting up DE to point to an area in memory where we describe where we would like the result to be stored (inbuf). This little block starts with the maximum size of the string we'll accept from the user (DB 24 - define byte), then there's a blank byte (DB 0) which BDOS will helpfully fill in with the string's actual length, then we leave a bunch of space to receive the string itself (DS 25 - define space). That's 24 characters plus the terminating character that will be added. Oddly this isn't '$', it's a carriage return. Even more odd, we don't actually need it as BDOS fills in the length of the string, but hey ho.
Once we've got the user's string, we call C_WRITESTR again to print a newline, and move the string length that got returned to us into the B register. We set C to zero to represent column zero.
The code at disploop is similar to our previous example, except this time the loop is definitely fully rolled. For each character from the input string (LD A, (HL) we do the ASCII -> font table byte offset conversion, fetch the symbol's bitmask (LD A, (HL); LD H, (HL)) and call MBB_WRITE_LED. Notice that this time we do include PUSH BC and POP BC because we have vital context (string length in B, column number in C) that must be preserved across the BIOS call.
In one final bit of business, if we run out of string characters before we reach the final column, or if the user string contains an ASCII code that we don't have a font entry for, we'll display the bitmask 0x0000 (all LEDs off) instead (blank).
Assembling the code (2)
You can assemble the code manually with sjasmplus --raw=strings.com stringss.asm and if all goes well you'll produce a file strings.com that you can run on your 'Beast. Or add it to your script/Makefile if you went down that route.
Running the code (2)
The procedure to run stringss.com on the 'Beast is the familiar:
Boot your 'Beast
SLIDE the STRINGS.COM file from the repo across to your 'Beast's B drive
while still logged-in to the B drive, type STRINGS and hit enter
All being well, you should see this (your string might be different):
Things you can try
How would you go about displaying the string backwards?
What's a different technique for displaying the string backwards?
Can you combine (1) and (2) to come up with a novel (albeit faintly ridiculous) alternative for displaying the string forwards?
End of Part Eight
That's it for Part Eight and our deeper dive into machine code and assembly language.
Last time in Your name in lights! (Part 7) we got a grounding in the fundamentals of machine code programming and managed to turn some LEDs segments on.
This time around there's a bit less theory and a bit more practical - in fact, it's a
Last time in Your name in lights! (Part 6) , we got a fancy scrolltext with brightness effects working, but were underwhelmed by its lack-lustre performance. Angry and tearful, we turned our red-rimmed eyes to the heavens and swore a dreadful oath to find a better way.
That quest starts here! We are going to learn Z80 assembly language programming, which is about the most fun you can have with your 'Beast. My cunning plan is to rework all the programs that we've already covered in the preceding BASIC articles, so it's probably a good idea to give those a once-over if you've skipped ahead.
To move forward, I'm going to assume that you've got SLIDE.COM on the B: drive of your 'Beast, and that you have the corresponding PC utility installed somewhere in your PATH on your development PC. Refer to the SLIDE README if you need more help with that.
We're going to start in the scrolltext/assembler/leds folder.
Background info
Any mug can write BASIC, but if you want to be 1337 you need to write machine code. That was true in the 80s, and it's even truer now!
Except we're not actually going to write machine code (which is just baffling screeds of incomprehensible numbers) - we're going to write assembly language, sometimes called "symbolic machine code", which is essentially a set of mnemonics that stand in for the baffling numbers, and which are easier for mere humans to manipulate.
In order to turn human-friendly assembly language into computer-friendly machine code, we use a piece of software called an assembler. These days, there are nearly as many different assemblers as there are z80 instructions (571, in case you were wondering!). They fall broadly into two camps: "native" assemblers are those which run on the same computer/operating system for which the assembly code is being written, and "cross" assemblers run on a different (usually beefier) computer than that for which the assembly code is intended. These days, cross-assembling is the obvious choice, as you get to take full advantage of your PC's massive storage, high-resolution display and integrated development environments with syntax highlighting, code completion, interactive help, AI etc etc.
My personal preference is SJASMPlus because it is fast, has a lot of useful features like structures and macros, and has good integration with modern IDE tools like VSCode. Its documentation is terse, but most queries are tractable given enough study.
Z80: TL;DR
I'm going to give the briefest possible overview of the Z80, as there is a vast amount of introductory material online. In essence, the z80 can load data from memory or an IO device, store data to memory or an IO device, or perform some rudimentary operations such as add and subtract on data. It has some rudimentary relational operators (is this thing bigger than this other thing?) and a good selection of logical operators (AND, OR, XOR). Data either lives in memory, which is large but relatively slow, or it lives in registers, which are scarce but fast. The z80 has 14 general purpose registers, two index registers, and a handful of other special purpose registers. Much of the fun of z80 programming is keeping as much state in these registers as possible without resorting to slow memory accesses. You'll quickly develop an obsession with minimising both the code size of your routines and their T-state count (getting them to run as efficiently as possible).
Back to BASICs
In Your name in lights! (Part 2) we wrote 4 strange characters to the LED display using a sizeable chunk of BASIC, and now we're going to repeat the exercise in assembly language. Here's the code:
;
; MicroBeast LED Demo - Step 1: Raw Segment Control
; Turn ON all 14 segments of the last 4 LED positions (columns 20-23)
;
; Build: sjasmplus --raw=leds.com leds.asm
; Run:   leds.com under CP/M on MicroBeast
;

            ORG     0x100            ; CP/M .com file starts at 0x100

            INCLUDE "../bios.inc"

; All 14 segments ON = 0x3FFF
; Low byte (L) = FFh = outer segments all on
; High byte (H) = 0x3F = inner/diagonal segments all on

            LD      B, 20          ; start at column 20
loop:
            LD      HL, 0x3FFF      ; all segments ON
            LD      A, B           ; column number
            PUSH    BC             ; preserve B across BIOS call
            CALL    MBB_WRITE_LED  ; write bitmask to LED
            POP     BC

            INC     B              ; next column
            LD      A, B
            CP      24             ; done all 4 columns (20-23)?
            JR      NZ, loop

            ; Exit cleanly to CP/M
            JP      P_TERMCPM
⚠️
My coding style is a little unusual: I prefer upper case mnemonics and 0x prefixes for hex numbers, whereas the modern fashion is lower case mnemonics and an h suffix for hex numbers.
Straight away I hope you'll notice how much more concise this code is than the equivalent BASIC program, largely because we don't have to jump through hoops to make BASIC call machine code - we're already in machine code! Nor do we have to worry about BASIC interpreting our data as floating point: in machine code land, everything's a byte or a word.
The ORG 0x100 line isn't an assembly language mnemonic, it's a directive - a special keyword that the assembler itself recognises and acts upon. In this case, we're telling it that we'd like our code to start at address 0x100, which is the standard place for CP/M programs. CP/M calls this part of memory the Transient Program Area or TPA. We stick to running our code in this area lest we overwrite some critical bit of memory that the operating system or firmware is using.
The INCLUDE "../bios.inc" line is another directive that tells the assembler to read the 'bios.inc' file, which contains the addresses of some BIOS routines that we're going to be using across all these examples. I've put them in an include file so that we don't repeat ourselves.
Next we load (LD) the 8-bit B register with the value 20, and start our main loop. The loop loads the value 0x3fff into 16-bit register pair HL, copies B into A and jumps to the BIOS routine with CALL MBB_WRITE_LED, which expects the bitmap in HL and the column number in A.
You'll notice some funny business surrounding the BIOS call; a PUSH BC beforehand, and a POP BC afterwards. What we're doing here is preserving the value of the 16-bit BC register before the call, and restoring it afterwards. We do this because we are reliant on our value in B being maintained, and we don't know what the BIOS does with the B register. In fact the BIOS "clobbers" B, so this bit of defensive coding proves prudent.
Once we've done that we increment B with INC B and check whether it has reached 24 yet (CP - compare). If not, we go around the loop again. Note that we had to copy B into A to do the comparison with 24. This is because the A register ("A" is for "accumulator") is usually the only one that can take part in arithmetic and logical operations, and the CP compare operation is essentially a subtract: if A was 24, the result will be zero and the Zero Flag (Z) will be set. If it wasn't 24, the zero flag will not be set. We can test this in the following jump relative, if not zero (JR NZ) instruction. There are two different ways that A can be not equal to 24: it can be greater than 24, or it can be less than 24. In the latter case, to make the subtraction work we'd have to "borrow" another bit, so the Carry (C) flag is set to indicate that the borrow happened, and we can JP C to jump on carry or JP NC to jump on no carry if we need to. Just remember that for unsigned integersZ is equal (A == n), else C (carry flag set) is less than (A < n), else NC (carry flag not set) is greater than (A > n). Things are a little but fruitier if you're comparing two signed numbers, but that's a wonder for another day.
🤔
And if you find this stuff fascinating consider this: the z80 actually does a subtraction (or a compare) by taking the two's complement of the subtrahend (the number being subtracted) and adding that to the minuend (the number being subtracted from). You make a two's complement by flipping all the bits and then adding 1, which the z80 does by inverting the register and setting the carry IN flag to 1. Then it does an "add with carry". If the result is bigger than 8 bits a carry out has occured and the carry flag is set. But the z80 remembers that the operation was originally a subtraction, and a borrow is the opposite of a carry, so the carry flag is flipped, becoming a 'borrow' bit for the purposes of subtractions and compares. Genius!
Once we're finished displaying characters, we JP P_TERMCPM which amounts to the same thing as JP 0x0 or a "jump through zero". This is a common way to exit a custom ("transient") program and return control to CP/M.
💡
This is the most common way to exit larger CP/M programs, but it is quite drastic and causes the CCP and BDOS to be reloaded from disk. CP/M calls this a "warm boot". For shorter programs that haven't messed about with CP/M's stack however a simple RET will return control to CP/M much more quickly. But, if you weren't as careful as you thought you were, it will almost certainly crash!
Assembling the code
You can assemble the code manually with sjasmplus --raw=leds.com leds.asm and if all goes well you'll produce a file leds.com that you can run on your 'Beast. That gets tedious quite quickly, so you might like to stick it in a script or Makefile to automate the process.
Running the code
The procedure to run leds.com on the 'Beast is similar to what we've used before, but slightly shorter:
Boot your 'Beast
SLIDE the LEDS.COM file from the repo across to your 'Beast's B drive
while still logged-in to the B drive, type LEDS and hit enter
All being well, you should see this (your string might be different):
Things you can try
Change the bitmap to some other symbol of your choosing
Try writing to all the columns instead of just the last four
Suppress the rising suspicion that I copied this section verbatim from the BASIC article
Useful references
There are so many z80 references on the internet that it's difficult to know where to start. I usually have these open:
I've also got a copy of "Programming the Z80" by Rodney Zaks to hand - there are loads of copies floating about and you can pick up a copy in decent condition for very little. It's great for checking status flag side effects of opcodes.
A lot of people swear by "z80 Assembly Language Programming" by Lance A. Leventhal - I've not been able to find an affordable copy, I fear it may have achieved "collector" status!
Speaking of which, when I first learned z80 it was from "Mastering machine code on your ZX Spectrum" by 80s scene legend Toni Baker. It's equally relevant to the 'Beast and will give you a solid foundation. Print copies are a bit hard to come by these days, but there are scans of the book online.
I'm not normally a VSCode fan (neovim FTW!) but it has excellent support for z80 development:
z80 Assembly Meter - select some code and see its byte count and T-state count in the status bar
vscode-neovim - make VSCode slightly more bearable ;)
End of Part Seven
That's it for Part Seven and our gentle introduction to machine code and assembly language.
Next time in Your name in lights! (Part 8) we'll look at font decoding and displaying arbitrary strings on the display.
microbeast
Your name in lights! (Part 7)
Last time in Your name in lights! (Part 6) , we got a fancy scrolltext with brightness effects working, but were underwhelmed by its lack-lustre performance. Angry and tearful, we turned our red-rimmed eyes to the heavens and swore a dreadful oath to find a better way.
That quest starts here!
We're going to be building on that foundation here, so if you skipped earlier parts or are still a little shaky on the fundamentals you might want to go back and read them again.
To move forward, I'm going to assume that you've got SLIDE.COM on the B: drive of your 'Beast, and that you have the corresponding PC utility installed somewhere in your PATH on your development PC. Refer to the SLIDE README if you need more help with that.
We're going to start in the scrolltext/basic/effects folder.
Background info
This time, we're going to build on our scrolltext program from before, but add a little bling.
In the first installment of this series I pointed you at the LED driver datasheet and just on the off-chance that you didn't pore over this document at the time, let me quote a bit of it here:
What this is telling us is that we can change the brightness of each character on our LED display, and that each character can be set to 256 different brightness levels!
This means we can do some cool fading effects by varying the brightness. In fact you might have noticed something similar when the 'Beast first boots. The fact that the firmware is already doing this might lead you to hope that perhaps there's a BIOS routine we can call to do the heavy lifting for us, and your faith is rewarded:
I've left the familiar MBB_WRITE_LED code on there for reference. This time we're interested in MBB_LED_BRIGHTNESS, and we can see that the address this resolves to (0FDD3h) is different from MBB_WRITE_LED (0FDD6h), and moreover this time the column is passed in the A register as before, but this time brightness is passed in the C register. (Note that the comment in the firmware header is wrong; there are actually 256 brightness levels, not 128.)
All of which means we're going to need another machine code stub to be able to call this routine.
The rough plan is, we'll send lovely shimmering waves of varying brightness along our text string as it's scrolling. In order to pull this off, we'll construct a lookup table where we've pre-computed brightness levels so that they follow a sine wave pattern, like this:
We could generate this lookup table in BASIC using the SIN() function, but it's a little awkward and frankly a lot easier to generate the values and cast them to integer values in the correct range using a python script on a modern PC, so that's exactly what I did.
Here's the code we'll be running this time:
10 REM === MicroBeast LED Demo - Step 5: Sine Wave Brightness ===
20 REM Scrolling text with a sine-wave brightness effect.
30 REM The brightness wave scrolls independently of the text.
40 REM
50 REM --- Machine code stub for MBB_WRITE_LED at 60000 (&HEA60) ---
60 REM CALL S%(BM%, C%) passes HL=&bitmask, DE=&column
70 S% = &HEA60
80 FOR I% = 0 TO 10: READ V%: POKE S%+I%, V%: NEXT I%
90 REM
100 REM --- Machine code stub for MBB_LED_BRIGHTNESS at 60011 (&HEA6B) ---
110 REM CALL B%(BR%, C%) passes HL=&brightness, DE=&column
120 REM   EX DE,HL / LD A,(HL) / EX DE,HL / LD C,(HL) / CALL &HFDD3 / RET
130 B% = &HEA6B
140 FOR I% = 0 TO 7: READ V%: POKE B%+I%, V%: NEXT I%
350 REM
360 REM --- Read font data into array (ASCII 32-126) ---
370 DIM FT%(94)
380 FOR I% = 0 TO 94: READ FT%(I%): NEXT I%
390 REM
400 REM --- Read sine table (64 entries, values 0-128) ---
410 DIM SN%(63)
420 FOR I% = 0 TO 63: READ SN%(I%): NEXT I%
430 REM
440 REM --- Get user input ---
450 INPUT "Enter scroll text: ", T$
470 REM
480 REM --- Build padded buffer ---
490 P$ = "                        ": REM 24 spaces
500 B$ = P$ + T$ + P$
510 BL% = LEN(B$)
520 REM
530 REM --- Main loop ---
540 PRINT "Scrolling with effects... press Ctrl-C to stop"
550 OF% = 1: REM text scroll offset (1-based)
560 BO% = 0: REM brightness wave offset
570 FC% = 0: REM frame counter
580 REM
590 REM --- Paint characters (only when text offset changes) ---
600 FOR C% = 0 TO 23
610   CH$ = MID$(B$, OF% + C%, 1)
620   IX% = ASC(CH$) - 32
630   IF IX% < 0 OR IX% > 94 THEN IX% = 0
640   BM% = FT%(IX%)
650   CALL S%(BM%, C%)
660 NEXT C%
670 REM
680 REM --- Brightness loop (runs every tick) ---
690 FOR C% = 0 TO 23
700   SI% = (C% + BO%) AND 63
710   BR% = SN%(SI%)
720   CALL B%(BR%, C%)
730 NEXT C%
740 REM
750 REM --- Advance brightness every tick, text every 4th tick ---
760 BO% = (BO% + 1) AND 63
770 FC% = (FC% + 1) AND 3
780 IF FC% <> 0 THEN 690
790 OF% = OF% + 1
800 IF OF% > BL% - 23 THEN OF% = 1
810 GOTO 600
840 REM
845 REM --- MBB_WRITE_LED stub (11 bytes) ---
846 DATA &HEB, &H7E, &HEB, &H5E, &H23, &H56, &HEB, &HCD, &HD6, &HFD, &HC9
847 REM
848 REM --- MBB_LED_BRIGHTNESS stub (8 bytes) ---
849 DATA &HEB, &H7E, &HEB, &H4E, &HCD, &HD3, &HFD, &HC9
850 REM
851 REM --- Font DATA (ASCII 32-126, 95 entries) ---
860 DATA &H0000, &H4900, &H0202, &H12CE, &H12ED, &H2DE4
870 DATA &H0B59, &H0200, &H0C00, &H2100, &H3FC0, &H12C0
880 DATA &H2000, &H00C0, &H4000, &H2400
890 DATA &H243F, &H0406, &H00DB, &H008F, &H00E6, &H0869
900 DATA &H00FD, &H1401, &H00FF, &H00EF, &H0040, &H2200
910 DATA &H0C40, &H00C8, &H2180, &H5083
920 DATA &H02BB, &H00F7, &H128F, &H0039, &H120F, &H0079
930 DATA &H0071, &H00BD, &H00F6, &H1209, &H001E, &H0C70
940 DATA &H0038, &H0536, &H0936, &H003F
950 DATA &H00F3, &H083F, &H08F3, &H00ED, &H1201, &H003E
960 DATA &H2430, &H2836, &H2D00, &H00EE, &H2409
970 DATA &H0039, &H0900, &H000F, &H2800, &H0008
980 DATA &H0100, &H208C, &H0878, &H00D8, &H208E, &H2058
990 DATA &H14C0, &H048E, &H1070, &H1000, &H2210
1000 DATA &H1E00, &H1200, &H10D4, &H1050, &H00DC
1010 DATA &H0170, &H0486, &H0050, &H0888, &H0078
1020 DATA &H001C, &H2010, &H2814, &H2D00, &H028E
1030 DATA &H2048, &H2149, &H1200, &H0C89, &H24C0
1040 REM
1050 REM --- Sine table (64 entries, values 0-255) ---
1060 DATA &H0080, &H008C, &H0098, &H00A5, &H00B0, &H00BC, &H00C6, &H00D0
1070 DATA &H00DA, &H00E2, &H00EA, &H00F0, &H00F5, &H00FA, &H00FD, &H00FE
1080 DATA &H00FF, &H00FE, &H00FD, &H00FA, &H00F5, &H00F0, &H00EA, &H00E2
1090 DATA &H00DA, &H00D0, &H00C6, &H00BC, &H00B0, &H00A5, &H0098, &H008C
1100 DATA &H0080, &H0073, &H0067, &H005A, &H004F, &H0043, &H0039, &H002F
1110 DATA &H0025, &H001D, &H0015, &H000F, &H000A, &H0005, &H0002, &H0001
1120 DATA &H0000, &H0001, &H0002, &H0005, &H000A, &H000F, &H0015, &H001D
1130 DATA &H0025, &H002F, &H0039, &H0043, &H004F, &H005A, &H0067, &H0073
Now you can see that we've got two machine code stubs (one for displaying characters and one for setting brightness) and also two lookup tables now (one for the "font" and one for our sine-wave of brightness values).
Our character display loop (which starts at line 600) has changed quite a bit. It starts out as before, then at line 680 we have:
680 REM --- Brightness loop (runs every tick) ---
690 FOR C% = 0 TO 23
700   SI% = (C% + BO%) AND 63
710   BR% = SN%(SI%)
720   CALL B%(BR%, C%)
730 NEXT C%
This goes through every column again, setting a suitable brightness value.
After that, we have this bit of chicanery:
750 REM --- Advance brightness every tick, text every 4th tick ---
760 BO% = (BO% + 1) AND 63
770 FC% = (FC% + 1) AND 3
780 IF FC% <> 0 THEN 690
790 OF% = OF% + 1
800 IF OF% > BL% - 23 THEN OF% = 1
What this is doing is incrementing both the brightness offset and the frame counter. When we increment the brightness offset, we AND 63 - this means that we keep only the bottom 6 bits of FC% so the effect is that whenever its value is 63 and we implement it, it wraps around to zero again.
This kind of modulo arithmetic with numbers that are a power of 2 is very, very common particularly in low level code like C or assembly language. The reason it's so ubiquitous is that a lot of maths operations in base 2 (binary) can easily be implemented with simple (and fast!) logic instructions that execute directly on the processor, like the AND we just saw. The alternative would be to do actual division and find the remainder, which is incredibly slow and tedious on old hardware like the z80. The z80 doesn't have a DIVIDE instruction, you'd have to write your own division routine.
We could of course use division in BASIC, but we'll come to why that's not such a great idea in a moment.
Running the code
This should be second nature by now:
Boot your 'Beast
SLIDE the EFFECTS.BAS file from the repo across to your 'Beast's B drive
"log in" to the A drive with A:
start MBasic with MBASIC
type LOAD "EFFECTS"
inspect it with LIST
run it with RUN
All being well, you should see this (your string might be different):
One thing you'll notice straight away is that it is monumentally slow. There's not even an artificial delay loop in there that we can tweak - this is running at full tilt! The sad truth is that while high-level languages like BASIC are great for learning how to code and writing simple programs, they squander a lot of the machine's power turning those fancy BASIC statements into machine code that the processor can execute.
To get more performance out of the processor (and believe me, it can go a lot faster!) we'll have to put aside BASIC, and like the bedroom-based game developers of yore teach ourselves z80 assembler..
Things you can try
Can you see any way to make the BASIC code quicker?
Try making the brightness wave go in the opposite direction!
It's not possible for the eye to actually discern 256 levels of brightness: how can you adjust the sine wave table so that the effect is more striking?
End of Part Six
That's it for Part Six, and also for MBasic! The good ship Microsoft has taken us as far as she can.
In the next part Your name in lights! (Part 7) we'll learn some z80 assembler, by re-implementing the programs we've already written.
If you're not quite ready for that yet and want to experiment a bit further in BASIC then by all means do so: experimentation is the best way to learn! I'd recommend upgrading from MBasic to BBC BASIC - it has mostly the same syntax but introduces a lot of features that make life a lot easier like multi-line IF statements and PROCedures. It's easier to call machine code in BBC BASIC too, and it has an excellent built-in assembler which you could use for the forthcoming articles if you wanted to.
If you want to dabble in other high-level languages you are spoilt for choice...there are CP/M implementations of Algol, COBOL, Fortran, Pascal, LISP, Forth, and C, and probably many more besides. These are easily found on the web, and most will run on the 'Beast without issue (just make sure it's the z80 + cp/m 2.2 version you're trying to run.
Well done for making it this far - the real fun is about to begin!
microbeast
Your name in lights! (Part 6)
Last time in Your name in lights! (Part 5), we get a basic scrolltext working and were able to scroll any message of our choosing.
We're going to be building on that foundation here, so if you skipped earlier parts or are still a little shaky on the