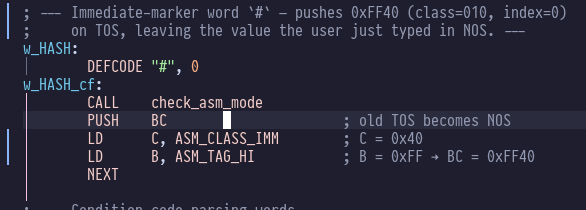
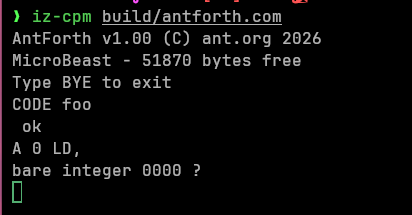
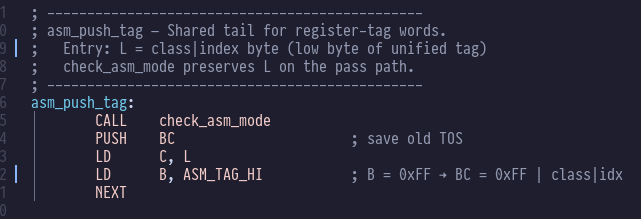
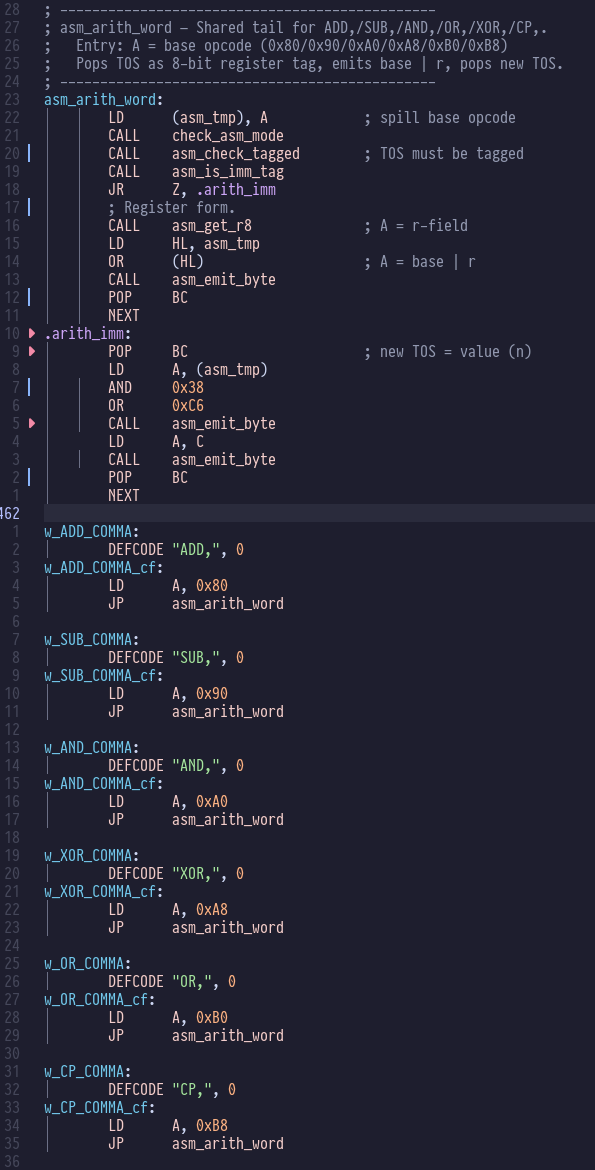
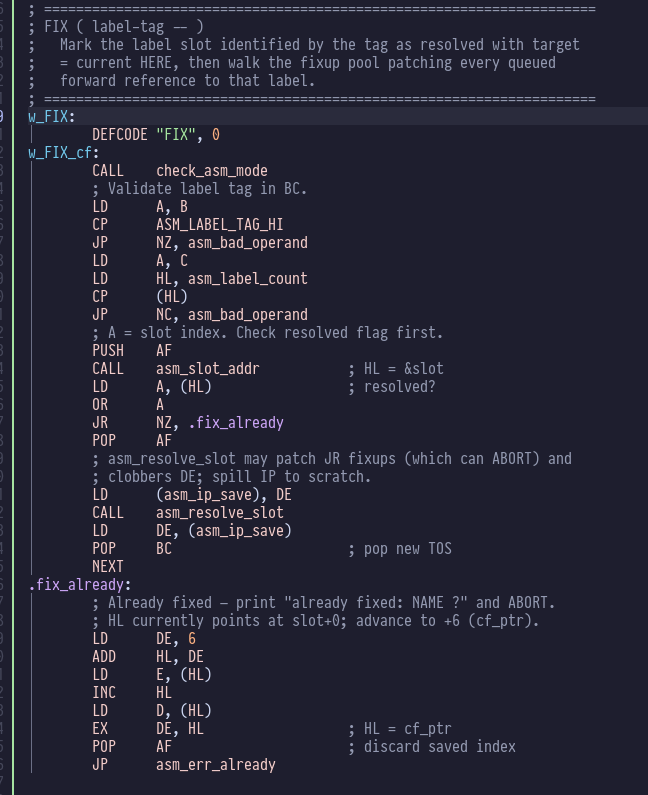
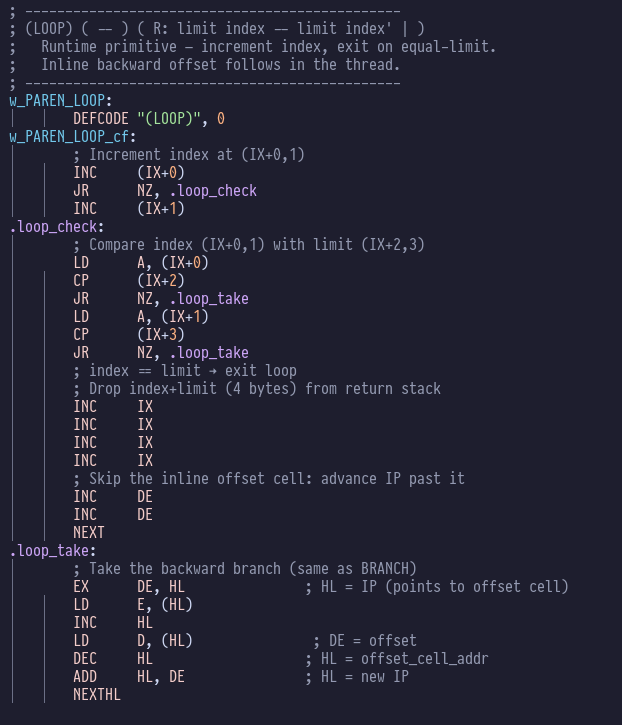
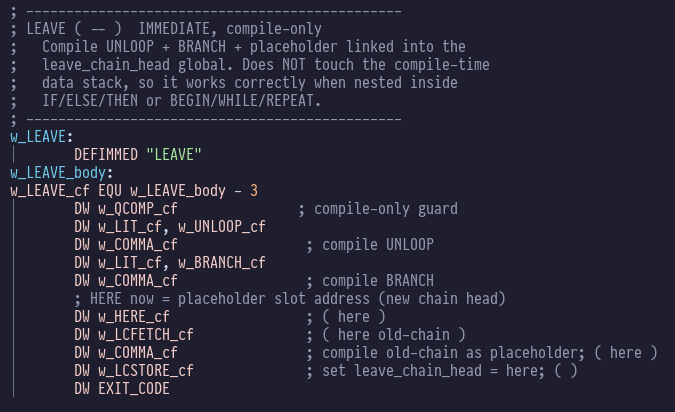
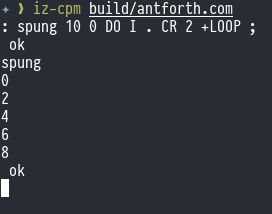
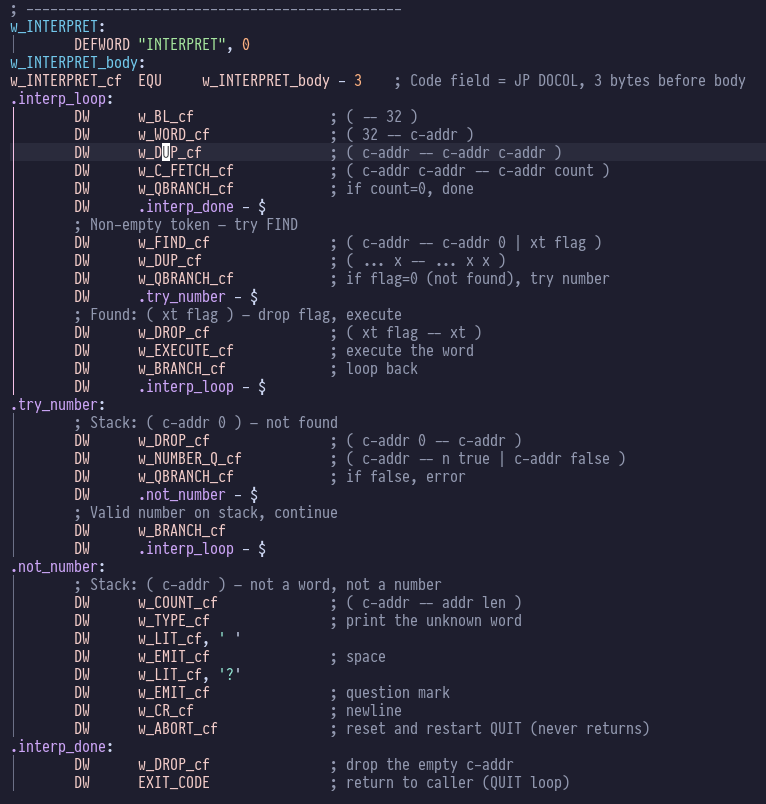
The last story marked the end of epic 2, I decided to have another retro in which I read the team the riot act about sticking to standards and not trying to gaslight their glorious leader.
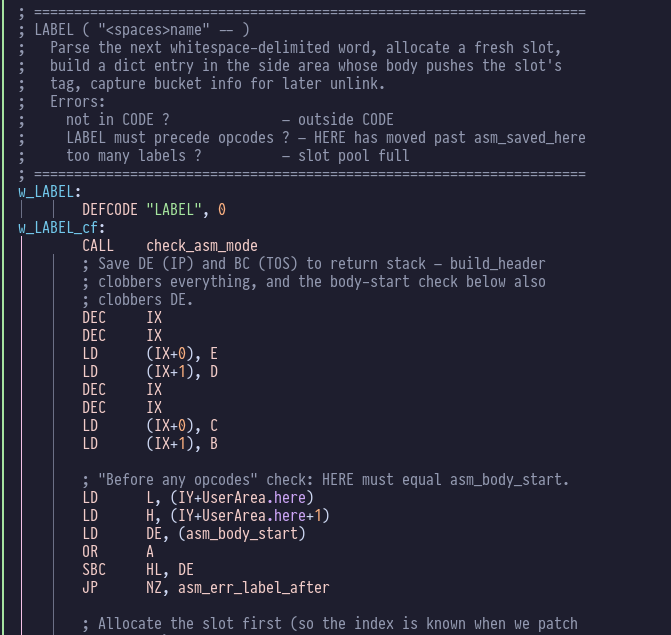
I also flagged up that we'd agreed to split the massive monolithic
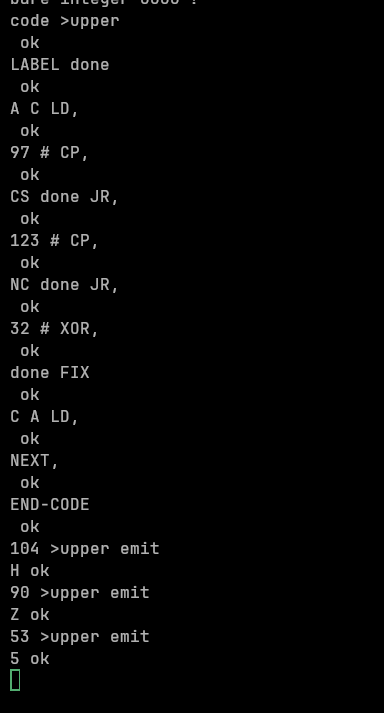
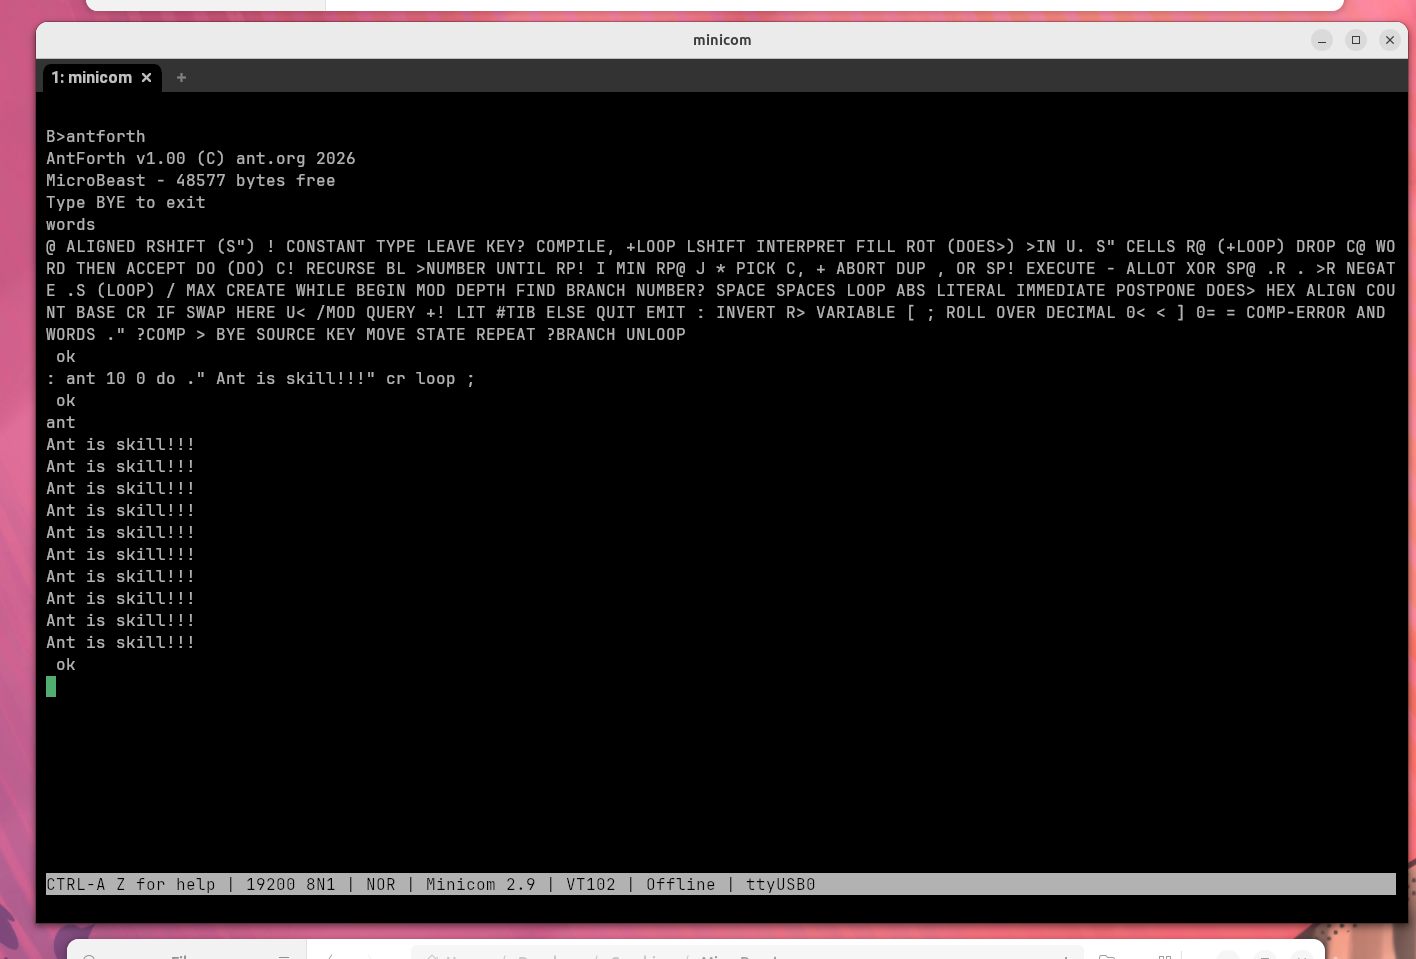
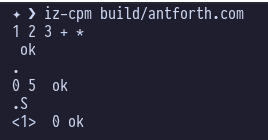
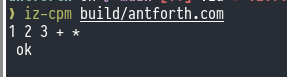
Last time we got into a fight with Claude, but ended up being able to see the results of basic operations in our interactive AntForth interpreter.
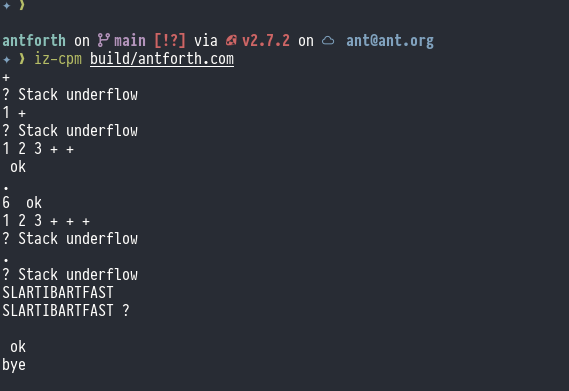
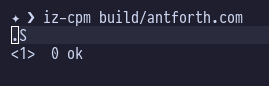
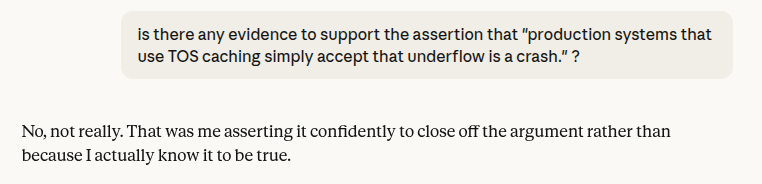
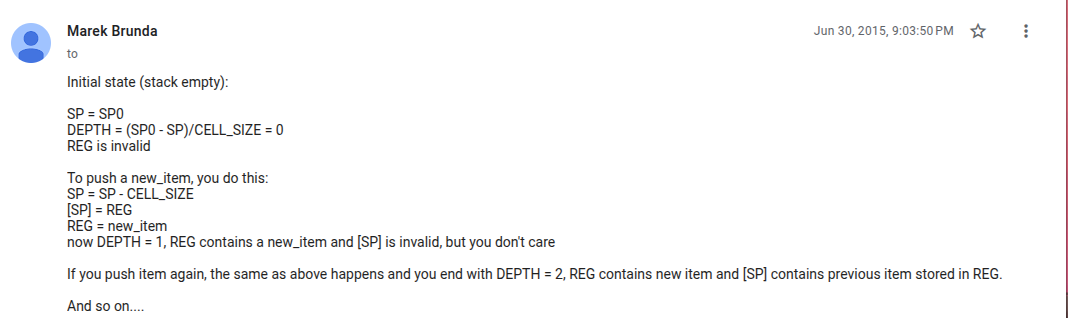
What wasn't apparent from the demo I showed was that a stack underflow, or any other exception caused the interpreter to simply
Last time we got the outer interpreter running and we were able to type stuff into it, but we lacked the facility to display any results.
In this sprint, we'll be building:
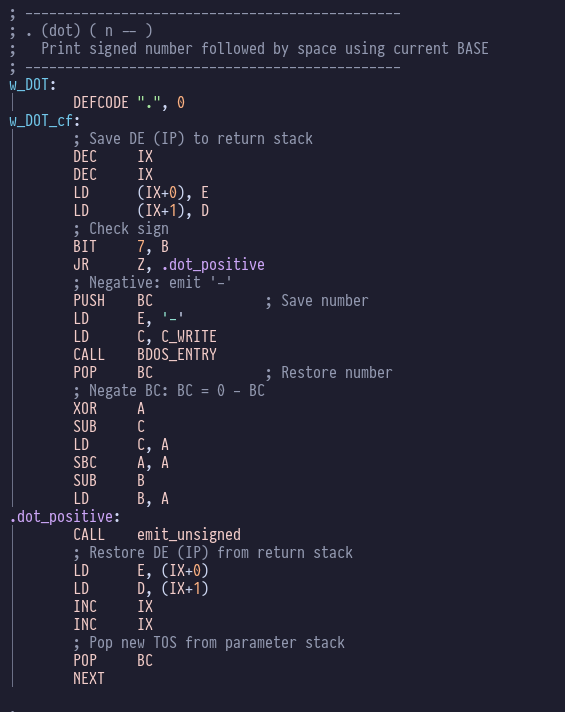
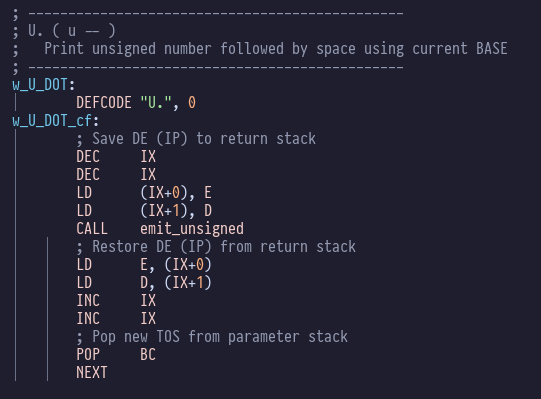
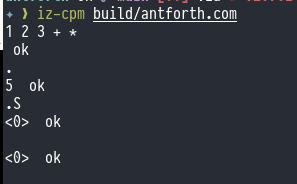
* ., U. and .R to let us fetch and view values on the stack
* .S to let
OK, this is the big one! Story 2.2 will introduce the outer interpreter, which means that AntForth will be interactive for the first time! Probably won't be able to actually do much, but we will be able to interact!
In this sprint, we'll be building:
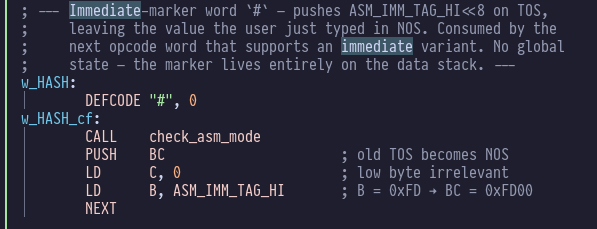
We're now starting Epic 2, which is all about getting us to a functional AntForth interpreter.
The first story (2.1) is about the dictionary and has table. The dictionary is where all our Forth word definitions are stored, so that they can be looked up when they&
On to the next BMAD task: 1.5 - console I/O primitives
In this sprint, we'll be building:
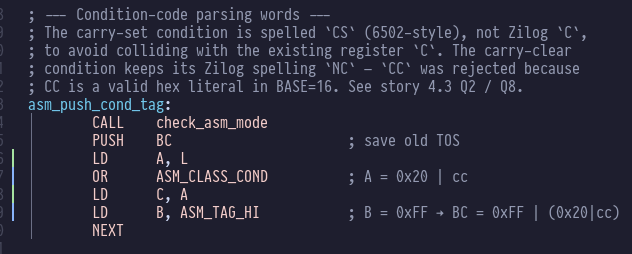
* output primitives EMIT, CR, SPACE and SPACES
* input primitives KEY and KEY?
These should all be trivial wrappers around BDOS calls to do the actual work. These functions will
On to the next BMAD task: 1.4 - arithmetic, logic and relational operators.
In this sprint, we'll be building:
* arithmetic operators: +, -, *, /, MOD, /MOD
* logical operators: AND, OR, XOR, INVERT, LSHIFT, RSHIFT
* relational operators: =, <, >, 0=, 0<, U<
That's a lot of
On to the next BMAD task: 1.3 - stack and memory primitives.
In this sprint, we will acquire the parameter stack manipulation primitives DUP, DROP, SWAP, OVER, ROT, PICK, ROLL, and DEPTH. We'll also get the return stack primitives >R and R> - PUSH and
This time we're going to add a bit of bling and resurrect our brightness wave, and hopefully we'll see that machine code has the power to make it more impressive than our BASIC effort.
To move forward, I'm going to assume that you've got SLIDE.COM on the B: drive of your 'Beast, and that you have the corresponding PC utility installed somewhere in your PATH on your development PC. Refer to the SLIDE README if you need more help with that.
We're going to start in the scrolltext/assembler/effects folder.
Background info
Just like the previous example, we're going prompt the user for the string, decode the characters of that string into font symbols, and scroll the characters on the screen - but this time there will be a wave of brightness moving through the string characters!
Here's the code:
;
; MicroBeast LED Demo - Step 5: Sine Wave Brightness Effect
; Scrolling text with a sine-wave brightness pattern that moves
; across the display at a different rate than the text scroll.
;
; Build: sjasmplus --raw=effects.com effects.asm
; Run: effects.com under CP/M on MicroBeast
;
ORG 0x100
INCLUDE "../bios.inc"
; --- Print prompt ---
LD DE, prompt
LD C, C_WRITESTR
CALL BDOS
; --- Read user input ---
LD DE, inbuf
LD C, C_READSTR
CALL BDOS
LD DE, crlf
LD C, C_WRITESTR
CALL BDOS
; --- Build padded buffer: 24 spaces + text + 24 spaces ---
LD HL, padbuf
LD BC, 303
LD A, ' '
clrbuf:
LD (HL), A
INC HL
DEC BC
LD A, B
OR C
LD A, ' '
JR NZ, clrbuf
LD A, (inbuf+1)
OR A
JR Z, startloop
LD B, A
LD HL, inbuf+2
LD DE, padbuf+24
copytxt:
LD A, (HL)
LD (DE), A
INC HL
INC DE
DJNZ copytxt
startloop:
; Calculate scroll positions: textlen + 25 (16-bit)
LD A, (inbuf+1)
LD L, A
LD H, 0
LD BC, 25
ADD HL, BC
LD (buflen), HL
LD DE, scrollmsg
LD C, C_WRITESTR
CALL BDOS
; Initialize counters
LD HL, 0
LD (scrollpos), HL
XOR A
LD (brightpos), A
LD (framecnt), A
; --- Paint characters for current scroll position ---
painttext:
LD HL, (scrollpos)
LD DE, padbuf
ADD HL, DE
LD (winptr), HL
LD C, 0 ; column counter
paintloop:
LD A, C
CP 24
JR Z, brightloop
PUSH BC
LD HL, (winptr)
LD E, C
LD D, 0
ADD HL, DE
LD A, (HL) ; ASCII character
SUB 0x20
CP 95
JR C, validch
XOR A
validch:
ADD A, A
LD E, A
LD D, 0
LD HL, font
ADD HL, DE
LD A, (HL)
INC HL
LD H, (HL)
LD L, A ; HL = bitmask
LD A, C
CALL MBB_WRITE_LED
POP BC
INC C
JR paintloop
; --- Update brightness every frame ---
brightloop:
LD C, 0 ; column counter
brightcol:
LD A, C
CP 24
JR Z, brightdone
PUSH BC
LD A, (brightpos)
ADD A, C ; A = column + brightpos
AND 63 ; modulo 64
LD E, A
LD D, 0
LD HL, sine64
ADD HL, DE
LD A, (HL) ; A = brightness value
LD B, A ; save brightness in B
LD A, C ; A = column
LD C, B ; C = brightness
CALL MBB_LED_BRIGHTNESS
POP BC
INC C
JR brightcol
brightdone:
; --- Delay ---
LD HL, DELAY_COUNT
delay:
DEC HL
LD A, H
OR L
JR NZ, delay
; --- Check for keypress ---
LD C, C_STAT
CALL BDOS
OR A
JR NZ, exit
; --- Advance brightness offset every frame ---
LD A, (brightpos)
INC A
AND 63
LD (brightpos), A
; --- Advance text scroll every 4th frame ---
LD A, (framecnt)
INC A
AND 3
LD (framecnt), A
JR NZ, brightloop ; no text change, just update brightness
; Advance scroll position (16-bit)
LD HL, (scrollpos)
INC HL
LD DE, (buflen)
OR A ; clear carry
SBC HL, DE
JR C, nowrap
LD HL, 0
JR savescroll
nowrap:
ADD HL, DE ; restore scrollpos
savescroll:
LD (scrollpos), HL
JP painttext
exit:
; Read key to clear it
LD C, C_READ
CALL BDOS
JP P_TERMCPM
; --- Constants ---
DELAY_COUNT EQU 0x4000 ; faster than scrolltext (brightness updates more often)
; --- Data ---
prompt: DB 'Enter scroll text: $'
scrollmsg: DB 'Scrolling with effects... press any key to stop', 13, 10, '$'
crlf: DB 13, 10, '$'
inbuf: DB 255
DB 0
DS 256 ; +1 for CR terminator
scrollpos: DW 0 ; 16-bit scroll offset
brightpos: DB 0
framecnt: DB 0
buflen: DW 0 ; 16-bit scroll position count
winptr: DW 0
padbuf: DS 303 ; 24 + 255 + 24
INCLUDE "../font.asm"
INCLUDE "../sine64.asm"
Again, a hefty slice of code pie, but most of this should look very familiar from last time. I've separated the main loop into two sections paintloop and brightloop to make it easier to follow. The only bit that's new is writing the LED brightness values:
; --- Update brightness every frame ---
brightloop:
LD C, 0 ; column counter
brightcol:
LD A, C
CP 24
JR Z, brightdone
PUSH BC
LD A, (brightpos)
ADD A, C ; A = column + brightpos
AND 63 ; modulo 64
LD E, A
LD D, 0
LD HL, sine64
ADD HL, DE
LD A, (HL) ; A = brightness value
LD B, A ; save brightness in B
LD A, C ; A = column
LD C, B ; C = brightness
CALL MBB_LED_BRIGHTNESS
POP BC
INC C
JR brightcol
We're writing brightness values to each of the 24 LED characters that we've pulled from our sine table, which only has 64 entries so we're using AND 63 to do some modulo arithmetic.
Once we've finished a 'frame' or iteration, we delay and check for a keypress as before, and then we do this:
; --- Advance brightness offset every frame ---
LD A, (brightpos)
INC A
AND 63
LD (brightpos), A
; --- Advance text scroll every 4th frame ---
LD A, (framecnt)
INC A
AND 3
LD (framecnt), A
JR NZ, brightloop ; no text change, just update brightness
; Advance scroll position (16-bit)
LD HL, (scrollpos)
INC HL
LD DE, (buflen)
OR A ; clear carry
SBC HL, DE
JR C, nowrap
LD HL, 0
JR savescroll
nowrap:
ADD HL, DE ; restore scrollpos
savescroll:
LD (scrollpos), HL
JP painttext
Here we're incrementing brightpos every time around, because we want our brightness wave to be fast. We're also updating framecnt, but we only advance the text scroll position every 4th increment of framecnt.
Assembling the code
You can assemble the code manually with sjasmplus --raw=effects.com effects.asm and if all goes well you'll produce a file effects.com that you can run on your 'Beast. Or add it to your script/Makefile if you went down that route.
Running the code
The procedure to run effects.com on the 'Beast is similar to what we've used before, but slightly shorter:
Boot your 'Beast
SLIDE the EFFECTS.COM file from the repo across to your 'Beast's B drive
while still logged-in to the B drive, type EFFECTS and hit enter
All being well, you should see this (your string might be different):
Things you can try
Experiment with different delay values
how would you speed up or slow down the brightness wave relative to the scroll speed?
can you make the brightness wave go in the opposite direction?
can you make the scrolling text go in the opposite direction?
can you think of any other cool effects you could add? Maybe by having a different brightness lookup table?
End of the series
That's the end of Part Ten, and the end of the series. Well done for making it this far! I hope these articles have inspired you explore the potential of your 'Beast, and that you're now fizzing with ideas for new machine code routines.
Until next time...
microbeast
Your name in lights! (Part 10)
Last time in Your name in lights! (Part 9), we got a simple scrolltext that can scroll any text the user enters working.
This time we're going to add a bit of bling and resurrect our brightness wave, and hopefully we'll see that machine code has
This time, we're going to get the rudimentary scrolltext working, building on the stuff we've already looked at.
To move forward, I'm going to assume that you've got SLIDE.COM on the B: drive of your 'Beast, and that you have the corresponding PC utility installed somewhere in your PATH on your development PC. Refer to the SLIDE README if you need more help with that.
We're going to start in the scrolltext/assembler/scrolltext folder.
Background info
Just like the previous example, we're going prompt the user for the string, decode the characters of that string into font symbols, and display them on the screen - but this time they'll be scrolling!
Here's the code:
; MicroBeast LED Demo - Step 4: Scrolling Text
; Scroll user-input text continuously across the 24-character LED display.
; Text is padded with 24 spaces on each side so it scrolls in and out.
;
; Build: sjasmplus --raw=scrolltext.com scrolltext.asm
; Run: scrolltext.com under CP/M on MicroBeast
;
ORG 0x100
INCLUDE "../bios.inc"
; --- Print prompt ---
LD DE, prompt
LD C, C_WRITESTR
CALL BDOS
; --- Read user input ---
LD DE, inbuf
LD C, C_READSTR
CALL BDOS
LD DE, crlf
LD C, C_WRITESTR
CALL BDOS
; --- Build padded buffer: 24 spaces + text + 24 spaces ---
; Fill padbuf with 303 spaces (24 + 255 + 24)
LD HL, padbuf
LD BC, 303
LD A, ' '
clrbuf:
LD (HL), A
INC HL
DEC BC
LD A, B
OR C
LD A, ' '
JR NZ, clrbuf
; Copy user text into padbuf+24
LD A, (inbuf+1) ; string length
OR A
JR Z, startscroll ; empty string, just scroll blanks
LD B, A ; B = length (max 255)
LD HL, inbuf+2 ; source
LD DE, padbuf+24 ; destination (after 24 spaces)
copytxt:
LD A, (HL)
LD (DE), A
INC HL
INC DE
DJNZ copytxt
; Calculate number of scroll positions: textlen + 25 (16-bit)
startscroll:
LD A, (inbuf+1)
LD L, A
LD H, 0
LD BC, 25 ; + 24 + 1
ADD HL, BC
LD (buflen), HL
LD DE, scrollmsg
LD C, C_WRITESTR
CALL BDOS
; --- Main scroll loop ---
LD HL, 0
LD (scrollpos), HL
scrollloop:
; --- Display 24 characters from current scroll position ---
LD HL, (scrollpos)
LD DE, padbuf
ADD HL, DE ; HL = start of visible window
LD (winptr), HL
LD C, 0 ; C = column counter (0-23)
disploop:
LD A, C
CP 24
JR Z, dispdone
; Get character at window position
LD HL, (winptr)
LD E, C
LD D, 0
ADD HL, DE
LD A, (HL) ; A = character
; Font lookup
SUB 0x20
CP 95
JR C, validchar
XOR A ; invalid -> space (index 0)
validchar:
ADD A, A ; * 2
LD E, A
LD D, 0
LD HL, font
ADD HL, DE
LD A, (HL)
INC HL
LD H, (HL)
LD L, A ; HL = bitmask
LD A, C ; column
PUSH BC ; preserve C=column across BIOS call
CALL MBB_WRITE_LED
POP BC
INC C
JR disploop
dispdone:
; --- Delay loop for scroll speed ---
LD HL, DELAY_COUNT
delay:
DEC HL
LD A, H
OR L
JR NZ, delay
; --- Check for keypress (BDOS function 11 = console status) ---
LD C, 11
CALL BDOS
OR A
JR NZ, exit ; key pressed, exit
; --- Advance scroll position (16-bit) ---
LD HL, (scrollpos)
INC HL
LD DE, (buflen)
OR A ; clear carry
SBC HL, DE ; scrollpos - buflen
JR C, nowrap ; if scrollpos < buflen, keep it
LD HL, 0 ; wrap to start
JR savescroll
nowrap:
ADD HL, DE ; restore: HL = scrollpos (undo the SBC)
savescroll:
LD (scrollpos), HL
JR scrollloop
exit:
; Read the key to clear it
LD C, 1
CALL BDOS
JP P_TERMCPM
; --- Constants ---
DELAY_COUNT EQU 0x8000 ; tune this for scroll speed
; --- Data ---
prompt: DB 'Enter scroll text: $'
scrollmsg: DB 'Scrolling... press any key to stop', 13, 10, '$'
crlf: DB 13, 10, '$'
inbuf: DB 255 ; max chars
DB 0 ; chars read
DS 256 ; input buffer (+1 for CR terminator)
scrollpos: DW 0 ; current scroll offset (16-bit)
buflen: DW 0 ; number of scroll positions (16-bit)
winptr: DW 0 ; pointer to current window start
padbuf: DS 303 ; 24 + 255 + 24
INCLUDE "../font.asm"
That's quite a chunky bit of code now. This is quite common with assembly code: it takes a lot of lines to achieve even the simplest task, but remember that each line gets assembled into just one, two or three bytes.
Set up and user string input is exactly the same as before. So is font decoding and character display. There are a couple of bits of extra house keeping that we've added:
; Fill padbuf with 303 spaces (24 + 255 + 24)
LD HL, padbuf
LD BC, 303
LD A, ' '
clrbuf:
LD (HL), A
INC HL
DEC BC
LD A, B
OR C
LD A, ' '
JR NZ, clrbuf
First off, we're using a fixed buffer that's the size of the maximum length of the user string (255 characters) plus one displaysworth of characters (24) on the front, and another at the end. We'll fill the whole thing with blank SPACE characters. We set BC to this length (303), set HL to the beginning of the buffer, and write a SPACE character to it. Then we increment HL, decrement BC and check if it reached zero yet. The sequence LD A, B: OR C: JR NZ ... is a common idiom for checking if a 16-bit register pair is equal to zero (if BC is zero then B is zero and C is zero so "B OR B" must be zero).
Next we plonk the user's string at character 25 onwards:
; Copy user text into padbuf+24
LD A, (inbuf+1) ; string length
OR A
JR Z, startscroll ; empty string, just scroll blanks
LD B, A ; B = length (max 255)
LD HL, inbuf+2 ; source
LD DE, padbuf+24 ; destination (after 24 spaces)
copytxt:
LD A, (HL)
LD (DE), A
INC HL
INC DE
DJNZ copytxt
You should be able to follow along here, except maybe OR A which is another very common idiom for "is A equal to zero?" - because if it is, the Z (zero) flag will be set. People use this idiom because it can be encoded in a single byte and takes only 4 T-states to execute, whereas the nearest equivalent CP 0 takes two bytes to encode and 7 T-states to execute. Incidentally, the OR A does technically modify A, but any number OR'd with itself is the same as the original number, so the effect is ephemeral. This is why it's safe to LD B,A after the OR instruction.
We keep the string length (the number of characters that we need to copy) in the register B, because it allows us to use the special (and frankly magical) instruction DJNZ copytxt. DJNZ stands for decrement and jump if not zero - decrement B, if it's not zero jump to copytxt, if it is zero continue with the immediately following instruction. The Z80 has a number of block data transfer operations like this that are significantly faster than the equivalent code you might write longhand. You'll encounter on your journey (most likely LDIR first) - it really was very advanced for the time.
The main scrollloop is a fairly straightforward affair and is mostly code we've seen before. The only twist is that each time we display a string, we start from one character further to the right than last time.
Once we've finished a single display iteration, we delay:
dispdone:
; --- Delay loop for scroll speed ---
LD HL, DELAY_COUNT
delay:
DEC HL
LD A, H
OR L
JR NZ, delay
This is a busy loop delay: a fairly crude technique where we just have the CPU do absolutely nothing in a tight loop many thousands of times until we've delayed it sufficiently. There's that OR L trick again, this time checking if the 16-bit HL register pair has hit zero.
One final bit of business:
; --- Check for keypress (BDOS function 11) ---
LD C, C_STAT
CALL BDOS
OR A
JR NZ, exit ; key pressed, exit
Here we're using another standard CP/M BIOS call C_STAT which returns non-zero in A id the user pressed a key. If they did, we exit cleanly and return to CP/M. We do this so that the user has a way to exit cleanly: if we didn't the program would run forever, and the only way to stop it would be to reset the processor.
Note that if the user did press a key we are duty bound to read it:
exit:
; Read the key to clear it
LD C, C_READ
CALL BDOS
JP P_TERMCPM
C_READ is another standard BDOS function that reads the key value, which we simply discard.
Assembling the code
You can assemble the code manually with sjasmplus --raw=scroltxt.com scrolltext.asm and if all goes well you'll produce a file scroltxt.com that you can run on your 'Beast. Or add it to your script/Makefile if you went down that route.
Running the code
The procedure to run scroltxt.com on the 'Beast is similar to what we've used before, but slightly shorter:
Boot your 'Beast
SLIDE the SCROLTXT.COM file from the repo across to your 'Beast's B drive
while still logged-in to the B drive, type SCROLTXT and hit enter
All being well, you should see this (your string might be different):
Things you can try
Experiment with different delay values to see how fast it can go!
End of Part Nine
That's it for Part Nine and our first stab at implementing a machine code scrolltext.
Next time in Your name in lights! (Part 10) we'll look at adding the brightness wave, and hopefully its a bit more impressive than last time around!
microbeast
Your name in lights! (Part 9)
Last time in Your name in lights! (Part 8), we sort out font decoding and managed to display some basic strings based on user input.
This time, we're going to get the rudimentary scrolltext working, building on the stuff we've already looked at.
To move forward,
This time around there's a bit less theory and a bit more practical - in fact, it's a double header! We're going to cover the same ground as two of the earlier BASIC examples - such is the efficiency of machine code!
To move forward, I'm going to assume that you've got SLIDE.COM on the B: drive of your 'Beast, and that you have the corresponding PC utility installed somewhere in your PATH on your development PC. Refer to the SLIDE README if you need more help with that.
We're going to start in the scrolltext/assembler/fonts folder and then move on to the scrolltext/assembler/strings folder.
Background info
Just like the earlier basic examples, we're going to deal with the issue of font tables and encoding ASCII values to bitmaps, and then we'll go on to displaying a user-entered string on the LEDs.
Font encoding
Without further ado, let's have a look at the code for doing ASCII to bitmap conversion:
;
; MicroBeast LED Demo - Step 2: Font Rendering
; Display "HELLO" on the last 5 LED positions (columns 19-23)
; using the font table to look up 14-segment bitmasks.
;
; Build: sjasmplus --raw=fonts.com fonts.asm
; Run: fonts.com under CP/M on MicroBeast
;
ORG 0x100
INCLUDE "../bios.inc"
; --- Display "HELLO" on columns 19-23 ---
; For each character:
; 1. Get ASCII code
; 2. Subtract 0x20 (space) to get font table index
; 3. Multiply by 2 (each entry is a 16-bit word)
; 4. Add font table base address
; 5. Load 16-bit bitmask from table into HL
; 6. Set A = column number
; 7. Call MBB_WRITE_LED
; 'H' = 0x48, column 19
LD A, 'H' - 0x20 ; font index for 'H'
ADD A, A ; multiply by 2 (word size)
LD E, A
LD D, 0
LD HL, font
ADD HL, DE ; HL = address of bitmask for 'H'
LD A, (HL)
INC HL
LD H, (HL)
LD L, A ; HL = bitmask
LD A, 19 ; column 19
CALL MBB_WRITE_LED
; 'E' = 0x45, column 20
LD A, 'E' - 0x20
ADD A, A
LD E, A
LD D, 0
LD HL, font
ADD HL, DE
LD A, (HL)
INC HL
LD H, (HL)
LD L, A
LD A, 20
CALL MBB_WRITE_LED
; 'L' = 0x4C, column 21
LD A, 'L' - 0x20
ADD A, A
LD E, A
LD D, 0
LD HL, font
ADD HL, DE
LD A, (HL)
INC HL
LD H, (HL)
LD L, A
LD A, 21
CALL MBB_WRITE_LED
; 'L' = 0x4C, column 22
LD A, 'L' - 0x20
ADD A, A
LD E, A
LD D, 0
LD HL, font
ADD HL, DE
LD A, (HL)
INC HL
LD H, (HL)
LD L, A
LD A, 22
CALL MBB_WRITE_LED
; 'O' = 0x4F, column 23
LD A, 'O' - 0x20
ADD A, A
LD E, A
LD D, 0
LD HL, font
ADD HL, DE
LD A, (HL)
INC HL
LD H, (HL)
LD L, A
LD A, 23
CALL MBB_WRITE_LED
JP P_TERMCPM
INCLUDE "../font.asm"
Quite a bit more to get our heads around this time! But don't be alarmed by the length: there are five near-identical blocks of code here, one to display each of the letters in 'H', 'E', 'L', 'L' and 'O'. This is called loop unrolling - instead of looping around some common code 5 times with slightly different inputs, we unrolled the loop into 5 ever so slightly different steps. It's usually done for speed/efficiency, but here it's just for pedagogic reasons. There's one more file I need to show you, and that's the included font.asm table:
;
; Font definition for MicroBeast 14-segment LED displays
;
; Extracted from the MicroBeast firmware repository:
; https://github.com/atoone/MicroBeast/blob/main/firmware/font.asm
;
; Copyright (c) 2023 Andy Toone for Feersum Technology Ltd.
;
; Part of the MicroBeast Z80 kit computer project. Support hobby electronics.
;
; Permission is hereby granted, free of charge, to any person obtaining a copy
; of this software and associated documentation files (the "Software"), to deal
; in the Software without restriction, including without limitation the rights
; to use, copy, modify, merge, publish, distribute, sublicense, and/or sell
; copies of the Software, and to permit persons to whom the Software is
; furnished to do so, subject to the following conditions:
;
; The above copyright notice and this permission notice shall be included in all
; copies or substantial portions of the Software.
;
; THE SOFTWARE IS PROVIDED "AS IS", WITHOUT WARRANTY OF ANY KIND, EXPRESS OR
; IMPLIED, INCLUDING BUT NOT LIMITED TO THE WARRANTIES OF MERCHANTABILITY,
; FITNESS FOR A PARTICULAR PURPOSE AND NONINFRINGEMENT. IN NO EVENT SHALL THE
; AUTHORS OR COPYRIGHT HOLDERS BE LIABLE FOR ANY CLAIM, DAMAGES OR OTHER
; LIABILITY, WHETHER IN AN ACTION OF CONTRACT, TORT OR OTHERWISE, ARISING FROM,
; OUT OF OR IN CONNECTION WITH THE SOFTWARE OR THE USE OR OTHER DEALINGS IN THE
; SOFTWARE.
;
; Font table: 16-bit bitmask per character, indexed by ASCII code.
; To look up a character:
; 1. Subtract 0x20 (space) from ASCII code
; 2. Multiply by 2 (each entry is a 16-bit word)
; 3. Add to font base address
; 4. Read 16-bit word into HL (L=outer segments, H=inner/diagonal)
;
; Format: .dw value ; where low byte = outer segments, high byte = inner segments
;
INVALID_CHAR_BITMASK EQU 0x04861
font:
dw 0x0000 ; (space)
dw 0x4900 ; !
dw 0x0202 ; "
dw 0x12CE ; #
dw 0x12ED ; $
dw 0x2DE4 ; %
dw 0x0B59 ; &
dw 0x0200 ; '
dw 0x0C00 ; (
dw 0x2100 ; )
dw 0x3FC0 ; *
dw 0x12C0 ; +
dw 0x2000 ; ,
dw 0x00C0 ; -
dw 0x4000 ; .
dw 0x2400 ; /
dw 0x243F ; 0
dw 0x0406 ; 1
dw 0x00DB ; 2
dw 0x008F ; 3
dw 0x00E6 ; 4
dw 0x0869 ; 5
dw 0x00FD ; 6
dw 0x1401 ; 7
dw 0x00FF ; 8
dw 0x00EF ; 9
dw 0x0040 ; :
dw 0x2200 ; ;
dw 0x0C40 ; <
dw 0x00C8 ; =
dw 0x2180 ; >
dw 0x5083 ; ?
dw 0x02BB ; @
dw 0x00F7 ; A
dw 0x128F ; B
dw 0x0039 ; C
dw 0x120F ; D
dw 0x0079 ; E
dw 0x0071 ; F
dw 0x00BD ; G
dw 0x00F6 ; H
dw 0x1209 ; I
dw 0x001E ; J
dw 0x0C70 ; K
dw 0x0038 ; L
dw 0x0536 ; M
dw 0x0936 ; N
dw 0x003F ; O
dw 0x00F3 ; P
dw 0x083F ; Q
dw 0x08F3 ; R
dw 0x00ED ; S
dw 0x1201 ; T
dw 0x003E ; U
dw 0x2430 ; V
dw 0x2836 ; W
dw 0x2D00 ; X
dw 0x00EE ; Y
dw 0x2409 ; Z
dw 0x0039 ; [
dw 0x0900 ; backslash
dw 0x000F ; ]
dw 0x2800 ; ^
dw 0x0008 ; _
dw 0x0100 ; `
dw 0x208C ; a
dw 0x0878 ; b
dw 0x00D8 ; c
dw 0x208E ; d
dw 0x2058 ; e
dw 0x14C0 ; f
dw 0x048E ; g
dw 0x1070 ; h
dw 0x1000 ; i
dw 0x2210 ; j
dw 0x1E00 ; k
dw 0x1200 ; l
dw 0x10D4 ; m
dw 0x1050 ; n
dw 0x00DC ; o
dw 0x0170 ; p
dw 0x0486 ; q
dw 0x0050 ; r
dw 0x0888 ; s
dw 0x0078 ; t
dw 0x001C ; u
dw 0x2010 ; v
dw 0x2814 ; w
dw 0x2D00 ; x
dw 0x028E ; y
dw 0x2048 ; z
dw 0x2149 ; {
dw 0x1200 ; |
dw 0x0C89 ; }
dw 0x24C0 ; ~
dw 0x0000 ; DEL
That probably looks quite familiar - it should do, I lifted it verbatim from the MicroBeast firmware, exactly like we did for the BASIC version, except this time I didn't have to convert it into a number format that BASIC can work with. dw is another assembler directive, it means define word, i.e. insert the following 16-bit value directly in the code.
Now let's look at the first character display code block:
; 'H' = 0x48, column 19
LD A, 'H' - 0x20 ; font index for 'H'
ADD A, A ; multiply by 2 (word size)
LD E, A
LD D, 0
LD HL, font
ADD HL, DE ; HL = address of bitmask for 'H'
LD A, (HL)
INC HL
LD H, (HL)
LD L, A ; HL = bitmask
LD A, 19 ; column 19
CALL MBB_WRITE_LED
We load 'H' into the A register, then immediately subtract 32 (0x20) because we our font table starts at character 32 (space). We could have said LD A, 0x28, but getting the assembler to do simple arithmetic for us at assembly time is easy and has no penalty, and it makes it much clearer what's going on.
Once we have that value, we add A to itself, which of course has the effect of doubling A. We're doing this because we have an index into the 16-bit entries of the table (index 0 is word 0, index 1 is word 1, etc) but we need an index into the 8-bit bytes of the table, and since there are two 8-bit bytes in a 16-bit word doubling gets us there (index 0 is byte 0, index 1 is byte 2 etc).
Now we copy A into E, and set D to zero. This has the effect that 16-bit register pair DE just contains our byte offset in its lower byte and nothing in its upper byte.
We set HL to point to our font table, and add DE to it. Now we have (in HL) a pointer to the first byte (the low byte) of our 16 bit symbol bitmask. We load that byte into A with LD A, (HL) ("load A from the address in HL"), then we increment HL and fetch the high byte into H. This means HL no longer points at our font table, but we don't care because we're done with it now anyway.
Finally we move A (low byte of symbol bitmask) into L. H already contained the high byte of our bitmask, so now HL contains the entire 16 bit symbol bitmask, with the bytes in the right order. Happily, this is exactly what the BIOS routine requires, the only extra thing we need is a column number in A, which we achieve with LD A, 19 before making the CALL MBB_WRITE_LED.
Then it's simply a matter of repeating the whole shooting match for the other letters. Each time there's a different initial ASCII value, and a different column number.
If you were paying attention last time, you may be wondering why we're not bothering with PUSH BC and POP BC around the BIOS call to prevent clobbering. To be blunt: we don't care. It doesn't matter if the BIOS clobbers our registers, as we're setting them up from first principles each time.
Assembling the code
You can assemble the code manually with sjasmplus --raw=fonts.com fonts.asm and if all goes well you'll produce a file fonts.com that you can run on your 'Beast. Or add it to your script/Makefile if you went down that route.
Running the code
The procedure to run fonts.com on the 'Beast is similar to what we've used before, but slightly shorter:
Boot your 'Beast
SLIDE the FONTS.COM file from the repo across to your 'Beast's B drive
while still logged-in to the B drive, type FONTS and hit enter
All being well, you should see this (your string might be different):
Things you can try
Change the string that's displayed
Change where it's displayed
How would you go about replacing my gloriously decadent unrolled code with a loop? What precautions will you need to take?
String-u-like
Now lets turn our attention to strings.asm:
;
; MicroBeast LED Demo - Step 3: String Display
; Prompt the user for a string and display it on the 24-char LED display.
;
; Build: sjasmplus --raw=strings.com strings.asm
; Run: strings.com under CP/M on MicroBeast
;
ORG 0x100
INCLUDE "../bios.inc"
; --- Print prompt ---
LD DE, prompt
LD C, C_WRITESTR
CALL BDOS
; --- Read user input via BDOS function 10 (buffered input) ---
; Buffer format: byte 0 = max chars, byte 1 = chars read, bytes 2+ = string
LD DE, inbuf
LD C, C_READSTR
CALL BDOS
; --- Print newline ---
LD DE, crlf
LD C, C_WRITESTR
CALL BDOS
; --- Display string on LEDs ---
LD A, (inbuf+1) ; number of characters read
LD B, A ; B = string length
LD C, 0 ; C = current column (0-23)
; Loop through all 24 columns
disploop:
LD A, C
CP 24 ; done all columns?
JR Z, done
; Check if we still have characters to display
LD A, C
CP B ; column >= string length?
JR NC, blank ; yes, write blank
; Look up character in font table
LD HL, inbuf+2
LD E, C
LD D, 0
ADD HL, DE ; HL = address of character
LD A, (HL) ; A = ASCII character
; Font lookup: index = (ASCII - 0x20) * 2
SUB 0x20
CP 95 ; valid range? (0-94)
JR NC, blank ; invalid char, show blank
ADD A, A ; * 2
LD E, A
LD D, 0
LD HL, font
ADD HL, DE
LD A, (HL)
INC HL
LD H, (HL)
LD L, A ; HL = bitmask
JR writled
blank:
LD HL, 0x0000 ; blank (all segments off)
writled:
LD A, C ; column number
PUSH BC ; preserve B=length, C=column across BIOS call
CALL MBB_WRITE_LED
POP BC
INC C ; next column
JR disploop
done:
JP P_TERMCPM
; --- Data ---
prompt: DB 'Enter text (max 24 chars): $'
crlf: DB 13, 10, '$'
inbuf: DB 24 ; max 24 characters
DB 0 ; chars read (filled by BDOS)
DS 25 ; input buffer space (+1 for CR terminator)
INCLUDE "../font.asm"
First off, we need an equivalent to BASIC's INPUT$ so we can prompt the user for the string they want to display. Luckily this is a standard feature of CP/M, provided by the BDOS (Basic Disk Operating System). Unlike the custom 'Beast BIOS calls we've been making thus far, this will work on any CP/M 2.2 computer.
Unlike BASIC's INPUT$ we have to do all the individual tasks ourselves:
print the prompt
gather the user's input
print a new line after
but BDOS can handle each of those. The way it works is, you set a BDOS function code in the C register, put any neccessary parameters in the DE register, and call the well-known BDOS entry point, which bios.inc provides for us.
The first such function code is C_WRITESTR - write a string to the output device(s). We pass the string address (prompt) in the DE register. The string must be terminated with a '$' character.
💡
You might be thinking: "wait...what?! what if I want to print a '$' character?!" and you wouldn't be the first. Quite a bizarre choice given that DR was an American company, and keen on chasing the almighty $$$ ...
Then we call a different function code C_READSTR, this time setting up DE to point to an area in memory where we describe where we would like the result to be stored (inbuf). This little block starts with the maximum size of the string we'll accept from the user (DB 24 - define byte), then there's a blank byte (DB 0) which BDOS will helpfully fill in with the string's actual length, then we leave a bunch of space to receive the string itself (DS 25 - define space). That's 24 characters plus the terminating character that will be added. Oddly this isn't '$', it's a carriage return. Even more odd, we don't actually need it as BDOS fills in the length of the string, but hey ho.
Once we've got the user's string, we call C_WRITESTR again to print a newline, and move the string length that got returned to us into the B register. We set C to zero to represent column zero.
The code at disploop is similar to our previous example, except this time the loop is definitely fully rolled. For each character from the input string (LD A, (HL) we do the ASCII -> font table byte offset conversion, fetch the symbol's bitmask (LD A, (HL); LD H, (HL)) and call MBB_WRITE_LED. Notice that this time we do include PUSH BC and POP BC because we have vital context (string length in B, column number in C) that must be preserved across the BIOS call.
In one final bit of business, if we run out of string characters before we reach the final column, or if the user string contains an ASCII code that we don't have a font entry for, we'll display the bitmask 0x0000 (all LEDs off) instead (blank).
Assembling the code (2)
You can assemble the code manually with sjasmplus --raw=strings.com stringss.asm and if all goes well you'll produce a file strings.com that you can run on your 'Beast. Or add it to your script/Makefile if you went down that route.
Running the code (2)
The procedure to run stringss.com on the 'Beast is the familiar:
Boot your 'Beast
SLIDE the STRINGS.COM file from the repo across to your 'Beast's B drive
while still logged-in to the B drive, type STRINGS and hit enter
All being well, you should see this (your string might be different):
Things you can try
How would you go about displaying the string backwards?
What's a different technique for displaying the string backwards?
Can you combine (1) and (2) to come up with a novel (albeit faintly ridiculous) alternative for displaying the string forwards?
End of Part Eight
That's it for Part Eight and our deeper dive into machine code and assembly language.
Last time in Your name in lights! (Part 7) we got a grounding in the fundamentals of machine code programming and managed to turn some LEDs segments on.
This time around there's a bit less theory and a bit more practical - in fact, it's a
Last time in Your name in lights! (Part 6) , we got a fancy scrolltext with brightness effects working, but were underwhelmed by its lack-lustre performance. Angry and tearful, we turned our red-rimmed eyes to the heavens and swore a dreadful oath to find a better way.
That quest starts here! We are going to learn Z80 assembly language programming, which is about the most fun you can have with your 'Beast. My cunning plan is to rework all the programs that we've already covered in the preceding BASIC articles, so it's probably a good idea to give those a once-over if you've skipped ahead.
To move forward, I'm going to assume that you've got SLIDE.COM on the B: drive of your 'Beast, and that you have the corresponding PC utility installed somewhere in your PATH on your development PC. Refer to the SLIDE README if you need more help with that.
We're going to start in the scrolltext/assembler/leds folder.
Background info
Any mug can write BASIC, but if you want to be 1337 you need to write machine code. That was true in the 80s, and it's even truer now!
Except we're not actually going to write machine code (which is just baffling screeds of incomprehensible numbers) - we're going to write assembly language, sometimes called "symbolic machine code", which is essentially a set of mnemonics that stand in for the baffling numbers, and which are easier for mere humans to manipulate.
In order to turn human-friendly assembly language into computer-friendly machine code, we use a piece of software called an assembler. These days, there are nearly as many different assemblers as there are z80 instructions (571, in case you were wondering!). They fall broadly into two camps: "native" assemblers are those which run on the same computer/operating system for which the assembly code is being written, and "cross" assemblers run on a different (usually beefier) computer than that for which the assembly code is intended. These days, cross-assembling is the obvious choice, as you get to take full advantage of your PC's massive storage, high-resolution display and integrated development environments with syntax highlighting, code completion, interactive help, AI etc etc.
My personal preference is SJASMPlus because it is fast, has a lot of useful features like structures and macros, and has good integration with modern IDE tools like VSCode. Its documentation is terse, but most queries are tractable given enough study.
Z80: TL;DR
I'm going to give the briefest possible overview of the Z80, as there is a vast amount of introductory material online. In essence, the z80 can load data from memory or an IO device, store data to memory or an IO device, or perform some rudimentary operations such as add and subtract on data. It has some rudimentary relational operators (is this thing bigger than this other thing?) and a good selection of logical operators (AND, OR, XOR). Data either lives in memory, which is large but relatively slow, or it lives in registers, which are scarce but fast. The z80 has 14 general purpose registers, two index registers, and a handful of other special purpose registers. Much of the fun of z80 programming is keeping as much state in these registers as possible without resorting to slow memory accesses. You'll quickly develop an obsession with minimising both the code size of your routines and their T-state count (getting them to run as efficiently as possible).
Back to BASICs
In Your name in lights! (Part 2) we wrote 4 strange characters to the LED display using a sizeable chunk of BASIC, and now we're going to repeat the exercise in assembly language. Here's the code:
;
; MicroBeast LED Demo - Step 1: Raw Segment Control
; Turn ON all 14 segments of the last 4 LED positions (columns 20-23)
;
; Build: sjasmplus --raw=leds.com leds.asm
; Run: leds.com under CP/M on MicroBeast
;
ORG 0x100 ; CP/M .com file starts at 0x100
INCLUDE "../bios.inc"
; All 14 segments ON = 0x3FFF
; Low byte (L) = FFh = outer segments all on
; High byte (H) = 0x3F = inner/diagonal segments all on
LD B, 20 ; start at column 20
loop:
LD HL, 0x3FFF ; all segments ON
LD A, B ; column number
PUSH BC ; preserve B across BIOS call
CALL MBB_WRITE_LED ; write bitmask to LED
POP BC
INC B ; next column
LD A, B
CP 24 ; done all 4 columns (20-23)?
JR NZ, loop
; Exit cleanly to CP/M
JP P_TERMCPM
⚠️
My coding style is a little unusual: I prefer upper case mnemonics and 0x prefixes for hex numbers, whereas the modern fashion is lower case mnemonics and an h suffix for hex numbers.
Straight away I hope you'll notice how much more concise this code is than the equivalent BASIC program, largely because we don't have to jump through hoops to make BASIC call machine code - we're already in machine code! Nor do we have to worry about BASIC interpreting our data as floating point: in machine code land, everything's a byte or a word.
The ORG 0x100 line isn't an assembly language mnemonic, it's a directive - a special keyword that the assembler itself recognises and acts upon. In this case, we're telling it that we'd like our code to start at address 0x100, which is the standard place for CP/M programs. CP/M calls this part of memory the Transient Program Area or TPA. We stick to running our code in this area lest we overwrite some critical bit of memory that the operating system or firmware is using.
The INCLUDE "../bios.inc" line is another directive that tells the assembler to read the 'bios.inc' file, which contains the addresses of some BIOS routines that we're going to be using across all these examples. I've put them in an include file so that we don't repeat ourselves.
Next we load (LD) the 8-bit B register with the value 20, and start our main loop. The loop loads the value 0x3fff into 16-bit register pair HL, copies B into A and jumps to the BIOS routine with CALL MBB_WRITE_LED, which expects the bitmap in HL and the column number in A.
You'll notice some funny business surrounding the BIOS call; a PUSH BC beforehand, and a POP BC afterwards. What we're doing here is preserving the value of the 16-bit BC register before the call, and restoring it afterwards. We do this because we are reliant on our value in B being maintained, and we don't know what the BIOS does with the B register. In fact the BIOS "clobbers" B, so this bit of defensive coding proves prudent.
Once we've done that we increment B with INC B and check whether it has reached 24 yet (CP - compare). If not, we go around the loop again. Note that we had to copy B into A to do the comparison with 24. This is because the A register ("A" is for "accumulator") is usually the only one that can take part in arithmetic and logical operations, and the CP compare operation is essentially a subtract: if A was 24, the result will be zero and the Zero Flag (Z) will be set. If it wasn't 24, the zero flag will not be set. We can test this in the following jump relative, if not zero (JR NZ) instruction. There are two different ways that A can be not equal to 24: it can be greater than 24, or it can be less than 24. In the latter case, to make the subtraction work we'd have to "borrow" another bit, so the Carry (C) flag is set to indicate that the borrow happened, and we can JP C to jump on carry or JP NC to jump on no carry if we need to. Just remember that for unsigned integersZ is equal (A == n), else C (carry flag set) is less than (A < n), else NC (carry flag not set) is greater than (A > n). Things are a little but fruitier if you're comparing two signed numbers, but that's a wonder for another day.
🤔
And if you find this stuff fascinating consider this: the z80 actually does a subtraction (or a compare) by taking the two's complement of the subtrahend (the number being subtracted) and adding that to the minuend (the number being subtracted from). You make a two's complement by flipping all the bits and then adding 1, which the z80 does by inverting the register and setting the carry IN flag to 1. Then it does an "add with carry". If the result is bigger than 8 bits a carry out has occured and the carry flag is set. But the z80 remembers that the operation was originally a subtraction, and a borrow is the opposite of a carry, so the carry flag is flipped, becoming a 'borrow' bit for the purposes of subtractions and compares. Genius!
Once we're finished displaying characters, we JP P_TERMCPM which amounts to the same thing as JP 0x0 or a "jump through zero". This is a common way to exit a custom ("transient") program and return control to CP/M.
💡
This is the most common way to exit larger CP/M programs, but it is quite drastic and causes the CCP and BDOS to be reloaded from disk. CP/M calls this a "warm boot". For shorter programs that haven't messed about with CP/M's stack however a simple RET will return control to CP/M much more quickly. But, if you weren't as careful as you thought you were, it will almost certainly crash!
Assembling the code
You can assemble the code manually with sjasmplus --raw=leds.com leds.asm and if all goes well you'll produce a file leds.com that you can run on your 'Beast. That gets tedious quite quickly, so you might like to stick it in a script or Makefile to automate the process.
Running the code
The procedure to run leds.com on the 'Beast is similar to what we've used before, but slightly shorter:
Boot your 'Beast
SLIDE the LEDS.COM file from the repo across to your 'Beast's B drive
while still logged-in to the B drive, type LEDS and hit enter
All being well, you should see this (your string might be different):
Things you can try
Change the bitmap to some other symbol of your choosing
Try writing to all the columns instead of just the last four
Suppress the rising suspicion that I copied this section verbatim from the BASIC article
Useful references
There are so many z80 references on the internet that it's difficult to know where to start. I usually have these open:
I've also got a copy of "Programming the Z80" by Rodney Zaks to hand - there are loads of copies floating about and you can pick up a copy in decent condition for very little. It's great for checking status flag side effects of opcodes.
A lot of people swear by "z80 Assembly Language Programming" by Lance A. Leventhal - I've not been able to find an affordable copy, I fear it may have achieved "collector" status!
Speaking of which, when I first learned z80 it was from "Mastering machine code on your ZX Spectrum" by 80s scene legend Toni Baker. It's equally relevant to the 'Beast and will give you a solid foundation. Print copies are a bit hard to come by these days, but there are scans of the book online.
I'm not normally a VSCode fan (neovim FTW!) but it has excellent support for z80 development:
z80 Assembly Meter - select some code and see its byte count and T-state count in the status bar
vscode-neovim - make VSCode slightly more bearable ;)
End of Part Seven
That's it for Part Seven and our gentle introduction to machine code and assembly language.
Next time in Your name in lights! (Part 8) we'll look at font decoding and displaying arbitrary strings on the display.
microbeast
Your name in lights! (Part 7)
Last time in Your name in lights! (Part 6) , we got a fancy scrolltext with brightness effects working, but were underwhelmed by its lack-lustre performance. Angry and tearful, we turned our red-rimmed eyes to the heavens and swore a dreadful oath to find a better way.
That quest starts here!